

Hello Scrapping Cottage friends! Thanks for taking the time to stop and visit with us today. It's Mary Marsh here bringing you the Saturday edition of the Blog.
IT'S NEW RELEASE TIME! The new Christmas dies are in the online store with 40 new designs and they are on a limited time sale at 30% off. It's not too soon to get started on your Christmas cards. I make about 50 handmade cards so I am anxious to get started on mine. Plus, Christmas is my favorite time of year to make and send cards.
Also there is a big Fall sale going on right now with savings of up to 50% on selected dies. And the new Lil' Bluebird Designs stamp sets and dies are also on a 25% off sale. Lots of ideas on the Blog from the Design Team on ways to use these new stamp sets.
Today for your viewing pleasure I am featuring the new High Flying Snowman die. So let's get started with some details of how I created my card.
Design Steps:
I started my card this week by selecting my designer paper. I found this paper with a snowflake theme background. I also had the matching cardstock base.
Tranquil Tide card base - 5 1/2" x 4 1/2"
Designer Paper - 5 3/8" x 4 1/4"

Then I cut the flying snowman images in colors that coordinated with the designer paper. The plane trim and banner are the greenish blue shade in the designer paper and card base. The plane itself is red because that makes it so Christmas. You can also follow the colored image on the packaging which is always a good guide.

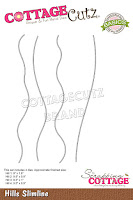
I wanted both clouds and a snow bank on my card for interest and also because the designer paper pattern was a bit busy. I used the Hills Slimline & Clouds Slimline dies. I cut them the full 9 1/2" and that way I could decide what part of the pattern I would use.

Next, I stamped my sentiment on the snowbank in the same ink (tranquil tide) as my card base. I trimmed the snowbank down to 5 3/8" and also added some white glitter to the top of the bank..


Well, that's it for me for this week. See you next Saturday. Before I close there are a couple of announcements.
Goodbyes and changes are always hard to announce. After being with us for 4 years, Jeanne is leaving the team because of work and family responsibilities. We are sorry to see you go and send our well wishes.
And, on a more upbeat note we will once again be back on YouTube with videos starting this Wednesday. Marla, one of our newest designers will be publishing videos 2x a month. So make sure you check them out.


Dies I used to create card:


3 comments:
Adorable card love your high flying snowman!
Lovely card Mary, super cute
Beautiful Mary
Post a Comment