Monday, November 30, 2009

SNOWY DAYS


There is no time, like snow time. We don't have snow where I live so we head to the mountains for snow time! This is a picture of Jack's first trip to the Snow!!!


Star Light, Star Bright, Please don't let me melt tonight! I love this adorable CottageCutz Snowman with sign shape. To add to the fun, I used Snow Tex to give my snowman and snowballs texture.


Sunday, November 29, 2009

The First Christmas


Remember, if Christmas isn't found in
your heart, you won't find it under a tree.
Charlotte Carpenter


Christmas is such a magical, wonderful
time of year. For us scrapbookers and
card makers, there is so much to create!


I was so excited to enhance the
QuicKutz Nativity scene with one
of the precious lambs from the
CottageCutz lamb die. I love how he
fits perfectly and is looking right at
Baby Jesus in awe and amazement!

Saturday, November 28, 2009

Holiday Hugs

I know we are just barely through with Thanksgiving, but can you blame me for not being able to wait any longer to play with these fabulous Holly Jolly Cottage Cutz dies!! As soon as I saw these adorable Elves I knew I had to have them. For the past couple of years, we have had our own elves come to stay with us during the Christmas season. My oldest daughter absolutely LOVES them!!! She named her elf Candy Cane Red and named her sister's Candy Cane White. Our elves are playful and happy and would never make a mess in the house! They mostly like to move around at night or when we are gone and play with the girls' toys and stuffed animals. Last year, my oldest daughter insisted that we take a picture with the elves in front of the Christmas tree and this is one of the pictures. I added the Elf with List die to draw attention to the little elves that the girls are holding in the picture. These Cottage Cutz Elf dies are going to be so fun to use to document the stories of our elves for years to come!

Thursday, November 26, 2009

HAPPY THANKSGIVING!!!!


I hope everyone has a wonderful Thanksgiving!!!


Wednesday, November 25, 2009

Watch for it Wednesday #36

My tip today is a fun way to use Perfect Pearls and a Mini Mister. You will need Perfect Pearls, a Mini Mister (they normally come in sets of 3), and some Ranger Re-inker (I used Peeled Paint - great neutral base with just enough die to make the Pearls show up). Now, you want to pick a couple colors of Perfect Pearls that you want to use. I chose Perfect Bronze and Sunflower Sparkle because they both said Autumn to me. Put a tiny scoop of each color into your Mini Mister. Then drop 3 drops from the Re-Inker bottle into the Mini Mister (FYI - You MUST use a re-inker and not regular alcohol inks. Alcohol inks are not designed to be aerosolized and are TOXIC if used in this manner!!) Now, just fill the Mini Mister up the rest of the way with water and mix it all together.

You are now ready to start spraying!!

Here is a before picture of a whole bunch of leaves that I have cut out to be sprayed with my Perfect Pearls solution. I have gone ahead and inked the edges and also outlined the leaf veins with my Copic markers before I spray them with my solution.

When you are ready to spray, make sure you have the area surrounding your pieces covered unless you want your work surface to have a new Bronze coating ;)

Hold the Mini Mister about 12" or 14" above your pieces and give it a couple of sprays. When you are first starting out, you are going to be tempted to over-spray. It will take a few minutes for the spray to dry so that the color will show up. Spray it a couple of times and then let it dry before you spray again. You can always add more color - you can't take it away once it is there! You may even want to practice on some spare sheets just to get a feel for it and to see if you like more or less color.

I gave this leaf a heavier coating than my others so you would really be able to see the change. The spray really gives the leaf such a wonderful sheen.

Here are the rest of my leaves. I know it is hard to see the bronze flecks on the leaves but hopefully you get the idea. Once all of my Perfect Pearl leaves were dried, I added them to my layout. I used the Cottage Cutz mini maple leaf die from the August Cottage Cutz Release to cut out all of the leaves. Then before I sprayed them with my Mini Mister, I inked the edges and then outlined the inside veins of each of the leaves with my Copic Markers. I also used the Cottage Cutz Raking the Leaves Die as another Fall accent to my page. And once again, the November Pagemaps were my inspiration for my page design.

Another really cool effect of spraying the leaves with the Perfect Pearls mixture is that as the leaves dry, they tend to curl up just a little. This curling makes for much more realistic leaves. I mean, when have you ever seen perfectly flat leaves, right?!!
This technique would also be great to use on your Winter layouts to make snow glisten and shine! Just change your Pearl colors! Really, what projects couldn't use a little something extra ;)
Here are a couple of close-ups to give you a better view of some of the details :)


I hope you liked this tip. Now, run out to the store and stock up so you can start spraying your cards and layouts!!

Tuesday, November 24, 2009

It's hard to say "I'm sorry"


If you're like me every once in awhile I say something stupid that offends a friend, family member or co-worker. I feel terrible of course and want to apologize and clear the air. I hate the feeling inside when this happens, luckily it's not very often.


I like to find fun sayings to go with my cards and thought this old saying about ruffling your feathers was perfect for this CottageCutz Rooster. I cut the large feather combo out twice in two different colors and inked the edges with similar colors of Distress Ink. I also inked the rooster's body and added some pen markings to make him stand out a bit more.

Whether you're sending an apology or not this rooster is a fun die to create projects with and goes together quick and easy.


Sunday, November 22, 2009

The Barn

Spending the day at barn with your family is just a fun way to spend a gorgeous FAll Day. The CottageCutz Barn is so detailed but so easy to use too.

And the CottageCutz Turkey completes the layout and gives me the opportunity to wish everyone a Happy Thanksgiving!!!


Saturday, November 21, 2009

Some more cards from our blog followers

This card was made by Lori Z. one of our followers who is just loving the CottageCutz dies.
These two Thanksgiving cards were sent from Rita N. using the CottageCutz Turkey.
Very cute Rita - thanks for sharing with us!


Thursday, November 19, 2009

Whimsical Thanksgiving!

I am so in love with whimsy!
It is one of the things in life that
goes to the very heart of me!
There is nothing more sprightly
or fanciful than a cluster of
Thanksgiving tags to add cheer
and help us celebrate this
blessed and precious day.
The CottageCutz sweet
"Basket of Apples" die is
perfectly whimsical and fun!


When it comes to Thanksgiving, I am
so very grateful for the many blessings
that have been so generously showered
upon my family and I. We are deeply
moved by the gifts and love of our
awesome, gracious, and amazing God!


God Bless you this Thanksgiving.

Have yourself a Moo-ey Little Christmas!

I just love this little Cottage Cutz Calf die from the Autumn release! He is the perfect size to use on cards or layouts. Since I figured it was a no-brainer that this guy is a fabulous addition to any kind of farm-related layouts or other projects, I decided to come up with something a little different for my post today.


I thought he would be the perfect addition to an otherwise traditional looking Christmas card. You know - kind of catch people of guard and have a little fun while you're at it!

I hope this card gets you inspired to try to something fun and different with your Cottage Cutz dies! They are truly perfect for any occasion!! :)

Wednesday, November 18, 2009

WATCH FOR IT WEDNESDAY #35

Today's tip is faux stitching. I don't know about you but I love the look of stitching on my cards and layouts but I've got to admit I'm not much into sewing these days. Faux stitching looks like you stitched on your project when you really didn't.

You just simply poke small holes and connect the lines with a pen.

As you can see below I poked holes into my cardstock and used a white gel pen for one side and a black pen for the other.


You can use a paper piercer or a push pin to make your holes. Make sure you have something underneath that you can poke into. You can do it free hand or use a ruler, make straight lines or wavy, the sky is the limit to your design and color of stitches.

Here is my finished card. Just like my real sewing I have a few crooked lines because I chose to do it free hand rather than use a ruler.


CottageCutz Country Turkey


Tuesday, November 17, 2009

Happy Thanksgiving with the CottageCutz Turkey


I'm so glad the Scrapping Cottage decided to put out a realistic detailed turkey. You can make your Thanksgiving turkey in a variety of colors to match your patterned papers.

Whether your wishing someone a Happy Thanksgiving, making placecards for your table or doing a layout after the big day this CottageCutz turkey is sure to please.

Monday, November 16, 2009

BASKET OF PUMPKINS

PUMPKINS, PUMPKINS EVERYWHERE YOU LOOK THERE ARE PUMPKINS.............


A TRUCK FULL OF PUMPKINS AND BASKETS OF PUMPKINS TOO!!!!

WE MUST BE AT THE PUMPKIN PATCH!!!!

I AM A FAN OF FALL COLORS AND THE COTTAGECUTZ AUTUMN DIES ARE THE BEST PART OF MY LAYOUT. I USED THE PUMPKIN PATCH SIGN, the TRUCK WITH HAY, THE TRUCK ACCESSORIES and the BASKET OF APPLES. But...I filled the Basket with pumpkins from the PUMPKIN PATCH SIGN!

Friday, November 13, 2009

Happy Fall!


Autumn is a second spring
when every leaf is a flower.
Albert Camus


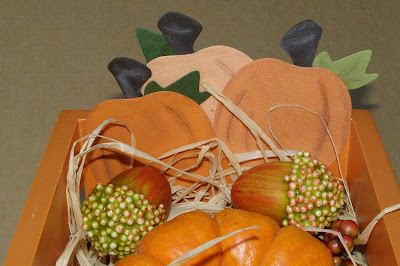
I found this adorable little orange
crate-a dear leftover from Halloween!
I thought it would be fun to embellish
it with some sweet CottageCutz!


CottageCutz
Harvest Frame

Build a Jack


Have a beautiful weekend!

Thursday, November 12, 2009

Silly Scarecrow

The Cottage Cutz Autumn release has so many fabulous dies to add to your papercrafting projects. One of my favorites from this release is the Cottage Cutz Scarecrow Die!! It comes with so many different pieces and ad-ons that enable you to make the Scarecrow in a variety of different ways! It is the perfect addition to any Fall layout.

I had so much fun creating my scarecrow for this layout! I wanted him to resemble the scarecrow in the picture, but not match it exactly. I couldn't decide what color cardstock to use for his pole so I decided to mount him onto a Popsicle stick. (Well, actually, it is a rub-on tool I had laying on my scrapbook table). This method allowed me to really pop the Scarecrow off the page and also add a fun new element to the overall layout. Instead of using the cardstock cut-outs of his arm ties, I used real thread to tie around the Scarecrows arms. Here again, another easy way to add some extra texture to your die cuts.

On a side note, for today's layout, I used one of the new November sketches from Pagemaps. Sketches are a great way to get your creative juices flowing. Some sketches may have all the elements you want and your layouts can closely resemble the original sketches. Other times, sketches can be a great starting point as you let your own vision take your layout in a totally different direction. Either way, they can be a fun tool to use with your scrapbooking.

Wednesday, November 11, 2009

God Bless our Troops, our Veterans and
all who gave their lives for our freedom.

Tuesday, November 10, 2009

WATCH FOR IT WEDNESDAY #34


HAPPY VETERANS DAY!!! My name is Ann and this is my first Watch for it Wednesday! I am the newest member of the Scrapping Cottage Design Team. I am so excited and honor to be a part of this fun and talented team. I have been making scrapbooks, cards and other project for the past 13 years. It is not only a hobby of mine, I have also become a collector of scrapbook items. I think there is some scrapbook items in every room of my house. One of my best friends got me hooked on collecting Quickutz and now CottageCutz.


For this project, I used Rangers Glossy Accents. It is a 3-dimensional clear gloss. I cut several different sizes of stars with the Quickutz cookie cutter die. I outlined the bigger stars with
the Glossy accents


and with the smaller stars, I let the gloss pour out of the bottle as I spread it around the star with the tip of the bottle. Drying time will vary depending on the amount of product applied ranging from 15-60 minute.


You can also you this product to give your CottageCutz a shine and even put it directly on your scrapbook paper.

Just Chicken In

When I saw this saying in a stamp catalog I thought it was pretty clever, and this
CottageCutz Country Hen and Nest go perfect with this saying. There are times when you haven't heard from a friend for awhile or you want to send someone you know a get well card. On this die you can chose a sitting or standing hen with a wrap or headband or like I did and just used the comb.

Some other chicken sayings that are going in to my sentiment book are:

Heard you flew the coop
Now That's Eggsciting
Best of Cluck!
You're no Spring Chicken

Monday, November 09, 2009

THE FARM


There is nothing more enjoyable then going to the Farm with my little grandsons. They are growing so fast and the CottageCutz Autumn release is perfect for this memory.


The CottageCutz dies are so easy to use, they gave my layout a great look.
I used the CottageCutz Chicken Coop, the Fence,
the Chicken Family and Crows.