Friday, January 31, 2020

A Chocolate Moose for Valentine's Day

Happy Friday!  Who doesn't like chocolate mousse?  I know I do, it's one of my favorites!  It's Jeanne today with a chocolate moose - the kind with antlers, but just as sweet as the kind you eat.
I thought I would make a Valentine's Day card for my husband that wasn't so pink, red or "girlie".  I started with the moose from the Arctic Moose & Polar Bear die.
I cut him out of chocolate brown, beige and black cardstocks, then assembled him.  I used some brown ink to shade his hair and antlers and to give him some depth.
Then I chose my papers.  I liked the striped paper with the coordinating small flower paper.  Although I could have used the pink or blue for the base of the card, I went with the beige.
I cut an A2 panel from the beige and used the largest Stitched Rectangle die with the small floral paper, the third largest square from the Stitched Squares die with the striped paper and the middle die from the Nested Circle Scallop dies in white.  I cut chocolate brown panels about 1/8" larger than the rectangle and square so I could frame them.
I added some brown polka dot ribbon to the floral panel and used foam dots to pop up the square with the scalloped circle and moose.  I thought the wooden heart and flower fit the theme without being too feminine.
I stamped my sentiment in chocolate brown ink on a strip 3 1/8 x 5/8 inches.  I mounted this to a strip of the chocolate cardstock 3 1/8 x 3/4 inches.  You can see where I made trim marks on the left side.  I glued the strip directly to the panel and added a matching enamel dot.
I am certain my husband will love his chocolate Valentine's "moose".  (I may have to make him a dessert one as well - LOL!)

Dies:
http://www.scrappingcottage.com/cottagecutzarcticmooseandpolarbear.aspx

http://www.scrappingcottage.com/cottagecutzstitchedrectanglesetbasics.aspx

http://www.scrappingcottage.com/cottagecutzstitchedsquaresetbasics.aspx
http://www.scrappingcottage.com/cottagecutznestedscallopcircleset.aspx

Thanks for stopping by today!  I hope you have a fun and creative weekend!


Thursday, January 30, 2020

Extraordinary!

Hello Scrapping Cottage Friends

It is Pam creating with you today!

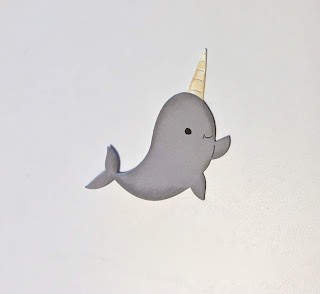
Today,  I am using the Narwhal die.  This sea creature is so unique I thought it would be a perfect die to use to let a friend know how unique and extraordinary she is!! So the card I am making is one of encouragement with a little whimsy thrown in.  I am hoping it brings a smile to her face!

Design Steps:
 1.  Using the Arctic Snowy Tree die cut 2 trees using green and white card stock.  Using the Snowy Mountains die cut it out using gray and white card stock
 2.  Assemble the trees and the mountain using a fine tip glue
 3.  Cut a piece of blue card stock 4 x 5 1/8, cut a 3 x 5 1/8 piece of green card stock and then make a freehand cut rolling hill on the top.  Use of piece of wave DP 3 x 5 1/8 and cut out the top of the waves
 4.  Cut out a piece of green card stock 4 1/8 x 5 1/4 for the background.  Glue the waves to the bottom of the blue card stock leaving room to slip in the green grass and on the green grass glue it down leaving room to slip in the mountains

5.  Next slip in the 2 pine trees and add a row of the wave DP at the bottom.  Glue just the bottom of that piece so you can slip in the Narwhal
6.  Using the Arctic Whale and Narwhal die cut the Narwhal out of gray card stock and his tusk out of white.  Shade the Narwhal with gray ink and his tusk with a light tan ink.  Use a black marker for his eye.  Slip the sea creature into the waves and add your sentiment


CottageCutz Productions


Thanks so much for stopping by!! We are so happy you did.  Be sure and take sometime to create have a great day.
Blessings
Pam


Wednesday, January 29, 2020

Just a Little Note

Hello!  This is Sukie and today I have a sweet card to share for my design team day. This card is perfect for Valentine's Day.
The die cuts are from the Cottage Cutz Love Letters die set. I followed the packaging colors and went with a non-traditional color theme for my card.
Once I put together my die cuts, I found the perfect plaid paper in my stash for the background of my card. I used the Fiskars Grass border punch for the grass.  The sentiment is from the Scrappy Moms (retired) Happy Mail stamp set.
I created the scene on my card by adhering the mailbox with a couple of extra letters.  Next came the branch with the adorable bird perched on top.
My card was finished off with the sentiment flag.  A few tiny hearts were added to the sentiment as embellishments.
Here is the die set used on my card, available in the shop:

Sunday, January 26, 2020

Whale You Be Mine?


Hi!

It's Anja here. I have a clean and simple card for you today. Perfect for Valentine's day.


For this card I used:
- Cottage Cutz die (Arctic Whale & Narwhal),
- Die Inks,
- white card base (15x15 cm),
- blue card stock (13x13 cm),
- white card stock for die cuts,
- bristol paper for background (12,5x12,5 cm),
- black pencil,
- white pen,
- Glossy Accents,
- heat gun,
- water spritzer,
- printer,
- paper glue.

First I cut and colored the whale. I used black pencil to emphasize some of the parts.


Next I printed the sentiment on bristol paper. I also trimmed a square out of blue paper.


Then I colored under the sentiment. I also spritzed a few drops of water on the color and dried the paper with the heat gun. Then I glued all the pieces of the card together.


And for the final touch I added a few drops of Gloss Accents.


And my card was done.


That's all from me for today. Have a nice Sunday and a lovely week.

Anja Z.


Cottage Cutz die I used:


Saturday, January 25, 2020

Be My Valentine


Hello Scrapping Cottage friends! Thanks for taking the time to stop and visit with us today. It's Mary Marsh here bringing you the Saturday day edition of the Blog. 

Today, I am featuring the Moose Pulling Gnome Sled. It's from the Christmas Part 2 collection, but I am repurposing it for a Valentine card. It's just a way to get some more mileage out of your dies. Let's get started on some details of how I created my card.

Design Steps:
This week I started with my designer paper. I had this great winter scene paper and thought it would work well for a Valentine card. You can see another card I created using a scene from the paper pack here.
The paper is in a 6" x 6" pack and I didn't want to cut too much of the background scenery away. So I decided to make a square card.

Designer Paper: 5 1/4" x 5 1/4"
Rose Cardstock Layer: 5 3/8" x 5 3/8"
Espresso Brown Card Base: 5 1/2" x 5 1/2"

Next, I cut the Moose & Gnome using the cardstock colors from the designer paper. Since I am making a Valentine card, I only put one of the gnomes on the sled.
This part of the card is ready for assembly. I attached the designer paper to the rose panel with double sided tape. The moose & gnome are attached with dimensional adhesive. Lifting the images off the background gives added depth to your card.
I was going to stamp a sentiment directly on the designer paper above the trees. But I thought this "be my valentine" phrase would look like the gnome added it to the snow. My hubby did that for me one year when we had a snowstorm on Valentine's Day. He spray painted a heart and the same words I used on my card in red paint on top of the snow. It was so cute and the neighbors loved it as well.
I decided to add a few hearts above the tree tops on the designer paper. Just for a little added interest. After all it's a card for the big love day and I thought I should have them somewhere on the card (LOL).
To finish off my card I added the image panel to the espresso brown card base. I went with a brown base because I thought it accented the rose layering panel nicely.
Well, that's it for me for this week. I hope I have given you a new idea for using this die. See you next Saturday!!!

dies I used to create card: