Saturday, October 31, 2020

Snowman Cupcake on a Fun Fold

Hello Scrapping Cottage friends! Thanks for taking the time to stop and visit with us today. It's Mary Marsh here bringing you the Saturday edition of the Blog. 

We have four brand new releases in the online store. It's Christmas Part 1 (22 new designs), Christmas Part 2 (21 new designs) and a Halloween release (14 new designs). They are all currently on sale and you can save 25% on the individual dies. Christmas Part 3 has just been released and is also on a limited time sale. This one also has savings of 25%.

Today, I have for your viewing pleasure a card featuring the new Snowman Christmas Cupcake die. This is such a cute die that I just couldn't resist making a card with it. I have a few December birthdays and I thought this would be a perfect winter themed birthday card. So let's get started on some details of how I created my card. 

Design Steps:

I decided to do a fun fold for my card this week. I saw this fold on Pinterest and thought it would be a cute one for my Snowman Cupcake. I started with my card base of 5 1/2" x 8 1/2". I scored it at 4 1/4" and then at 5 1/2". 
Then I used 1/8" Scor-Tape to seal the left section of the card base closed.  
This is the photo of the card base after it's secured with tape. It's like a book-binding. 
Next, I chose two winter themed designer papers for the card front. The larger piece is 2 3/4" x 5 1/4" and the smaller is 1" x 5 1/4". 
I attached those to the base front with double sided tape. 

I cut the snowman cupcake image in colors to match the designer paper. 
I wanted to frame the cupcake image and decided on the Stitched Wide Rectangle Frame. I used the 2nd largest die and cut in flirty flamingo cardstock. It's one of the shades in the designer paper. 
I stamped my birthday wishes sentiment in coastal cabana ink. It is also one of the colors in the cardstock. I used my MISTI and inked 3x to get a bolder image. 

Next, I attached the snowman cupcake using dimensional adhesive. In the frame corner I added the happy phrase. It's from the Festive Birthday Greeting die. 
To complete my card I added some bakers twine and bow in the flirty flamingo shade. That's it for me for this week. See you next Saturday. 

dies I used to create card:


Friday, October 30, 2020

Happy Paw-lidays!

Happy Friday!  Its' Jeanne today with a card for pet lovers.  Christmas Pets is one of my favorite dies from the new Christmas Releases because it is so versatile.  I used it for a Christmas card, but if you leave off the Santa hats you have an adorable bundle of pets for any occasion.

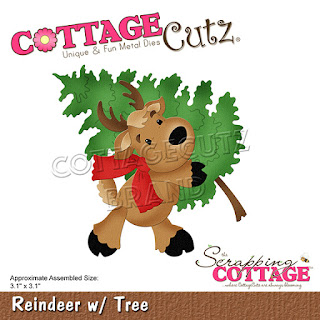
To start my card I cut all the pieces from white cardstock and used Distress Oxide ink and blending brushes to color.  The tree is cut from the Reindeer w/Tree die and the star is from the Christmas Camper die.  I did use gold foil cardstock for the star.

I partially assembled my images before placing them on the card.  I find this easier than trying to assemble everything on the card itself.

Below are the inks I used for coloring the pieces.  This pile of pets reminds me of a dog and two cats that I used to have, so I colored them similarly.  Our orange tabby would definitely have been the cat sitting on top of the dog! 


I decided to make this a 5 1/4 inch top fold square card to fit in a 5 1/2 inch square envelope.  I cut the card base from white cardstock 10 1/2 inches by 5 1/4 inches and folded it in half.  Then, I cut a plaid panel 5 1/4 inch square to completely cover the front and a piece of red cardstock 4 7/8 inch square.

Using white cardstock I cut a circle using the largest of the Stitched Circle dies and a 4 3/4 square which I embossed with a snowflake themed embossing folder.

My sentiment strip is 3/4 inch high and about 4 1/2 inches long.  The length isn't crucial as it gets trimmed but I did center my sentiment to make it easier to place.


Next, I stacked all the layers centering them.  The red being just slightly larger than the white embossed panel gives it a nice frame.

I glued my images to the front and placed the sentiment at an angle.  Because this plaid is on a diagonal I made sure to line up the sentiment with the plaid.  After it was glued down, I trimmed the overhang.

I hope you've enjoyed my card today and it's given you some inspiration for creating this weekend.  The new Christmas releases and Halloween release are on sale for a limited time.  Be sure to stop by the online store!

Dies used:


Thanks for visiting today!  I hope you have a fun and creative weekend!

Thursday, October 29, 2020

Snowman and Owl Pal!

 Hello Scrapping Cottage Friends,

It is Pam sharing with you on the blog today!

The design team is continuing to create cards from our 4 new releases.  The dies are from Christmas Part 1 (22 designs), Christmas Part 2 (21 designs), Christmas Part 3 (12 designs) and a Halloween release (14 designs).  All of these fabulous dies are on sale right now in the store for 25% off.  Just click here to check them out.

I am still working on my Christmas cards and today I will be sharing the Snowman and Owl Pal die.  I decided to pair it with a heart just to change things up a bit! 


Design Steps:

1.  Start out by using the Snowman and Owl Pal die and cut on green, black, brown, light brown, yellow, red, green DP, and a red and white striped DP.  I didn't do any shading this time.  I just used a fine tip glue to assemble and a fine tip black marker for the eyes
2.  Use a white A2 card base and glue down a piece of 4 x 4 red DP at the top
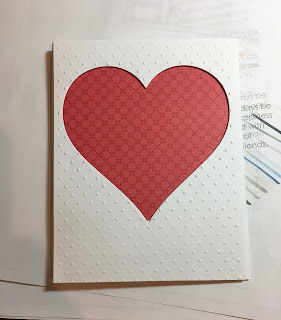
3.  Cut a 4 x 5 1/4 piece of white card stock and run it through a dotted embossing folder and then using the largest Stitched Heart die cut out a heart 3/4 of an inch from the top
4.  Apply dimensional tape to the back of the heart and then pop it directly over the red DP


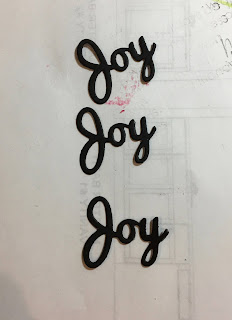
5.  Use the Joy Expressions die and cut out 3 Joys from black card stock.  Glue the 3 together
6.  Pop the snowman to the left side of the heart and glue down the Joy to the right side as shown.  Your card is complete

CottageCutz Products


Thanks so much for stopping by today!  I hope you are getting sometime to be creative.  It is so relaxing and people love getting something handmade by you!

Blessings
Pam


Wednesday, October 28, 2020

Merry Christmas

Hello!  This is Sukie and today I have a Christmas card to share.  There are so many fabulous new dies available in the store for those holiday creations.  I'm having a blast creating cards with them.

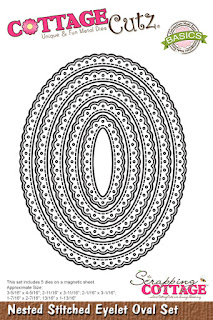
I went with a blue theme for my card and cut out 2 of the gnomes from the Cup O'Gnomes die set. I used the same cup for the gnomes so that they would coordinate.  The snowflakes and Christmas sentiment are from the Christmas Love die set which I paired with the Nested Stitched Eyelet Oval.
The gorgeous striped paper is from my stash of Christmas papers which was complimented by a solid blue card base. The oval was layered on top of the striped card panel.  I adhered the oval toward the top of my card leaving enough room for the sentiment.
Next, the two gnomes were nestled inside the oval die cut. They were offset a bit for a whimsical appearance.
A few snowflakes were scattered amongst the gnomes.  I cut one of the snowflakes in half and tucked them behind each of the gnomes.
The oversized sentiment was adhered along the the bottom edge of my card.  The hand cut flag with the embossed sentiment was affixed above.
This non-traditional card will be a fun way to say Merry Christmas during the upcoming holiday season.
Here are the die sets used on my card, available in the store: