Thursday, February 28, 2019

He is Risen!

Good Morning Everyone!

It is Pam creating with you on the blog today!
Just a quick reminder that our new Spring Release dies are on sale today for 25% off!  Don't miss out on this fantastic savings!
I have started making my Easter cards.  And today I am using one of the new release dies that is absolutely gorgeous and the true meaning of Easter.

Design Steps:
Use a stencil to create the sunburst.  I used Tim Holtz inks and blender tool to add the color
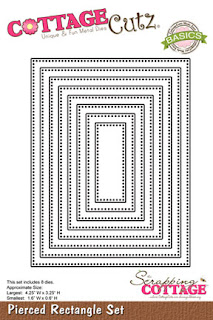
Use the second to the largest Pierced Rectangle die to cut out the stencil sunburst

Use the He is Risen Cross die and cut them out of white card stock
Use a light blue A2 card base.  Cut a piece of light yellow card stock 4 x 5 1/4 and run it through an embossing folder
Glue the embossed yellow card stock to the blue card base.  Pop up the sunburst onto the card on the left side of the card front
Glue the He is Risen to the front of the card
Pop up the cross on the left side of the card and your card is complete


CottageCutz


Thanks so much for stopping by! I hope you take some time to be creative!
Blessings
Pam

Wednesday, February 27, 2019

Happy St. Patrick's Day

Hello! This is Sukie and I'm back for my guest designer post with this fun St. Patrick's Day card.  The Lucky Leprechaun at the focal point of my card is one of the adorable dies from the Valentine's release.
For my card I went with a monochromatic theme with the different shades of green, however, I used a white background to ensure the leprechaun would pop on my card.  A few gold accents provided the perfect amount of sparkle to the leprechaun's accessories.  
The white panel was cut with the Cottage Cutz Nested Stitched Scallop Rectangle Set which was layered on another panel cut from the Stitched Rectangle Set.
The papers for my standard A2 card base are from the DCWV Double Sided Cardstock stack.  The double sided sheet provided a contrasting look to the background.  I used a punch for the circle which was sized perfectly for the sentiment.
The sentiment is from the Scrappy Moms (retired) Dancing in Circles stamp set and it was heat embossed on the circle.  The heat embossing gives the sentiment an extra bold look. 
Here are the dies I used on my card available in the shop:

Tuesday, February 26, 2019

Coffee time

Hi, Janja is here with you.
Today I have prepared a card for coffee lovers.


- CottageCutz dies: Love Latte & Donut, Rectangle Set, Nested Stitched Scallop Rectangle Set
- card base: 4.3" x 5.3 "(11 x 13.5 cm), folded
- patterned paper
- colored card stock
- colored ink pads
- embossing powder - white
- double-sided adhesive tape, foam tape, glue

Cut out cups and donuts from colored card stock. Emphasize the edges with ink pads. Paste all the pieces together.

Stamp a sentiment with a VersaMark ink on a brown card stock. Apply white powder and heat emboss. At the end cut the sentiment.


Prepare a card base. Cut three rectangles. Paste them on the front of the card with a double-sided adhesive tape.


Attach cups and donuts with foam tape to the background.


Finished card.


I would like to invite you to the online store. The new Spring dies are on sale for 25% off. 

Have a nice day.
Janja


Sunday, February 24, 2019

Happy St. Patrick's Day


Hi!

It's Anja here. Winter is slowly waving its goodbye and warmer days are coming. I can't wait for the Spring to come.

I made a simple card for today's post. I used an adorable Scottie die and made a card for St. Patrick's Day.


For this card I used:
- Cottage Cutz dies (Shamrock & Valentine Scottie, Oval Set),
- Distress Inks (Pumice Stone, Black Soot, Vintage Photo, Hickory Smoke, Shabby Shutters, Forest Moss, Mowed Lawn),
- white card stock for die cuts,
- white card base (10,5x15 cm),
- patterned paper for background (10x14,5 cm),
- printed sentiment,
- gold pigment ink,
- black pen,
- white pen,
- paper trimmer,
- adhesive foam pads,
- paper glue.

First I cut and colored the dog. I used black and white pen fr the eyes.


Then I cut all the pieces for the background.


I printed and trimmed the sentiment.


And than I assembled the card together. I used adhesive foam pads for the dog.


I'm still waiting for the Spring Release to arrive, but you can get it for 25 % off in The Scrapping Cottage store.

This is all from me for today.

Have a nice Sunday and see you again next week.

Anja Z.


Cottage Cutz dies I used:


Saturday, February 23, 2019

Bunny in his New Ride

Hello Scrapping Cottage friends! Thanks for taking the time to stop and visit with us today. It's Mary Marsh here bringing you the Saturday edition of the Blog.

We have a new release of 36 Spring dies in the online store. There are a variety of designs so perfect for Easter or Spring cardmaking. Take a look in the store you definitely won't be disappointed. And, they are currently on a 25% off sale.

For my card today I am using the new Bunny Carrot Car  and the Happy Easter Greeting dies. He is just the cutest little thing. So perfect for your Easter card making. So let's get started with some details of how I created my card.

Step 1: I started my card this week with a sketch. I am using the Splitcoaststampers weekly sketch #737. I thought it would work well to showcase this sweet little bunny driving in his carrot car. 

I just had to select my card colors, and I decided on a soft green for my designer paper. 
White card base: 4 1/4" x 5 1/2"
Pistachio Designer Paper: 2" x 5 3/8"
For the bunny and carrot car, I just chose colors that would coordinate well with the pistachio designer paper. 
Step 2: Now that all my elements are cut I am ready to start card assembly. I attached the designer paper to the white card base with double sided tape. 

For element 2 of the sketch I cut 2 rectangles for my Happy Easter sentiment. Used the 4th largest rectangle and pierced rectangle dies.  I was undecided what color to use for the rectangle that would be against the designer paper. I tried several colors and then settled on the pistachio shade. I cut the Happy Easter phrase from a Strawberry colored cardstock.  
I secured these panels together also using double sided tape. I decided to add some soft green sequins to the left side of this panel just to balance it off. 
I added this panel to the card base with double sided tape. 
To finish off my card I place the bunny image atop the rectangle panel. Secured it to the designer paper also using double sided tape. 
The sentiment panel still wasn't right for me so I added 2 additional sequins to the bottom left. And it was a fit and a wrap for my card. 
Well that's it for me for this week. See you next Saturday. The DT has begun showing these new dies so if you missed any of the cards you can look back on the Blog to view.
 
dies I used to create card: