Friday, December 30, 2022

Slimline Peek-a-Boo Valentine's Day Card


Hi everyone! Linh here and I have a new video up on the Cottage Cutz YouTube channel. I hope your holidays were wonderful. I'm starting to think ahead to Valentine's day. And this year, I think I'll give cards to my friends. Here's a lovely Gal-entine's day card for your friends who love their fur babies and their coffee. :)


Thursday, December 29, 2022

Rock 'n' Roll Birthday Wishes

 Hello Scrapping Cottage Friends

It is Pam creating with you today.

I hope you all had a wonderful Christmas!  I sure did I got to spend it with family in Ohio.

I have a few birthdays coming up in January and February.  So I decided to do a couple of birthday cards.  I am using our Fifties release dies.  The card features Fifties Jukebox and Fifties Soda Bar dies.  I used the mini slimline design to showcase these cute dies.


Design Steps:

1.  Use the Fifties Soda Bar die cut the following colors of card stock:  black, white, silver, pink, turquoise, red and brown.  Glue the pieces together with a fine tip adhesive
2.  Use a white card base measuring 3 1/4 x 6 1/4, cut a piece of turquoise dotted DP 3 1/8 x 6 1/8
3.  Glue and assemble the soda bar on the turquoise dotted DP on the right hand side of the paper
4.  After the soda bar is assembled glue the panel to the front of the card base
5.  Using the Fifties Juke Box die cut the following colors of card stock: pink, turquoise, black, gray, yellow, and white
6.  Assemble the Juke box with a fine tip glue
7.  Glue the Juke Box to the left side of the card and then add the sentiment which is layered on pink.  Your card is complete and so cute!

CottageCutz Products


We have more inspiration on our YouTube Channel check it out HERE

Thanks so much for stopping by!  And I will see you next Thursday.

Blessings and Take Care


Wednesday, December 28, 2022

The Season of Love


 I hope you all had a very Merry Christmas. Marla back again with my last CottageCutz YouTube video for 2022.  As we settle into a long hard winter, we leave behind our warm Christmas cheer and transition into the season of love, Valentine's Day.  

But hold on, don't put away those Christmas dies just yet.  Today's card features the "Christmas Owls" from the Christmas Part I release.  I ditched the Santa hat from the smaller owl and replaced it with the bow from the "Ginger Friends" die.  Finally, I omitted the holly from the branches and magically, we have a winter scene with two "love birds."  I was inspired by the old-world style of the top hat, so I paired these "love birds" with a retired vintage style patterned paper I had in my stash.

If you head over to watch the video, you can see how I colored my owls to add texture and enter for a chance to win the "Christmas Owls" die.  I hope you'll fly this coop and meet me there.  

Until next time, have a safe and Happy New Year.  See you in 2023!...... Marla


Tuesday, December 27, 2022

Tea light Window Luminarie

Happy Tuesday Cottage Cutz Friends!
Melinda here with you, and today I am sharing a wintery luminaire I created with the Rustic Winter Window and Wintery Village dies from this years Christmas release. Here's a look at my finished project.
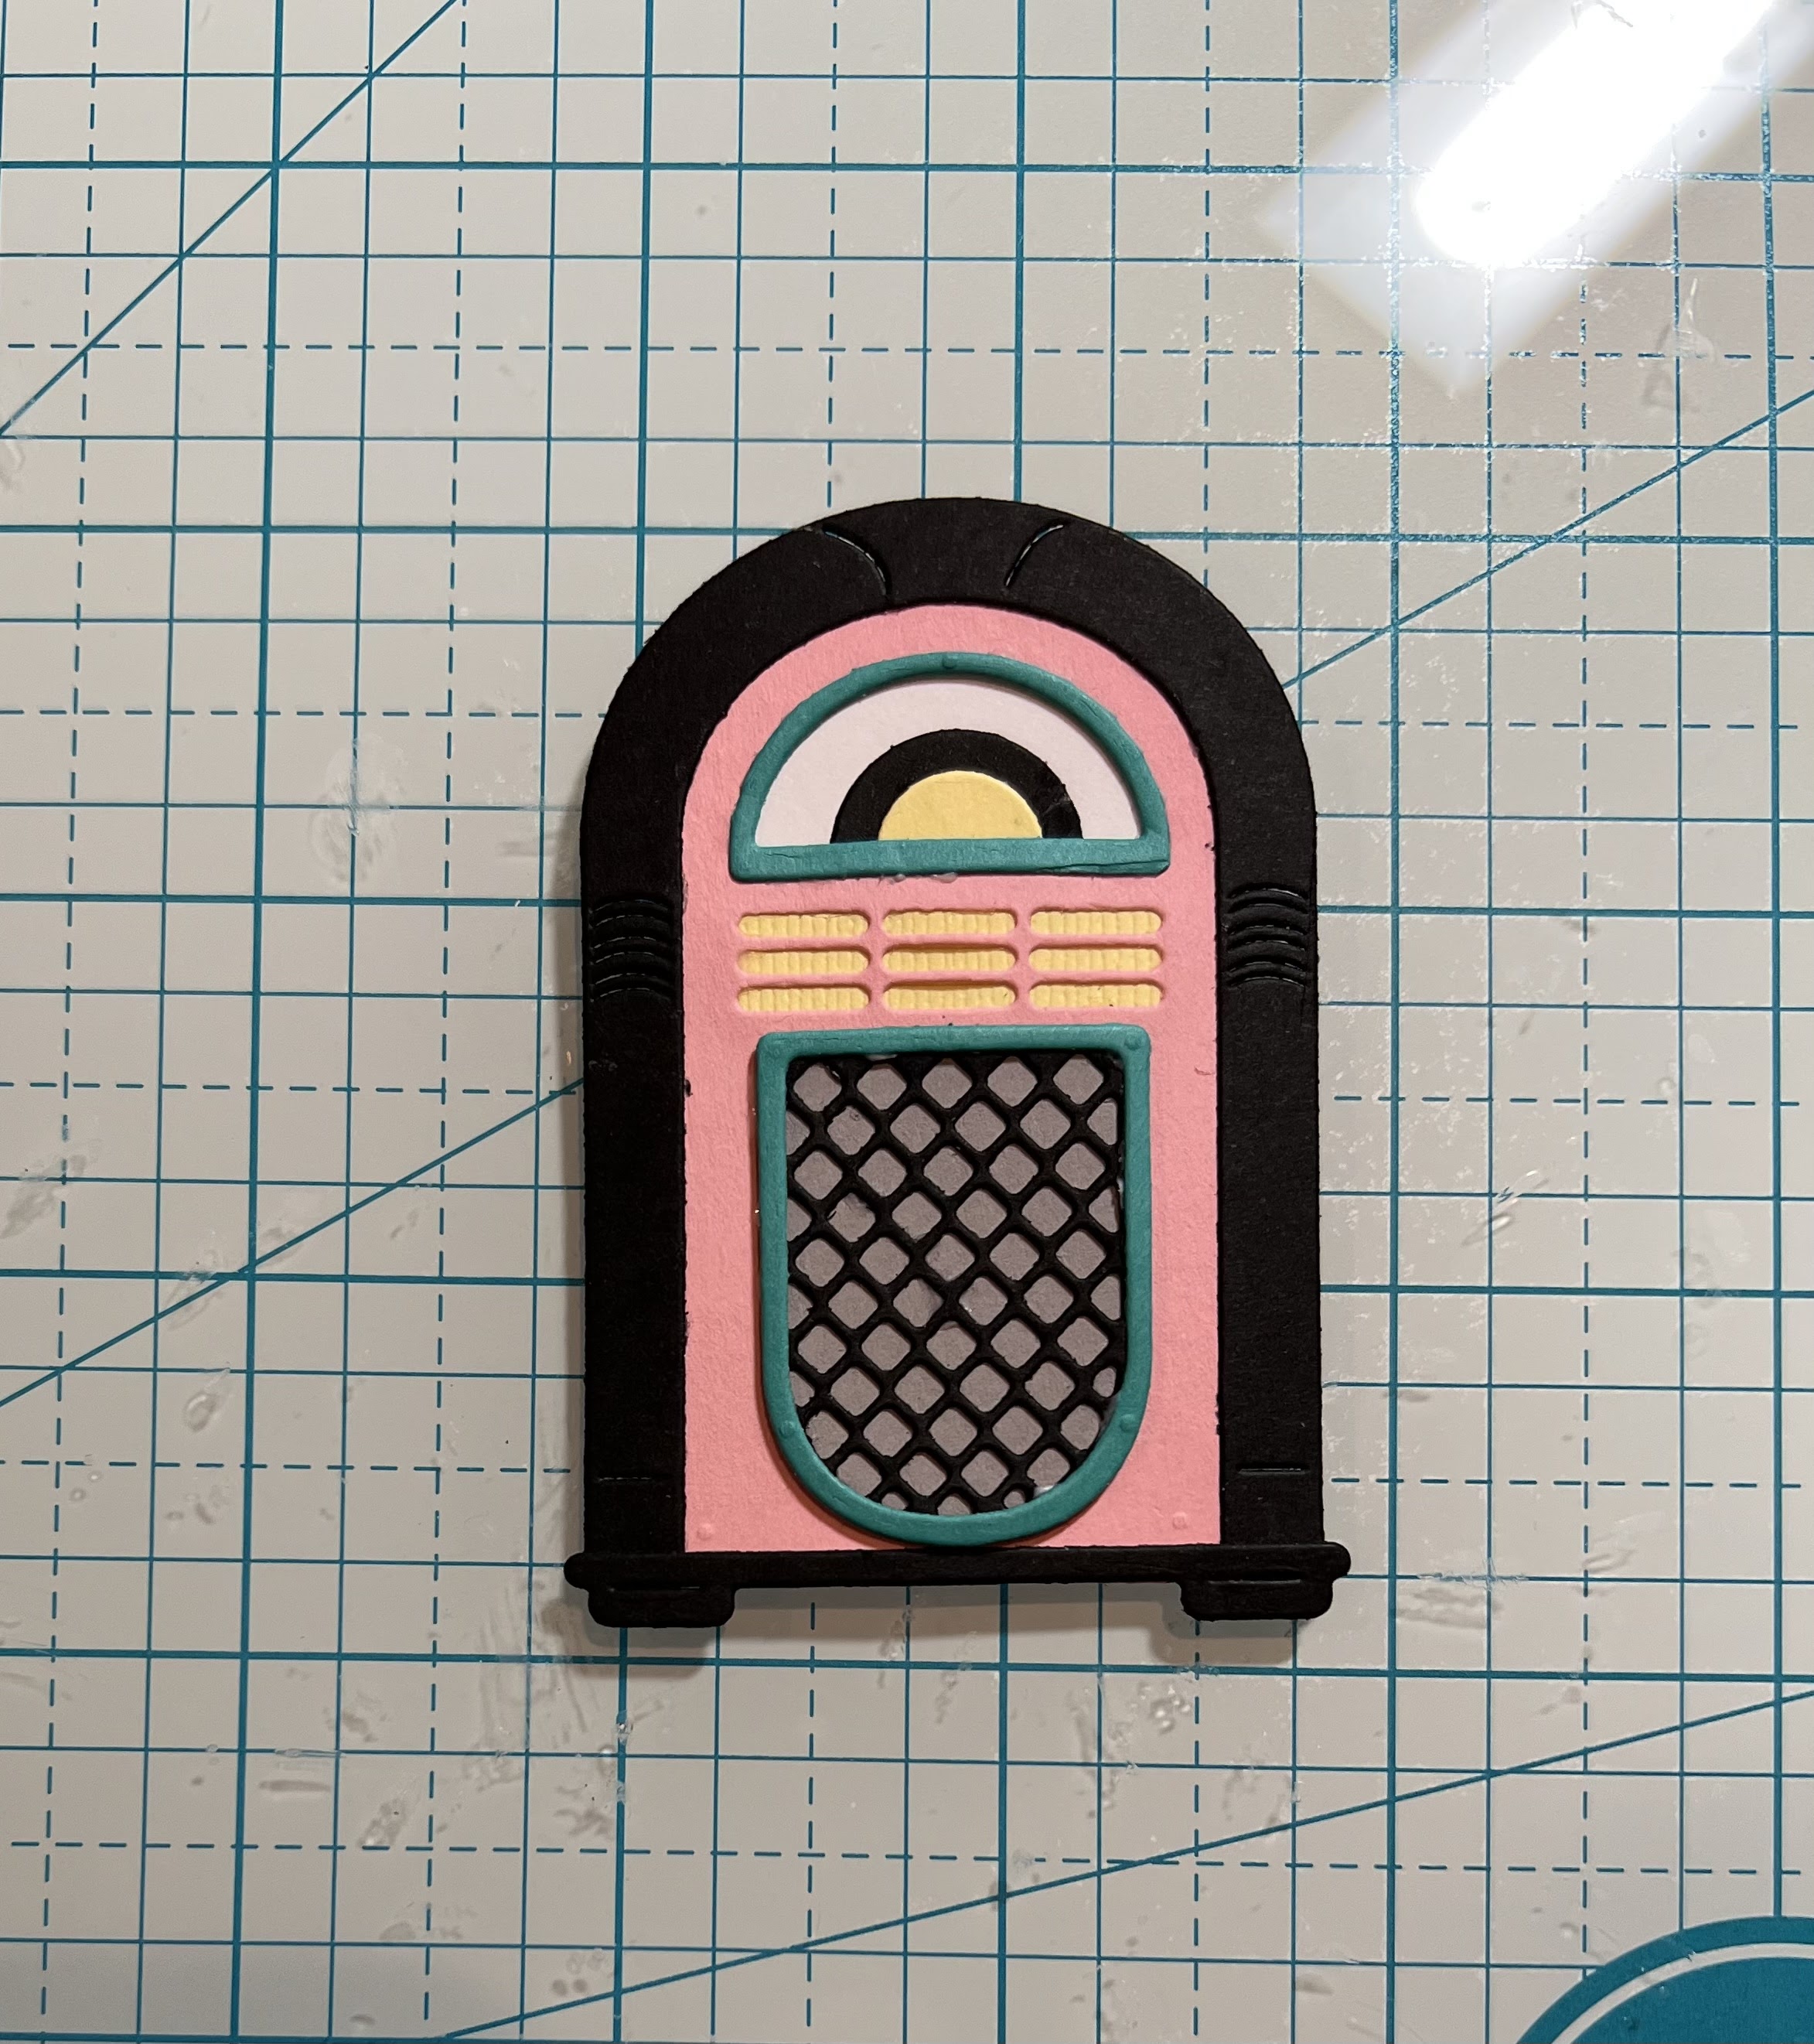
To create my luminaire, I used the window from the rustic winter window die. 


I started by cutting out the window frame in Kraft cardstock 8 times. I sandwiched a piece of acetate between two of the frames. To attach the frames, I cut out four pieces of the same Kraft cardstock in .5 x 2.75 inches. I scored down the length at a .25" and folded them. I used these to attach the four panes together. 

In this photo you can see I added glue just to the outer edge so that I can attach the next frame set. To make the four of them stand on the box base I created, I had to effectively use the frames "upside down" from the way they are presented on the finished die. However, I think it works that way just fine. ;-)
Next, I went to work figuring out my base. I settled on the following:
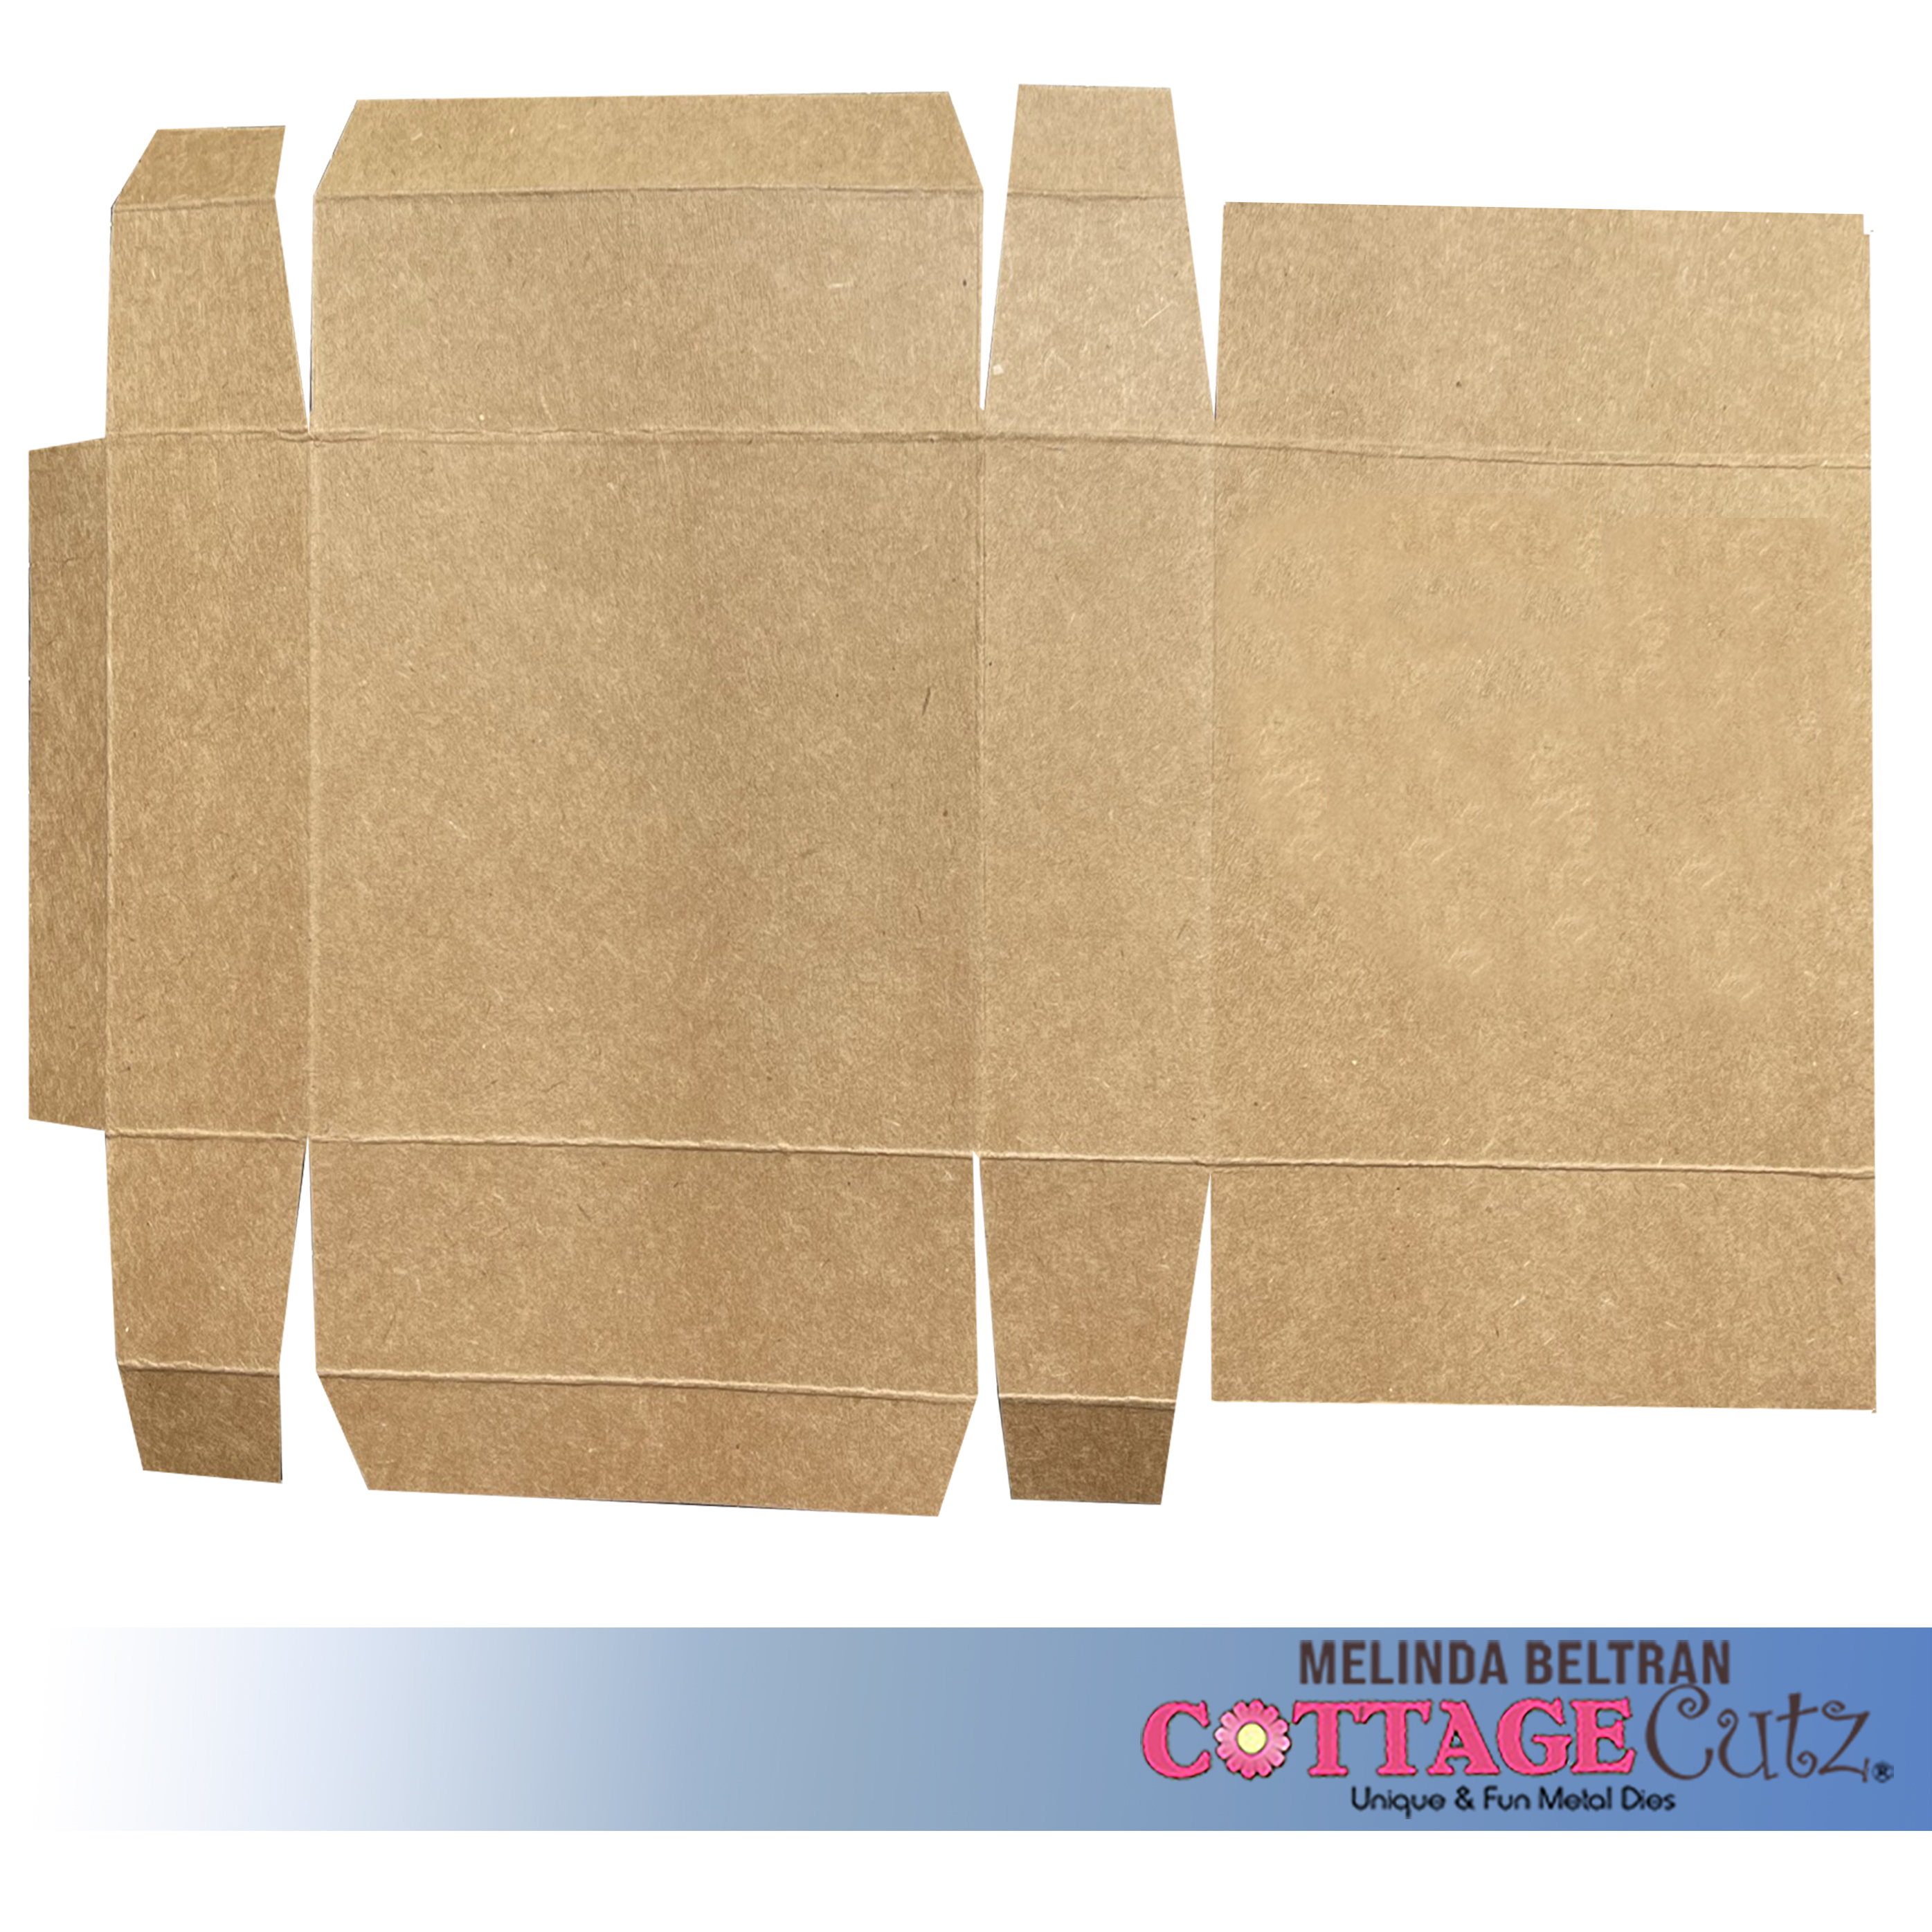
Cut a piece of Kraft cardstock 8.5" x 6"
Along the 8.5" length you will score at .5, 1.5, 4.5, and 5.5
Along the 6" length you will score at .5, 1.5, 4.5 and 5.5
You will cut off the areas "x" out in the photo above.
Then  you will trim the rest according to the below photo.

Next you will want to find the center point on the right 3x3 square. I used a 1.5" circle punch to cut out a circle with the center point as close to the middle as I could "eye ball it".


Here's what it will look like with the hole.  You will put glue on the tabs with the white lines as indicated in the photo below. You will then go ahead and assemble the box.


You will also want to put adhesive on the last two flaps to close it up. When it is completely assembled, it will look like the box below. I stuck a solar powered tea light candle in the center base.


I then cut out the cute wintery village die cut in black cardstock 3 times. I wrapped it around the bottom edge and glued it to the base. Lastly, I added some puffy paint on the tops of the window frames as well as along the window sills. I also added some paint along the top of the base of the box. Here is a look at what it looks like in daylight without the tea light on.

Here is one last look at the completed project. This shot shows it on a slight angle so you can see how it sits. I think it turned our really good and you could make a bunch of these for a great wintery themed home décor piece. I will be adding it to my tiered tray with a wintery theme.

Dies I Used

Rustic Winter Window


Wintery Village


Here's a look at the entire release. Be sure to head over and grab them while they last!

Well that about covers it for today! Until the next time, have a wonderfully craft-die day!
Melinda Beltran


Monday, December 26, 2022

Shaker Tag Gift Card Ornaments

Merry Christmas CottageCutz friends!  I hope you had a wonderful holiday with your loved ones. 

Kris here sharing with you today.  I know most of you are done making Christmas projects now, so maybe you want to save this idea for next year's gifts... OR you can always change the theme and use these for gift bag tags (thinking Valentine's... Birthdays...any special occasion!) ☺  

I'm a huge fan of shakers, so I made 2 ornaments that are shaker tags with gift card holders on the back, using the Jolly Santa Gnome from the Christmas 1 Release & I made the other with the Polar Bear Trio with Igloo from the Christmas 2 Release.  


The patterned papers and tiny tags are from 
Winter Wonderland (Polar Bears Tag) and 
 Let it Snow (Jolly Santa Gnome) from Doodlebug Designs

JOLLY SANTA GNOME TAG
White Cardstock:
• cut 5-1/2" x 3-3/4"
• die cut Jolly Santa Gnome
Red Cardstock (back of tag):
Acetate/Window Sheet:
• 3-1/2" x 4-1/4"
Patterned Paper #1 (red with Santas):
• 5-1/2" x 3-3/4"
Patterned paper #2 (green trees):
• 3-3/4" x 3" - then cut the top with a Hills Slimline die
Patterned Paper (tiny tags):
• cut apart one of the tiny tags and punch hole where indicated

HOW TO:

1.  Glue patterned paper #2 to the bottom of patterned paper #1.

2.  Measure along the TOP of the patterned paper #1 and make pencil marks at 3/4", 1-7/8" and 3"

3.  From the TOP, measure down each SIDE and place a mark at 1-1/4"

4.  Make a diagonal cut from the TOP 3/4" marks down to the 1-1/4" SIDE marks.

5.  Punch a hole about 1/2" down from the center (your 1-7/8" mark)

6.  Place that tag over your white piece and use as a guide to cut the corners off of white tag and punch hole in middle. 


7.  Using a rectangle die, (I used the 3rd largest of the Nested Wacky Stitched Rectangles) center it over your Patterned Paper tag and cut.

8.  Turn that tag onto back side and place Scor Tape (or other strong double sided adhesive) close to the rectangle cut-out.  Attach your window sheet.

9.  Add foam strips/tape just outside the rectangle and around edges of tag.  (See photo below)

10.  Add sequins/shaker elements.


11.  Carefully place your WHITE TAG on top, lining up edges and the hole at top.


12.  Color your Jolly Santa Gnome and attach to tag front using foam tape for dimension. 

*Optional (but highly suggested):  Add Snow Writer (puffy snow, etc) to the trim on his hat & coat!  LOVE the dimension it gives 😊


13.  Glue the red Merry Christmas Ribbon to back of tag.

*Optional:  Add a pocket to the back for a gift card!


POLAR BEAR TRIO WITH IGLOO TAG
Same cutting measurements as the Santa tag with the following exceptions:
• the 2nd patterned paper I glued to the top of the white tag (inside shaker, instead of the front & cut the bottom with the hills die)
• I used the 2nd largest Nested Wacky Stitched Rectangle (larger than the one on Santa shaker)
• I die cut a large snowflake from the Snowflake Set
• I die cut Merry Christmas w/ Snowflakes (for back of tag) from purple cardstock


How CUTE are these?!!  
♥ these adorable CottageCutz dies!

They are for my girls, so here they are on the tree ☺


Merry Christmas to you all, and wishing you all the crafty goodness in 2023!
~Kristine

PRODUCTS USED: