Monday, August 31, 2020

Enjoy...It's Your Special Day!

Hello!  This is Sukie and today I have a beach themed card to share.  I used the Surf Shack and Day at the Beach die sets.  Both of the die sets are from the latest Beach & Tropical die release.

I created a beachy background for my card by ink blending some Oxide Inks.  The bottom portion of my card was splattered with some paint for a sandy look on the beach.
The die cuts were also shaded with some Oxide Inks and then adhered to my card base creating a fun and whimsical scene.
Here are the die sets used on my card, available in the store

Sunday, August 30, 2020

Monkey Hugs

Hi!

It's Anja here. For today's post I made a card using a monkey die.

For this card I used:

- Cottage Cutz dies (Pirate Monkey, Treasure Chest Island, Under The Sea),

- Distress Inks,

- craft card base (15x15 cm),

- white card stock for die cuts and background (14x14 cm),

- black pigment ink,

- sentiment stamp,

- acrylic block,

- white pen,

- brush,

- paper glue.


First I cut and colored the monkey. 

Next I cut and colored the stones and the palm trees.

 
Next I did the background. 
 

And last I stamped the sentiment on the card.

 
And my card was done.


I wish you all a nice day and successful week ahead. See you again next Sunday.
 
Anja Z. 


Cottage Cutz dies I used for this card:


Saturday, August 29, 2020

Good Vibes


Hello Scrapping Cottage friends! Thanks for taking the time to stop and visit with us today. It's Mary Marsh here bringing you the Saturday edition of the Blog.

We have a brand new release of Beach & Tropical dies in the online store. We have 14 new designs in this release and they are currently on sale for a limited time at 25% off

They are so perfect for creating beach themed birthday cards, thank you, thinking of you etc. Let your imagination soar! The Design Team has been showing some great samples to spark your creativity. If you haven't seen them, look back on the Blog for lots of eye candy.

For my card today, I am using the Surf Mobileand I created a birthday card for my daughter-in-law. She is a California girl and she surfs so this will be perfect for her. Let's get started on some details of how I created this card.

Design Steps: 

I started off this week with my card colors. The color challenge #806 this week on Splitcoaststampers was hosted by our own Jeanne. She chose the colors of poppy parade, so saffron and pool party for the color trio. 
so saffron, poppy parade, pool party

Using cardstock in the challenge colors, I cut the surf mobile. For the pool party I shaded with the same color of ink to get a deeper blue tone. 

Next, I chose my background designer paper.  I was going after a hippie vibe with this paper and I think I found it. 
Poppy Parade Card Base: 4 1/4" x 5 1/2"
Designer Paper Layer: 4 1/8" x 5 3/8"

White Image Panel: 3" x 4" (largest Rectangle die)
Poppy Parade Layering Panel: 3 1/4" x 4 1/4" (largest Stitched Rectangle die)
The Peace phrase is from an older Christmas die - love, peace, joy and my good vibes sentiment is computer generated. I cut it out and snipped the ends for a flag sentiment and attached the peace symbol as an embellishment. 

Now that all the elements are cut, I am ready to start my card assembly. I attached the panels with double sided tape and the surf mobile I used dimensional adhesive to lift it slightly off the background. The Peace phrase is attached with ranger multi matte adhesive. 

Well, that's it for me for this week. I hope I have given you a fresh idea for the Surf Mobile die. See you next Saturday.

Dies I used to create card: 


Friday, August 28, 2020

Toucan Birthday Party

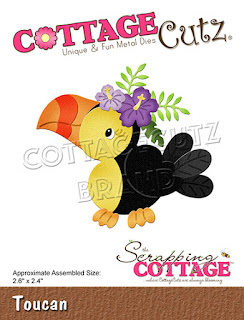
Happy Friday!  It's Jeanne today with a fun, bright birthday card featuring the toucan from the new Beach & Tropical release.  It seems every week I get a new favorite die.  This toucan is so adorable, I think it may be my new favorite!
I had this sentiment had thought it so perfect for a toucan birthday card.  The first thing I did was pick out a paper for the background.  I wanted it bright with yellow and orange since those colors are in the birds' beaks.  There were multiple options but I liked this one for its casual feel.  From there the colors were chosen and the rest was easy.
I cut the pieces from various colors of cardstock using two oranges (beaks, feet, flowers) and two yellows (bird, cake, flowers).  I cut the cake stand from silver and then used paper snips to cut off the base to make a cake plate.  I assembled the birds but did not attach the eyes or feet.  I wanted the eyes to be looking towards the cake and the feet on the branch, so these will need to be the added last.
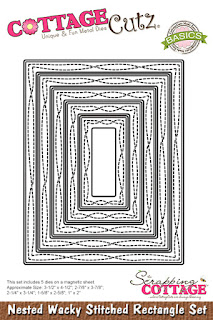
Since all of this will be adhered to an A2 card base, I cut a panel from my patterned paper 4 1/4 x 5 1/2 inches.  I used white cardstock to cut a rectangle using the largest of the Nested Wacky Stitched Rectangles.
I stamped the sentiment in the lower left corner of the white rectangle, centered it on the panel and added the branch and cake.  I  placed the birds on the card without gluing down to finalize placement of the branch.
I glued the body of the lower toucan first leaving the head unattached so I could slip in the upper toucan and adjust its placement.  When that was done I adhered the lower toucan's head using a fine tipped glue.  Then I added the eyes and feet.
The lower right of the card looked a bit bare so I added a few flowers.  Normally I like white space on cards but this one is so festive It seemed to need MORE!  So I added....
a few sequins for bling!  After all, what's a party without sparkle?

And now a little extra tip:
When cutting the beak, feet, body and flowers I had colors for parts that I did not use.  It took just a few minutes to assemble a few more beaks and flowers.  Now I have them ready to use on other cards.  Not exactly the same as this card, but definitely usable.  I store these in the die package so they are ready to go!

Dies:
http://www.scrappingcottage.com/cottagecutztoucan.aspx

http://www.scrappingcottage.com/cottagecutzlayeredcakeandstand3x3.aspx

http://www.scrappingcottage.com/cottagecutzgardenbear.aspx
http://www.scrappingcottage.com/cottagecutznestedwackystitchedrectangleset.aspx

Thanks for visiting today.  Be sure to stop by the online store where the new release is on sale for a limited time.

I hope you have a fun and creative weekend!


Thursday, August 27, 2020

Sand Castles

 Hello Scrapping Cottage Friends

It is Pam sharing some creative tips today!

I have another fun beach themed card for you.  Who doesn't love the beach right!  The only part of the beach that bugs me is sand everywhere!! Even in places you never dreamed of.  But the sound of the ocean, the cool water,  and the warm breezes really out number the sand complaint! Anyway I am using the Sandcastle die today and I hope you enjoy this card as much as I enjoyed making it!

Background Photo by xiaokang Zhang on Unsplash

Design Steps:
1.  Use the Sandcastle die and cut the pieces out of a Sand DP, Dark Brown Card Stock, Silver and white.  Use TH's inks to shade the pieces 
2.  Color the bucket and flag red, the star fish yellow and shade the shells.  Glue together with a fine tip glue
3.  Use a piece of Sand DP and a piece of Sky DP.  Cut the hill in the sand and then lay the sand on top of the sky and cut with the Double Stitched Rectangle die second from the largest
4.  Glue the sand to the bottom of the Sky DP
5.  Cut a piece of white textured card stock 4 x 5 1/4.  Then glue the beach rectangle to the center of the white textured card stock.  Stamp the sentiment in black as shown
6.  Using dimensional dots pop the castle to the sand as shown.  Your card is complete

CottageCutz Products

I really hope you are enjoying your summer.  I can't believe it is almost over! Time just seems to fly especially when you are creating!
Blessings
Pam