Saturday, April 30, 2016

DAINTY DAISIES WITH ANITA KEJRIWAL

Hello friends,

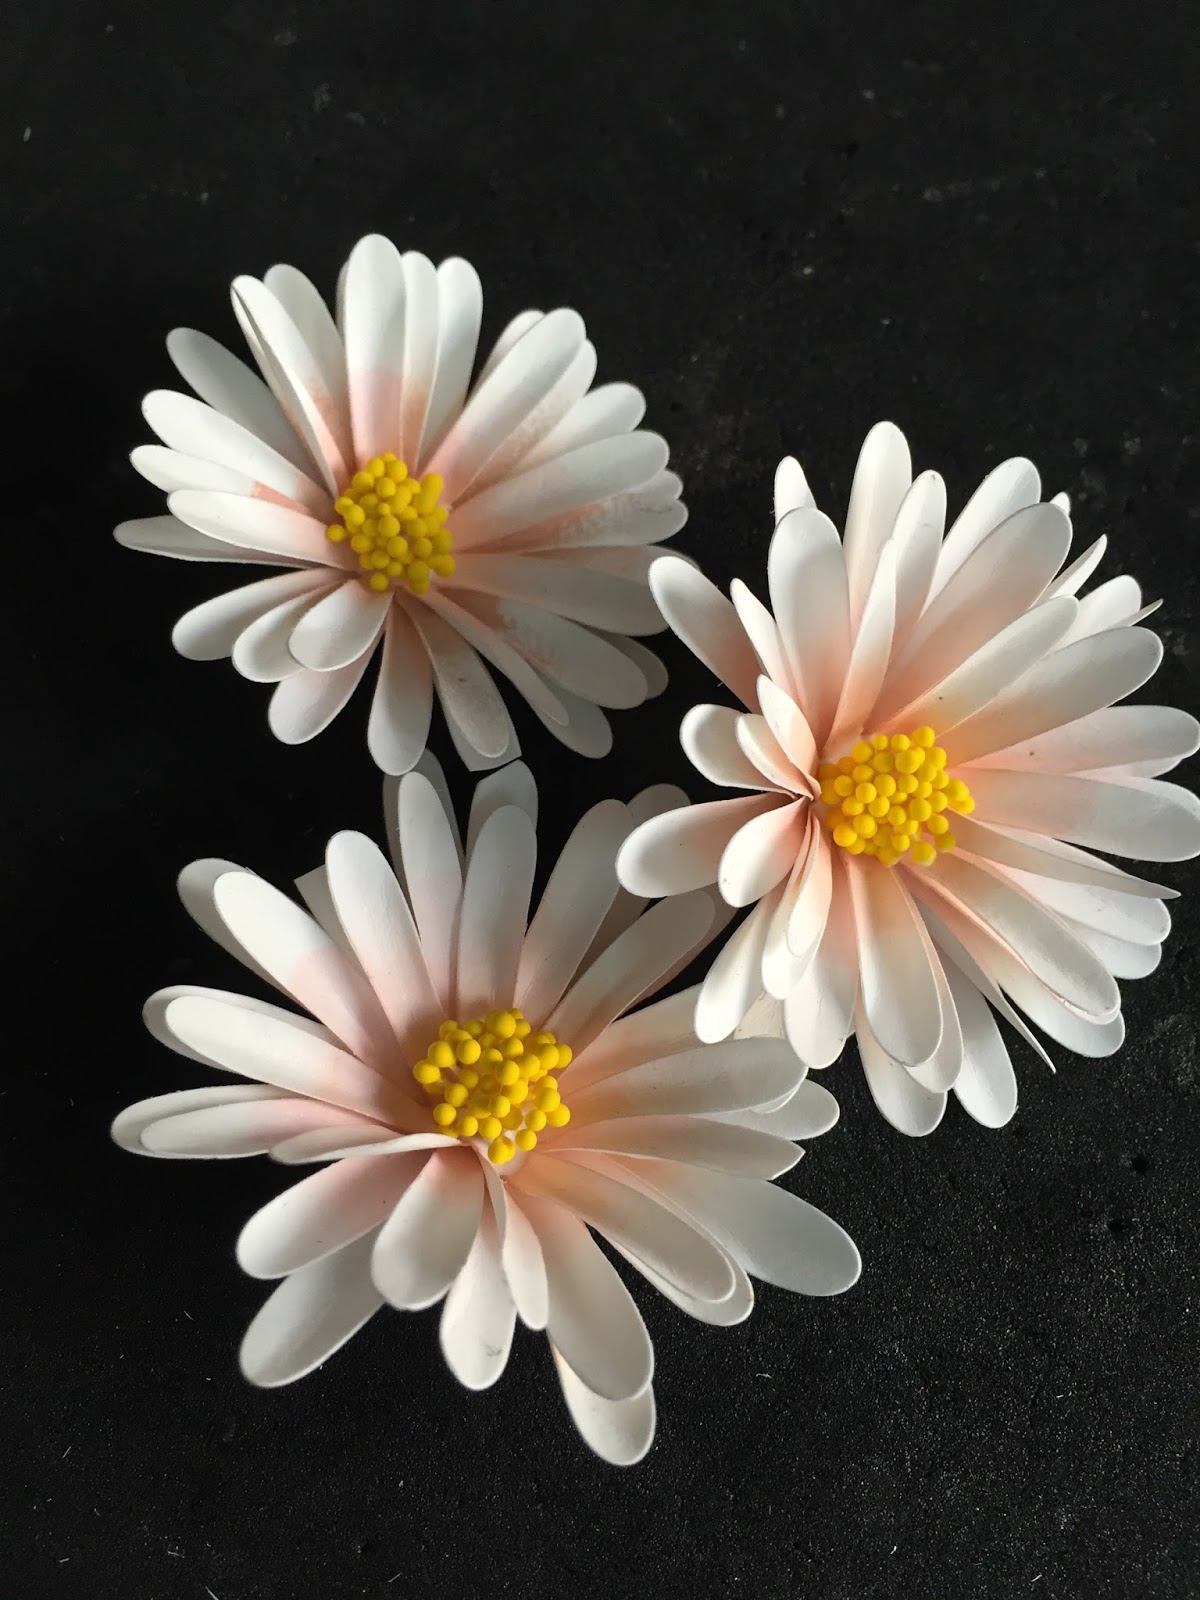
Its Saturday time and I am here with another bouquet of flowers for you using CottageCutz dies. CottageCutz has some most amazing flower dies and I simply love their 3D flower dies. In my previous posts , I have shown many ways as to how to use these dies beautiful. Today, I am here with one of my most favourite flowers--DAISY.
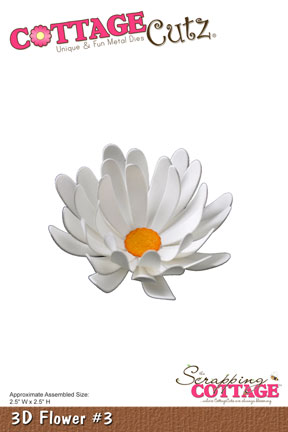
The CottageCutz 3D flower #3 die can give you most beautiful daisy flowers and they are so simple to make.
Here I have a very simple card that highlights the beauty of these flowers. Please follow the step by step pictures on making of the flowers.


Here is the step by step instruction for creating the flower

 Cut out die cuts from white card stock with the CottageCutz 3D flower #3 

       Colour the centre of each flower using the Archival Pink Peony ink

        Shape the flower by placing a stylus in the centre of each petal and by  pinching.


        Layer the flowers together-four layers in one flowers and cup deeply in the middle to make the  flowers stand upright. Add pollens in the centre.


            Cut out leaves from CottageCutz Leafy Foliage die and colour Archival leaf green ink


Cut a card base measuring 8.25 inches by 4 inches. Cut a mat layer 8 inches by 3.75 inches and adhere to the card front. Cut a pattern paper 7.75 inches by 3.5 inches and distress the edges. Add texture using modelling paste and stencil.


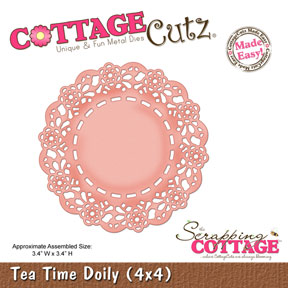
Arrange the flowers, leaves and CottageCutz tea time doily as shown. Add sequins to the card.


The Anything Goes Challenge is still going on and you just have few hours to join in. Do send in your entries for amazing prizes.
See you next week. Please do leave a few words and thanks for your time.


Friday, April 29, 2016

Watercolor Flowers (Video)


Hi, it's Vladka!

For today's card I used dies from last release, called Flourishes and Flowers. It is beautifull and very usefull release, full of greenery and flowers and can be easily combined with dies from prevoius releases.


So, this is my card, where I cut flowers out with watercolor paper and used distress inks, brush and water to color them. I also printed this beautifull quote on vellum paper and combined it white cardbase.

Here is list of all supplies I used:
Cardstock: White Cardstock for Cardbase 
CottageCutz Dies: Listed Below
Distress Ink: Fossilized Amber, Rusty Hinge, Firec brick, Barn Door, Aged Mahogany
Other: peace of Vellum paper, Scissors, Paper trimmer, Sizzix machine, 


I also prepared video for you. This is my second video in English, So, please have patience with me :) My first one was about how I store my CottageCutz dies and if you are interested, you can check it here.


Thank you for stopping by and for checking the video. And don't forget, you still have two days to participate in our first CottageCutz challenge. You can add link to your project here. And please, use only Scrapping Cottage dies.

Thursday, April 28, 2016

Happy Mother's Day

Hello everyone,

It's Donna here sharing another beautiful card using the CottageCutz dies!  How many of you have made your mother a card and mailed it? Not me, but we still have about two weeks to get it out. Now onto my card.
  • Card base  is an A2 (4 1/4 x 5 1/2)
  • Top layer is 4 1/4 x 5 1/2
  • Center pieces are 4 1/4 x 1 1/2 
I die cut the two butterflies and pieced them together. I cut out two circles from the cross-stitched circle dies.  I used the 5th and 6th circles.  The larger circle is with the blue butterfly and the smaller is with the pink butterfly. I adhered them to my card with a glue dot and added my butterflies. I die cut the Happy and Mother's Day out with black cardstock, added some clear wink of stella then used liquid glue to adhered them to my card. I finished my card off by adding some sequins.


Don't forget to join the CottageCutz challenge...click here for all the details. Please come back and see us again soon!

List of dies used for this project:


Wednesday, April 27, 2016

~Happy Spring~


Hello Scrapping Cottage Friends! Thanks for taking the time to stop and visit today. It's Mary Marsh here bringing you the Wednesday edition of the Blog.

For your viewing pleasure, I am showcasing one of the new April release dies and also demonstrate how you can take a single die and add layers, a little embossing and some created embellishments to dress up the card.

Let's get started with some details on how I created this card:

cardstock and patterned paper sizes:
daffodil card base measures 4 1/4" x 11" and scored at 5 1/2"
pomegranate embossed layer  is 4 1/8" x 5 3/8"
patterned paper layer is 3 1/8 x 4 3/8"

I used a flower embossing folder that just embosses around the cardstock edge. Thereby creating a perfect frame for the next layer where I used my patterned paper.

I used the new large leafy flourish and cut 2 of them in a dark green card stock. I added an extra swirl at the top right and some extra leaves on the middle left.  That just helped create balance on my card. This is adhered with multi matte medium. It's a strong adhesive and it dries clear unlike glossy accents.
To continue building my card, I cut some flowers from the mushroom & flowers die in daffodil and pomegranate.

My sentiment was stamped before I attached all the die cuts in a dark green ink. It makes it easier for placement to do that first. To finish off my card I added a butterfly cut from the butterfly with flowers die. I cut it once in daffodil cardstock and then in a daffodil patterned paper. I used the multi matte medium to attach just in the middle. That way I was able to lift the wings for added dimension. The solid butterfly is glued directly to the patterned paper layer.


Well Friends that's my card for today. I hope this provided some inspiration for you. The April release is filled with  awesome dies to help you create some gorgeous floral cards. Check it out.

Just a little reminder, it's not to late to enter our brand new challenge. There are prizes to be won. Check out all the details here.

So until next time.........inky hugs!


http://www.scrappingcottage.com/cottagecutzlargeleafyflourishelites.aspx
http://www.scrappingcottage.com/cottagecutzmushroomandflowers4x4pre-order.aspx
http://www.scrappingcottage.com/cottagecutzbutterflywithflowerspetites.aspx


Tuesday, April 26, 2016

Card with flowers in a box

Hi everyone, Janja here!

For today's post, I used one die from each of this year's releases and prepared the card in a box. I like to combine dies with each other. 


For the card we need:
  • white card base: 10.6" x 5.3", folded
  • black cardstock: 5" x 5"
  • two patterned paper: 4.8" x 4.8" and 4.8" x 2"
  • white and color cardstock
  • texture paste and stencil
  • stamp
  • embossing ink and white embossing powder
  • heat gun
  • white pigment ink pad
  • white pearl cardstock and transparent foil for the box
We prepare several cutouts with the die 3D flower #5.


The cutouts are molded with a shaping tool and assembled. 


Once we have selected patterned paper and cardstock trimmed to the desired size, we cut out a hole in the smallest of them in the form of an oval with a die from the basic set oval (4th die from the center).
Place a stencil on paper and apply texture paste over it with a spatula. 


While the textural paste is drying, we cut out another oval from black cardstock. We stamp the sentiment and treat it with hot embossing technique. The edges of the oval are shaded with white pigment ink. 
We place cutout, which is now seen as a blackboard, in the previously prepared hole. The edges are masked with a white oval frame. We use the basic die sets: an oval and stitched oval (4th die from the center).


With nets cutouts we enliven the background of the card. At the end glue flowers and greenery (the leafy vines die and the Lacey rose die). 


When a card is delivered in person, it's best if it is stored in a box. 
A box is made 0.40" greater than the base card. The height is 0.79". In the box cover we cut out the opening (4.5" x 4.5") and on the inner side of the box cover clamp foil, with double-sided adhesive tape. At the end, decorate the box cover. 
Our card is now neatly and securely stored. 


And don't forget on our April challenge - anything goes. You still have time to share your projects with us till the end of the month.

Dies, which I used at work: 


Thanks for looking. 

Janja