


Thanks so much for stopping by. If you have any questions just leave a comment and I will do my best to answer. Have a great day!


 This USA Eagle can be made with or without the hat and the USA because they are separate pieces, but simple as well.
 I'm excited to be able to use this die for Scout Eagle Congratulation cards as well.


 Of course this cuts out everything on the die but you don't need to punch it all out, just the one you want to use for a stencil. Then I used some ink and a dauber to sponge the flower onto my paper.
 I did the same with the Flower 3, Layered die and just used the stem.
 We invite you to ask questions and make comments on any of our posts. We're here to help!
 Don't forget to the Edger dies, I think the Rick Rack is my favorite because I now have Rick Rack in any color I need and as much as I want!
 Check out the newest Cottage Cutz Summer Release available for pre-order now!!!
 My best friend Buddy, The Die. . Puppy in House, by Cottage Cutz. I wanted to create a mini scrapbook look in a frame. The main issues with framing a scrapbook layout is the page will not fit flat on the glass because of all the layers of paper and embellishments. I know it is hard to see, but if you notice how the plaid background does not match on the edge, that is because I cut a MAT in the same plaid background and mounted it on Scotch foam tape. This way the raised mat would create an even height on the outside of the layout. This would make the layout lay flat against the glass on the entire edge. This created a shadow box area in the center to work within. Remember this foam tape / mat frame trick for a layout page that may be causing the album to not close flat when closed. The frame helps the pages stack up better when using a lot of thick embellishments on a special page..
  Now I was able to do the puppy and the house in several layers and overlaps of paper without there being an issue. Everything lays flat and does not press against the glass.
 The other advantage to the mat frame, is the lettering is almost floating. The top of MY BEST is glued to the mat only on the tops of the letters and FRIEND is glued along the bottom of the letters to the mat. This allowed the letters to appear as if they are floating. So how do I solve the dot to the "i", I would have had to stick the dot of the i to the glass or glue it down on the background, than it would not have been floating. . . . notice the cute lettering trick. . . .use the negative of letters, so I used this for the I on the friend. I did not not want the I to stick out alone, so I picked the e from best at the top. To add additional dimension I mounted the red frame for the photo behind the mat, than mounted the frame above the mat on the top.


 Again I am using a simple die. . . to create a patterned background. Here I cut a ton of Cottage Cutz Fish Skeletons and randomly applied the fish skeletons to my 2 1/2" lettering. Than cut all the overlap off, remember to cut as you go, that way you may have some fish parts to use in the smaller area's. I than attached the letter to the shadow cut to add a slight color contrast, I used two different white cardstock. This took the clean white look of the bones away.
 Don't forget the negative of your dies cutz. Here I stacked up all the negatives and randomly . .unevenly cut around the edge to create a tile look.
 Now I have two 5" x 6" panels to create a nice background for a card. I think this may make a nice background for a Father's day fishing card? What about hot pink cardstock with white skeletons and diamonds . . for the eyes of the fish. . wooo . . .FuFu cat card? Maybe as a wavy or school of fish across a scrapbook page?
  Here I used the Biscuits to create a simple border.
 Don't forget to break a few eggs and show a broken biscuit or two.
 I Started with a rusty ink and sponged the edges on in a few area's of the biscuit
 Than highlighted the biscuits with a dark brown ink and added the sparkle with a Sakura Sparkle gelly roll pen. Remember to swirl around in the general area that you want the sparkle, than tap a couple of times with your finger to spread the sparkle. Your swirl or pen lines will completely go away.


 There have been a few questions on the CottageCutz Edger dies that I thought I'd show you again what these dies are like. I'm showing the Dog Edger in my example.
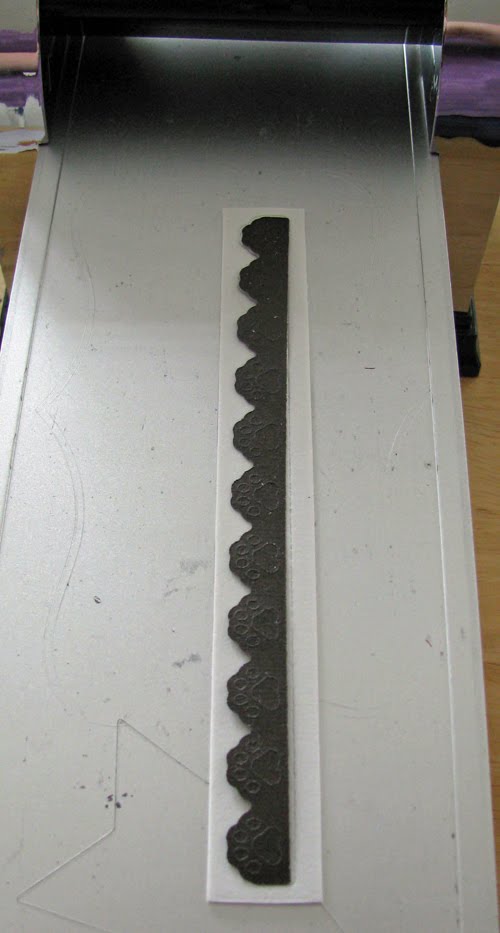 These come just like a regular die but in a 7" strip. Just place the paper over the top and cut out.
 You get an actual cut out of the Edger. Then for those that have punch outs I simply pop out the pieces with my piercer and put some glue on the back and they're ready for my project.
 Here's my card using the Dachshund, Dog Edger and the Dog Biscuit die.


