Thursday, May 31, 2018

Gorgeous Tulips

Good Morning Friends!

It is Pam creating with you today!

We have a number of sales going on in the store today!  Including a look at our new release which is Just for Guys!!! Which is also on sale for 25% off!  So please check out the online sales!

Today, I am using one of the dies from the Mother's Day release.  I think it is just beautiful and can be used for anniversary, birthday, sympathy and thank you.

Design Steps:
1.  Using the Bouquet of Tulips die cut all of the pieces out in white
2.  Use your markers to color and shade the flowers
3.  Assemble the flowers and tape or glue them to the back of the pitcher.  Glue the bow to the pitcher as shown

4.  Use a black A2 card base cut a piece of polka dot black DP slightly smaller then the base.  Use the second from the largest Cross Stitched Circle and cut a black circle.  Also using the Expression Thanks die cut 3 out and layer one on top of the other.
5.  Pop the pitcher to the black circle and then add to the card.  Glue the thanks to the card as shown
Cottage Cutz Products


Thanks so much for stopping by today! And make sure to take some time for yourself to be creative!

Blessings
Pam

Tuesday, May 29, 2018

Mother's Day Release Design Team Samples (Part 4)

Hello Scrapping Cottage friends! Thanks for taking the time to stop and visit today. We are sampling DT cards from the Mother's Day release.
There are 22 dies in this release that includes 3 Mothers Day phrase dies. All the other dies could be used year round for a variety of occasions as you will see with these DT cards. 

We have had a good response when we do a group post on a release. It gives you the opportunity to see more card samples from the Design Team. So we are continuing that again this month. The Design Team will start showing cards with the "Just For Guys" dies next week.

There are 4 samples for today from our talented Design Team members Jeanne Knobbe and Pam Mackay.

Card 1:  This first sample is from Jeanne Knobbe. She used the Stitched Birdhouse die. It's perfect for new neighbors and a great way to welcome people to the neighborhood.

The card also features the Spring Grass and Nested Wacky Stitched Rectangle dies. Jeanne cut two rectangles from the Wacky Rectangles and used partial die cutting with the Spring Grass die to get the grassy bottom. Her card colors are from the Splitcoaststampers color challenge #689.
Card 2:  The next sample is another beautiful one from Jeanne Knobbe. She used the Berry Cake, Mother's Day Cupcake, Love Hearts, Sweet Phrase and Scalloped Circles dies to create a card for a special friend. 

This card could be used for a birthday card, thank you card, or just to let someone know they are special. The berry cake and cupcake are so detailed with  the added berries, flowers and icings.

Card 3: Our next sample is from design team member Pam MacKay. She used the Mama Raccoon & Baby to create such a cute outdoor scene. The trees just completes her scene so well and they are part of the Rustic Sign & Trees die. A perfect thank you for the outdoors person.

Or how about as thank you cards from a new mother for a baby gift. By changing the sentiment you could make it a birthday or get well card. Lots of possibilities with this die.
Card 4: Our last sample for today is another from Pam MacKay.  On this one she used the Mom's Garden Bouquet to create such a pretty, feminine card. The colors for her card are also from the Splitcoaststampers color challenge #689.
The addition of the stitched eyelet oval draws your eye right to the bouquet and the fancy floral lace border just adds to the feminine appeal. Think birthday, get well or a card just to say hello as some possibilities with this die.
 I hope the samples shown today have sparked some ideas for alternate ways to use these new dies.  They are all so beautiful and the detail in all of them is amazing. All of the dies used on today's cards are on sale. Check out the online store for the exact savings.

Mother's Day release dies used:
http://www.scrappingcottage.com/cottagecutzberrycake.aspx

http://www.scrappingcottage.com/cottagecutzmamaraccoonandbaby.aspx

http://www.scrappingcottage.com/cottagecutzmomsgardenbouquet.aspx

http://www.scrappingcottage.com/cottagecutzmothersdaycupcake.aspx

http://www.scrappingcottage.com/cottagecutzstitchedbirdhouse.aspx


Monday, May 28, 2018

Flower Trio

Hi, it's Lois here with the Monday edition of the CottageCutz blog.  We're still featuring dies from the Mother's Day release, but be sure to check out our new "Just for Guys" release now in the Scrapping Cottage on-line store.  And you might want to take advantage of the Memorial Day sale -- up to 50% off on Select dies and 25% off on this new "Just for Guys" release.  How fun!  New dies on sale!

Now, on to my card.  I'm going back really far for my layout.  I love to look back at old layouts from the Splitcoaststampers Sketch Challenge.  While I'm using the layout as a starting point, I have adjusted it a bit to accommodate my design.  This is Sketch Challenge 27 which was from June of 2005, long before I started doing the challenges.  So it's almost like I'm participating in the original challenge.


As I said previously, I adjusted the sketch by actually eliminating the three individual panels.  This is my card:


To start my card, I cut the pieces from the Stitched Tulip and Daisies die, all from white cardstock.


Using a variety of Copic markers, I colored each piece and assembled my three flowers/pots.


I then cut two shelves from brown cardstock, using the Shelf with Plants die.


I cut an 8 1/2" x 5 1/2" piece of white cardstock and a 4 1/4" x 5 1/2" piece of woodgrain patterned paper.


After cutting one of the shelves down to size, I glued the patterned paper onto the white card base and added the two shelves.


After placing small foam pop dots on the back of the three flowers and pots, I added them to the shelves,  . . .


. . . stamped the rustic sentiment, and my card was finished.


CottageCutz dies used on my card are:

http://www.scrappingcottage.com/cottagecutzstitchedtulipanddaisies.aspx

http://www.scrappingcottage.com/cottagecutzstitchedtulipanddaisies.aspx

Be sure to check out The Scrapping Cottage store for the Memorial Day sales - up to 50% off on Select CottageCutz dies and 25% off the brand-new "Just for Guys" release.


Sunday, May 27, 2018

Card with Foxes

Hi!

This is Anja. Hope you had a good week. Mine was busy at work and it'll be like this till end June. This year Summer vacation will be well deserved. But I wasn't just working, I managed to take some time to craft. I had to color this cute Fox die. I decided to make a card I could give to one of my friends, that always support me.


For this card I used:
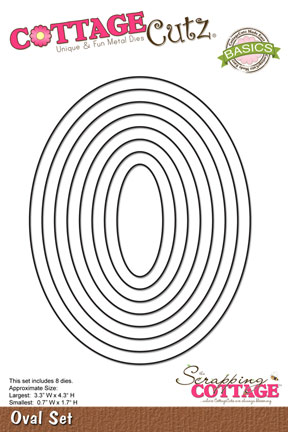
- Cottage Cutz dies (Mama Fox & Baby, Mom's Garden Bouquet, Oval Set),
- Distress Reinkers (Peeled Paint, Faded Jeans, Twisted Citron),
- Zig markers (color numbers: 010, 050, 061, 091, 099),
- card base (13x10,5 cm),
- smooth watercolor paper for background (12,5x10 cm) and die cuts
- sentiment stamp,
- Versafine Black Onyx ink pad,
- adhesive foam pads,
- watercolor brush,
- brushes,
- color pallet,
- heat gun,
- glass surface,
- washi tape,
- paper glue.

First I made the background. I cut the paper and glued it on the surface with washi tape. I put quite a bit of water on the surface and then slowly some color on top with the brush. I used the pallet and the reinkers. When I was satisfied with the color, I dried it with the heat gun.


I did the same withe the green color. When I had the surface dried, I spritzed a few water drops on top and let it dry.


When the background was dry I cut the edges off.


The I cut out a second largest oval.


I used the largest oval die to cut from white paper.


When I had the ovals cut, I glued it together. I also glued what was left of the colored background to the card base. I adhered the ovals on top of that. Then I die cut and colored the foxes. I used Zig markers.


Then I cut the flowers. I used reinkers for the green parts.


When I had everything colored, I just needed the sentiment. I stamped it on the white strip of paper and glued it on the card with adhesive foam pads.


And this is my finished card.


Before I go, I just want to remind you there is a Memorial Day Sale going on at the Online Store. Savings of up to 50% on dies. Also, the new "Just for Guys" release is in the store. That is currently 25% off.

I wish you a great Sunday.

Anja Z.


Cottage Cutz dies I used:


Saturday, May 26, 2018

Mama Owl Welcomes Baby

Hello Scrapping Cottage friends! Thanks for taking the time to stop and visit with us today. It's Mary Marsh here bringing you the Saturday edition of the Blog. We are still showcasing the beautiful dies from the Mother's Day release. They are so versatile and can be used for cards other than Mother's Day.

Also, want to let you know that there is a Memorial Day sale going on at the online store. You can save up to 50% on selected dies. Lots to choose from so make your way over there to look around. You just might find something that you can add to your collection.

We also have a new release of dies. This one is our "Just For Guys" dies. There are 14 awesome designs and they will be so perfect for creating your Father's Day or other masculine cards. The design team will begin showing samples soon.

For today's card, I am featuring the oh so cute Mama Owl & Baby die, and I made a card to welcome a new baby. I like to have some of these type of cards on hand for either a baby shower or to send out to congratulate on a new birth. So let's get started with some details on how I created my project.

Step 1: I started by picking my card colors this week. I wanted to use some soft baby boy colors. So I chose a Caribbean blue, brown sugar (soft brown), and a patterned paper that has both of these colors for the card base.  I also had some of the Caribbean blue twine that I decided to use. Thought it would fit well with these owl images. Twine and dotted paper - I like the combo for a baby boy card.
Card Base: 4 1/4" x 5 1/2"
Brown Sugar Panel: 4" 1/8" x 5 3/8"
Patterned Paper Layer: 3 7/8" x 5 1/4"
 
Step 2: Cut my Mama & Baby owl. For baby, I used the Caribbean blue cardstock and sponged his wings with the same ink for a bit of color variation. Mama was cut in a cantaloupe shade and her wings and eyes are cut in coral cardstock.  They are so, so cute. I just love how they turned out.
Step 3: Stamped my welcome baby sentiment on white cardstock that was cut with the 3rd largest pierced rectangle die.
I layered that onto another rectangle cut with the Caribbean blue cardstock.  Added a branch for the owls to perch on. It's from the stitched honey bees set.  
Step 4: Added the blue twine to the background panel and attached to card base.

 I used mounting tape to attach the image panel. I wanted it lifted somewhat from the twine. I dimensional adhesive only on the top and bottom of the panel.  No need for the dimension where the panel sits on the twine, since that's already raised.
I finished off this week's card by adding a few hearts cut from the Caribbean blue cardstock.
I hope I have given you an idea on a way to use this really cute Mama Owl & Baby die. It's on sale this weekend. In fact, all the dies I used on today's card are on sale this weekend.

Have a wonderful Holiday weekend! See you next Saturday.

dies I used to create card:
http://www.scrappingcottage.com/search.aspx?find=mama+owl+%26+baby
http://www.scrappingcottage.com/cottagecutzstitchedhoneybees.aspx