Tuesday, May 31, 2022

2 Cupcakes Card and a little extra

Hello Scrapping Cottage friends!  
Melinda here with you on this Terrific Tuesdie! For those in the USA and who observe Memorial Day, I hope you had an wonderful holiday!  Today I am sharing a quick and simple card featuring more dies from the New Sweet Treats Release! Talk about sweet! This set is over the top adorable!  Here is what I created.

Here's a look at my completed card. I started with a horizontal top folding card base. I used some white cardstock for that. I then cut a piece of some colorfully cute patterned paper I had in my stash. I cut it to 4x5.25 for the mat. 

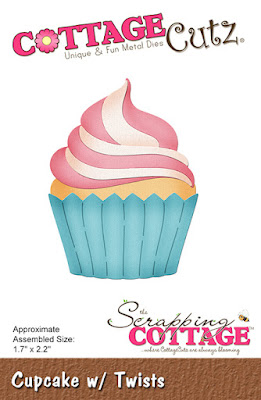
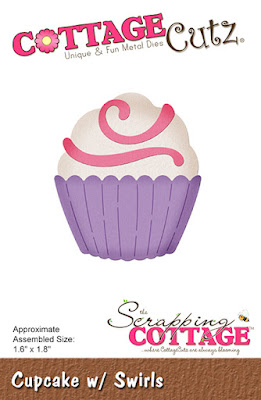
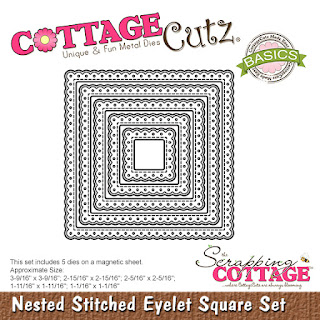
Next I went to work on my cupcakes. I cute them out of white cardstock and then colored them with  my markers. i then mounted them onto a yellow cardstock mat and then mounted those onto the Eyelet Stitched square mats.

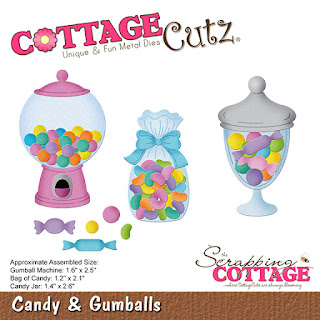
I then added some of the adorable little gumballs, jelly beans and candies from the Candy & Gumballs die set. I then also Dressed up my cupcake tops with some stickles.  I used the stardust color so that it would play off the colors underneath it.

Here is a closeup of my other cupcake.

Here is the new sweet treats release.

Sweet Treats Release


The Dies I used to create this project:


Have you checked out the CottageCutz YouTube channel yet? 
It is filling up with beautiful projects and great how-tos!  
Head over and check out the latest video! 

So before I sign off, I just have to share one more thing....

I wanted to share this adorable little "gnome" I made. He is pieced together with all various pieces and parts form several of the dies from the new release. I think he is so stinkin' CUTE!!! You know how it is when you are working and you have parts and pieces strewn about your table and then....SHAZAM! Inspiration strikes!....lol!  Can you guess which pieces are which? Well you have a week to think about it. I will be putting this sweet little fella on a project and then sharing the pieces I used to err...well... "piece" him together...so be sure to come back.. :-)

Well that about covers it for today! Until the next time, have a wonderfully craft-die day!
Melinda Beltran

Monday, May 30, 2022

Memorial Day


Happy Memorial Day everyone.  Today is the day to remember and honor so many amazing people
Who have fallen serving out country.  We salute you…

I created a card using red and blues in honor of our fallen 
I die cut my cones and created a bunch of
Different flavor’s and added sprinkles to some and strawberries…
To make my candy amd gumballs I took acetate tp make it appear as glass and cut a fun image from  a piece of patterned paper to make it look like its inside of the bag.
Products Used


Complete Release


Saturday, May 28, 2022

Fountain Sundae - Double Easel Fold

Hello CottageCutz friends! Thanks for taking the time to stop and visit with us today. It's Mary Marsh here bringing you the Sunday edition of the Blog.

It's new release time!!! We have new dies in the online store. It's our Sweet Treats release with 13 new designs. They are so perfect for any card making occasion you may have. The individual dies are currently 30% off.

We are also having a big Memorial Day sale with savings of up to 70% off. Check the online store

Today for your viewing pleasure, I have created a birthday fun fold card. This fold is called a double easel fold. I am using the new Fountain Sundae die for my card. This is a birthday card for a friend, so I decided to add a "gift card" holder. I am giving her a gift card to a local ice cream parlor. They make the most delicious SundaesSo, let's get started with some details of how I made this card.

Design Steps:

Since I knew the fold I was going to use for my card, I picked my designer papers and coordinating cardstock. I found this fun and festive paper that I thought was perfect for a birthday card.  The ice cream cone paper was a perfect addition to my fun fold. 

The card base is 4 1/4" x 11" and I scored it at 2 3/4" then at 5 1/2". The cardstock color is a rich blackberry shade. I am using designer paper that is the same color. 
You fold it in half at the 5 1/2" score- this makes a valley. Then fold the 2 3/4" score back- to make a mountain. See photo below
You fold it in half at the 5 1/2" score- this makes a valley fold. Then fold the 2 3/4" score back- to make a mountain fold.  I used ombre designer paper in the blackberry color. Cut it at 4" x 2 1/2". All attached with double sided tape. 
Next, I cut a piece of the blackberry cardstock at 3 1/2" x 9" and scored at 4 1/2". This is the card front and attaches to the back panel and over the ice cream paper. 
I used another ombre designer paper on this panel measuring 3 1/3" x 4 1/4". Then attached to the card base with double sided tape. 
 For this panel on the inside, I used more designer paper - 3 1/4" x 4 1/4" to create my gift card holder.  I just used a 1 1/2" circle punch to cut a notch to slip the gift card in. I attached with Art Glitter Glue on the bottom and about 3/4 of the way up the sides. 
I cut a piece of white cardstock the same size and stamped my birthday sentiment.  
Attached this panel to the card inside with double sided tape. 
Now for my fountain sundae image. I cut in cardstock that coordinated with the designer paper. I decided to attach it to a circle with dimensional adhesive. I used the 3rd largest Circle die. I stamped my sentiment in coral ink.
Now for the easel "holder". I used the Stitched Circle die and cut in blackberry cardstock. Cut a smaller one with the Circle die and added a heart. To complete my card, I scattered a few sequins.  
Here is more of a side view of this fun fold.
And then what it looks like completely open. I decided to add another piece of the ice cream designer paper.
I hope I have given you a fun idea for a way to use this new die. See you next Saturday!

Reminder: Our YouTube Channel has a new video from Marla Harris. There is a giveaway for being a subscriber, liking the video and leaving a comment. Click here.

Dies I used to create card:


Friday, May 27, 2022

Easy Slider Card with No Special Dies


Hi everyone! My name is Linh and I'm honored and excited to be here as a guest designer. I have a new video up on the CottageCutz YouTube Channel. In this video, I'll show you how I made this fun slider card. I don't drink so when I say "Make it a double", my husband knows this is what I'm talking about. LOL

To create this card, I've used elements from three different sets from the new Sweet Treats collection. The main ice cream cup and larger scoop of ice cream is from the Ice Cream Sundae die set. That set includes a dollop of whipped cream and a strawberry, but I always think of ice cream sundaes as having a cherry on top, so I took the cherry from the Cupcake with Cherry set. The scale fits perfectly. In order to have the second scoop hidden initially, it needs to be smaller than the large scoop. I used one of the many scoops of ice cream from the Build An Ice Cream Cone set.  This creates the perfect double-scoop ice cream cup!

I die cut all the elements from solid color card stock but to make the ice cream extra special, I dusted it with Nuvo Shimmer Powder and spritz it with my homemade mica mist in snow white. That gives it all the delicious color variation of natural ice cream as well as a beautiful shimmer. I used Diamond Glaze on the cherry to give it that glossy shine. To finish the card, I used my Dymo label to create the custom sentiment and stamped "pull here" on an arrow so the card recipient knows this is an interactive card.


Thursday, May 26, 2022

Candy Cart Mini Slim Line Card


Hello, my crafty friends, Marla Here with another YouTube video tutorial over on the CottageCutz YouTube Channel featuring the "Candy Cart" from the Sweet Treats Release.  Find out how you can win this sweet die in my video and see how this delicious card came together.

If you watched the last video featuring the "Pedestal w/Cupcakes" and subscribed, left a comment and liked the video, you could be the lucky winner of that die.  I hope you'll join me.


Wednesday, May 25, 2022

Birthday Easel

 Hello Scrapping Cottage Friends

It is NEW RELEASE TIME!!

It is our Sweet Treats release!  There are 13 different designs and everyone of them can be used for a variety of occasions especially Birthdays!! The individual dies are 30% off.  This sale price won't last long so click HERE to hop on over to the store!

Today, I am using the adorable Easel Sign w/Flowers.  This die can be used to proclaim any occasion.  I think it would make a really cute Wedding announcement.


Design Steps:
1.  Use a white 6 1/4 x 4 1/4 card base, 6 1/8 x 4 1/8 blue card stock, 6 x 4 flowered DP,  use the largest Pierced Rectangle die and cut out blue card stock and finally use the second from the largest Pierced Rectangle and cut out white card stock
2.  Use the Easel Sign w/Flowers and cut out the following card stock: red, yellow, green, silver, black and a piece of wood grain DP
3.  Stamp the black insert piece with VersaMark and emboss with white powder.  Assemble the easel with a fine tip glue
4.  Glue the white rectangle to the blue rectangle and add a strip of green to the bottom of the white rectangle
5.  Glue the easel to the middle of the rectangle and add a few flowers to the grass below the easel as shown above
6.  Glue the flower DP to the piece of blue card stock add the white ribbon tied in a square knot.  Then glue that panel to the front of the white card
7.  Place dimension tape to the back of the blue pierced rectangle and then pop it onto the card front as shown below and your card is complete

CottageCutz Products


We have more inspiration on our YouTube Channel check it out HERE
Thanks so much for stopping by!  And I will see you next Thursday.

Blessings and Take Care