Saturday, July 31, 2021

Whisking You a Happy Day (new stamps & die)

Hello Scrapping Cottage friends! Thanks for taking the time to stop and visit with us today. It's Mary Marsh here bringing you the Saturday edition of the Blog.

IT'S NEW RELEASE TIME! The Scrapping Cottage has just added a new brand to the company line. Lil' Bluebird Designs is being introduced with 16 new Photopolymer Clear Stamp Sets and 16 coordinating dies. There are stamps for so many of your card making occasions and then some. The coordinating dies just make it a perfect fit for your card making designs. 

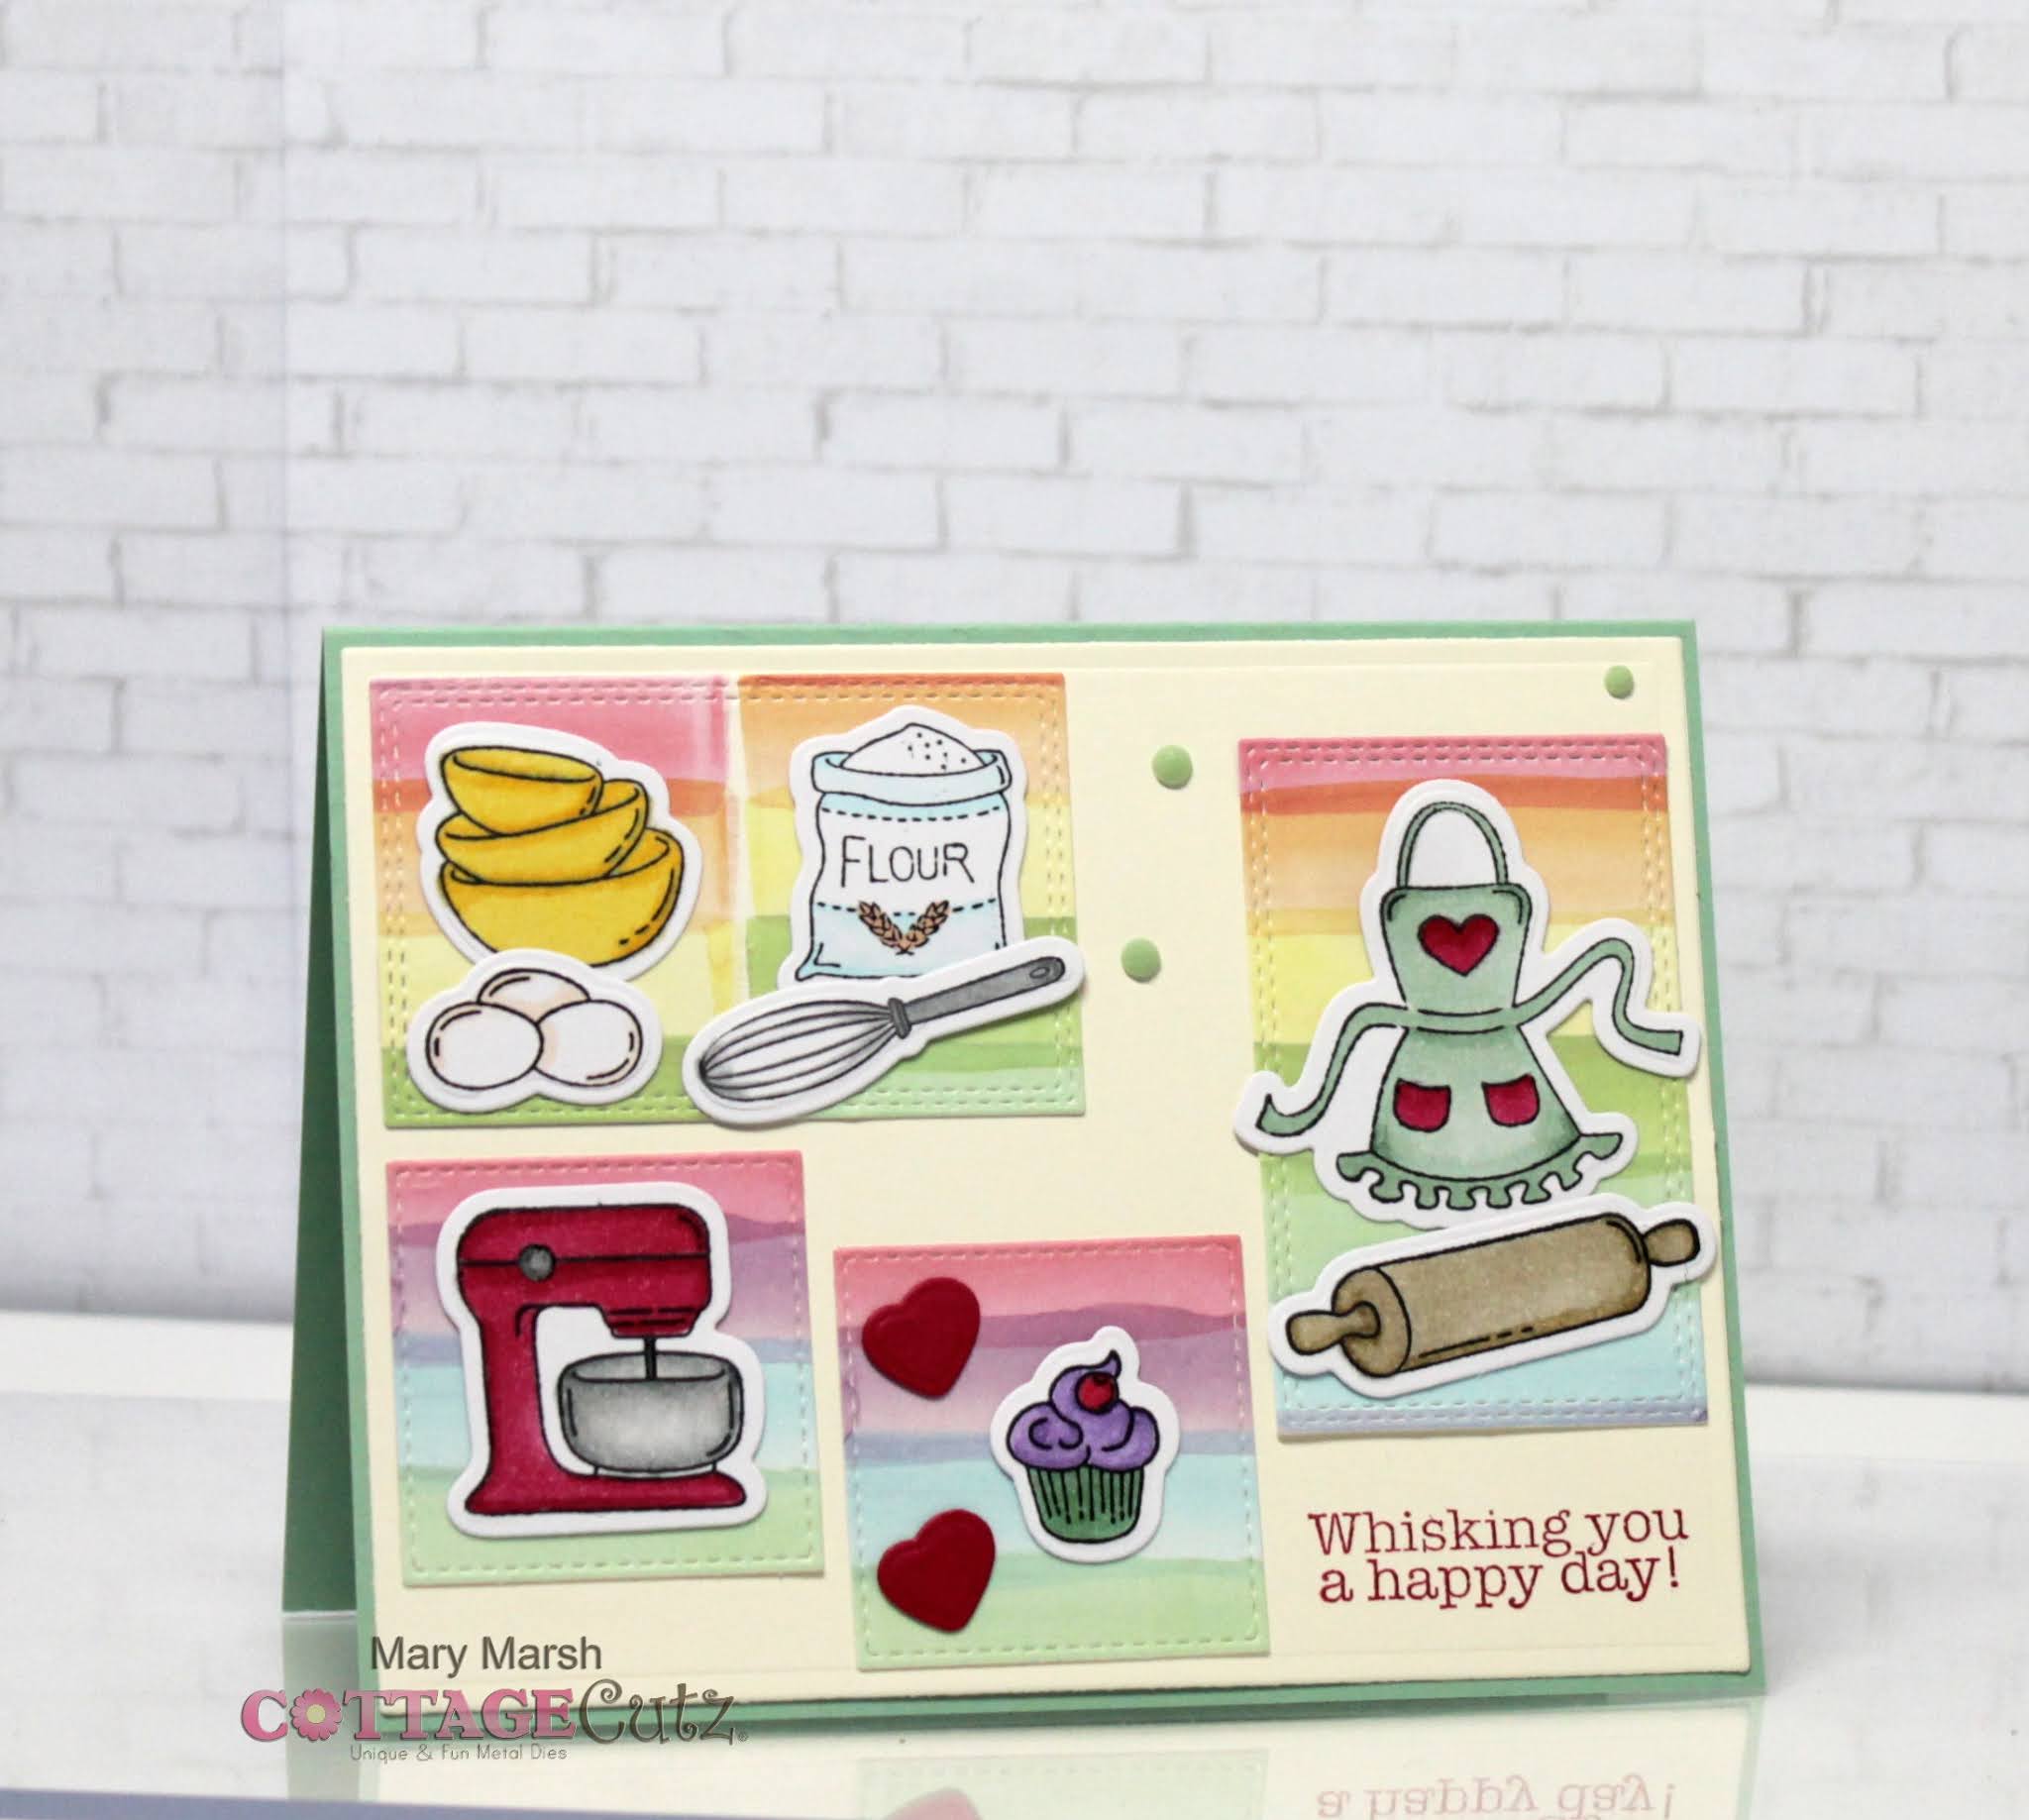
Today for your viewing pleasure I am featuring the new In the Kitchen stamp & Coordinating die set. I created a birthday card for my next door neighbor who is an avid baker and shares many of her creations with my hubby and I. A card using these new stamps would be perfect for her. So let's get started with some details on how I created my card.

Design Steps:

I started my card by stamping and coloring the images. The coordinating dies made it so easy to cut the images.  
I used a combination of alcohol markers and Prismacolor pencils as my coloring medium. The photo below shows the markers and pencils I used. 
Before I started card assembly, I stamped the sentiment from the stamp set. I used my MISTI just in case a double inking was needed. 
Once that was done I put together my card layout. I wanted to use designer paper for the background images but I didn't have paper that wasn't overpowering the images. Then I happened to notice some washi tape that I had. So I covered a panel of white cardstock with the tape. I used the 3rd largest Double Stitched Rectangle die and the 4th largest Stitched Square die and cut from the washi tape panel I created. 
Now I am ready to start card assembly. I attached the images to the washi tape panels with glue dots and the panels to the image base with double sided tape. The vanilla image panel is 4 1/8" x 5 3/8".
To complete my card, I added a mint green card base 4 1/4" x 5 1/2" and scattered a few mint green enamel dots. 
And that's it for me for this post. I hope I have given you an idea for this new stamp & die set. Many more samples coming from the DT next week. See you again next Saturday. 


Stamps & Dies I used to create card:


Friday, July 30, 2021

O-fish-ally Awesome

Happy Friday!  It's Jeanne with today's card.  Before I get to my card I'd like to let you know about the wonderful Christmas in July sale that is going on right now in the online store.  You can save up to 65% on select dies!

And another big announcement - the Scrapping Cottage is now offering great stamps and coordinating dies from Lil' Bluebird Designs!  I can't wait to begin coloring and designing with these adorable images. Be sure to check them out in the online store.

Now for today's card.

A few weeks back I mentioned that I had saved an extra strip of watercolored paper (click here for those instructions) and extra fish for another card.  Well...here is that other card!  With a few extras.

I used my leftover strip and fish (I ended up using only one fish) and added a crab and jellyfish.  I struggled with what color to use for the jellyfish, then hit upon using vellum.  I love it because he really does look like a jellyfish!

Using the Circle Windows Slimline die I cut a panel from wood grain paper.  I also used the largest of the Nested Slimline Rectangles in dark brown as a backing panel because the Circle Windows die has rounded corners and I knew these would show on the card.  I cut three portholes from brushed gold cardstock using the middle of the Stitched Wide Circle Frames dies.

To get everything placed I laid the wood grain panel over the dark brown and used a pencil to outline the circles.  I then placed my water panel over this (it is slightly narrower than the circles so I could see the tops and bottoms of the circles), placed a frame over the middle circle and traced the center on the water panel.  In this way I knew exactly where to stamp my sentiment.

After gluing down the water panel, I placed the wood panel on top without adhering it. One at a time I placed my creatures underneath and gently lifted the wood panel.  I marked where to place the creature in pencil where it could not be seen.

This method allowed for me to place the critters exactly where I wanted them.  I glued the wood panel to the base and trimmed the jellyfish tentacles (they were a bit long.)  You can see here that the water strip is narrower than the height of the openings for my portholes.  

But not to worry, it was covered up when I added the porthole frames.  Finally I used a few gems as rivets.  A fun card for an awesome friend.

Dies used:


Thanks for visiting today!  I hope  you have a fun and creative weekend!


Thursday, July 29, 2021

Gnome Birthday


Hello Scrapping Cottage Friends

WE HAVE A BIG CHRISTMAS IN JULY SALE WITH SAVINGS OF UP TO 65% ON SELECTED COTTAGECUTZ DESIGNS.  DON'T MISS THIS EARLY SALE AND SHOP EARLY FOR THE BEST SELECTIONS!

ALSO........ We have a HUGE SLIMLINE DIE RELEASE with 20 fantastic dies.  The dies are at a savings of 25% off right now in the store.  The new designs are just so amazing.  They are sure to put your imagination into overdrive!!  Check them out right HERE.

I am using the Whimsical Heart Slimline today!  I have 8 birthdays in September so I am getting a jump start with this cute little gnome birthday card!


Design Steps:

1.  Use a white slimline card base and cut the background in white using the Whimsical Heart Slimline die
2.  Glue the heart panel to the white card base
3.  Using the Flower Power Tomte die cut out all the pieces in: green, tan, white, blue, yellow and dark brown.  Shade the pieces then assemble the Gnome
4.  Cut out the balloons using yellow, red and blue card stock.  Tie a white string to each balloon
5.  Pop dot the gnome and balloons to the front of the card.  Stamp and layer the sentiment then pop it just under the gnomes feet.  Add a few sequins and your card is complete


CottageCutz Products


I really appreciate you stopping by today!  I hope you get some time to get crafty especially on a hot summer day. It is so relaxing!!

Blessings and Take Care
Pam

Wednesday, July 28, 2021

What a Tweet-heart!

Hello!  This is Sukie with this week's design team post showcasing the newly released Slimline dies.  This release is a wonderful selection of slimline dies that are perfect for creating all occasion cards.  They are all on sale too!  Also, there is a huge Christmas in July sale going on right now!

The Leafy Background Slimline die set was used to cut out the background for my card.  I created an ink blended background and spritzed it with water.  Once it was dry, I used the die to cut it out.  I also cut out the adorable Bluebird and the Nested Stitched Scallop Oval and shaded them with Oxide Inks.

The die cut panel was adhered to a white slimline card base.  The contrast of the colors really makes the leafy background pop.
The bluebird and branch were nestled inside the die cut oval fitting almost perfectly.
The oval was then affixed to the center of the card base.
I stamped a whimsical sentiment on a piece of card stock and trimmed it into a hand cut flag. The flag was added underneath the oval.

Here are the die sets used on my card, available in the store:

Tuesday, July 27, 2021

Introducing Lil' Bluebird Designs


Hello Scrapping Cottage Fans! Thanks for taking the time to stop and visit with us today. It's Mary Marsh here bringing you the Tuesday edition of the Blog.

We are excited to announce a new brand under The Scrapping Cottage Inc line. Lil’ Bluebird Designs is being introduced with 16 new Photopolymer Clear Stamp Sets and 16 coordinating dies. There are stamps for so many of your card making occasions and then some. The coordinating dies just make it a perfect fit for your card making designs.  

There are some great bundle savings on just the stamps or the stamp and die combo. It's a limited time sale so check it out in the online store.    

We have some exciting ideas for products that we will be adding under the Lil’ Bluebird Designs brand.  Items that will compliment all of your paper crafting projects.

The design team will begin showing samples with the new stamps and dies later in the week. So check back in with us. Or if you don't already get email updates from us featuring the DT sample cards, you can sign up at the top right side of the Blog. 

We also have a big Christmas in July sale going on right now with savings of up to 65% off selected dies.  


Monday, July 26, 2021

Wedding Slimline

Hello Scrapping Cottage friends! Thanks for taking the time to stop and visit with us today. It's Mary Marsh here bringing you the Monday edition of the Blog.

IT'S NEW RELEASE TIME! We have a new collection of Slimline Designs. Your slimline cardmaking is going to get a lot easier. We have 20 new designs and they are on sale. You can get each individual die for a limited time 25% off. The dies have appeal for all styles and occasions of cardmaking. So check them out and make your selections.

We also are having a big Christmas in July sale with savings of up to 65% on selected CottageCutz designs. Shop early for best selections. 

Today for your viewing pleasure, I am featuring the new Heart XO Windows Slimline die, and I created a wedding card. I love the XO's cascading down the side of the card. So perfect for a wedding card. Then again this die would work for Valentine's Day, anniversary or birthday cards as well. 

I used elements from an older 2017 wedding release to decorate the hearts. I used the Little Chapel, Rose with Wedding Rings and Wedding Bells with Bow. I also used the Best Wishes Expressions die but it's retired and out of stock.  But you could also stamp a sentiment or add one of our other Love phrases such as this one or this one

The light purple card base is 3 1/2" x 8 1/2". I cut another panel in the same color of cardstock for the image panel.  I used a medium and a darker purple cardstock for the card accents.  To finish it off, I added a few purple enamel dots. 

That's it for me for this post. See you this Saturday. 

Dies I used to create card: