Monday, October 26, 2020

Ho Ho Ho Car!

Hello Scrapping Cottage Friends,

It is Pam sharing with on the blog today.

The design team is continuing to create cards from our 4 new releases.  The dies are from Christmas Part 1 (22 designs), Christmas Part 2 (21 designs), Christmas Part 3 (12 designs) and a Halloween release (14 designs).  All of these fabulous dies are on sale right now in the store.  Just click here to check them out.

Today, I am featuring the Ho Ho Ho Car!  I think it is my favorite of all the dies but I change my mind daily!  Hee Hee!!


For this card I used an A2 white card base a 4 1/8 x 5 3/8 piece of red card stock, 3 7/8 x 5 1/8 piece of checked DP,  3 1/8 x 4 1/8 piece of red card stock and a 3 x 4 piece of green checked DP.  Doily and a 3 x 3 red card stock with glitter snow at the bottom.
Cut, shade and assemble the pieces using a fine tip glue. Stamp and layer the sentiment pop pieces onto red square and your card is complete
CottageCutz Products

Thanks so much for stopping by today I really am grateful and happy you did!
Blessings
Pam

Sunday, October 25, 2020

Birdhouse Christmas

Hi!

It's Anja here. I have another Christmas scene for you today. This time I used a beautiful Woodland Birdhouse die form the Christmas Part 3 release and add a cute little owl.

 
For this card I used:
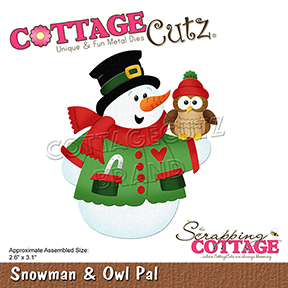
- Cottage Cutz dies (Woodland Birdhouse, Snowman & Owl Pal),
- Distress Inks,
- craft card base (15x15 cm),
- white card stock for die cuts,
- white paper for printing (220 g),
- brown card stock for background (13,5x13,5 cm),
- black pen,
- white pen,
- brush,
- paper trimmer,
- paper glue.

First I cut and colored all the pieces. 
 

Next I printed and trimmed the sentiment. I trimmed a square (13x13 cm).

 
Then I added a bit of blue to the background. I used a brush. 
 
 
I decided to add a bit of color between the white background and craft card base. That's why I trimmed a square out of brown card stock. 

And after that I glued all the pieces together and my card was done.


That's all from me for today. Have a nice week and see you again next Sunday.
 
Anja Z.
 
 
Cottage Cutz dies I used for this card:


Saturday, October 24, 2020

Sledding Penguins


Hello Scrapping Cottage friends! Thanks for taking the time to stop and visit with us today. It's Mary Marsh here bringing you the Saturday edition of the Blog. 

We have four brand new releases in the online store. It's Christmas Part 1 (22 new designs), Christmas Part 2 (21 new designs) and a Halloween release (14 new designs). They are all currently on sale and you can save 25% on the individual dies. Christmas Part 3 has just been released and is also on a limited time sale. This one also has savings of 25%.

Today, I have for your viewing pleasure a card featuring the new Sledding Penguins dies. This is such a cute die I couldn't resist  making a Christmas card with it. I have a family member that loves penguins and has a collection so this card will be perfect for her. 

But, It doesn't have to be limited to Christmas. You could use this for a thank you card for a Christmas gift received or a winter themed birthday card. So let's get started on the details of how I created my card. 

Design Steps:

I knew I had several different snow themed designer papers. I just had to pick the one that I wanted to use. Decided on this blue green shade with touches of white and red. I also cut 2 snow slopes for the penguin sledders. 

Coastal Cabana card base: 4 1/4" x 5 1/2"
Coastal Cabana designer paper: 4 1/8" x 5 1/4"
Next, I cut my penguins in different cardstocks. I gave them red hats and a coastal cabana sled to match the designer paper. 
For the card sentiment, I decided to do a combo of die cut phrase and a stamped sentiment. For the Christmas phrase I used the new Merry Christmas Love die and cut in red cardstock. The Merry & Bright phrase is stamped in red ink. 
I am now ready to start card assembly. I attached the snow slopes to the designer paper. The bottom larger slope is attached with dimensional adhesive and the top slope I used double sided tape. 

I attached the Penguins to the snow slopes again using dimensional adhesive. I wanted them lifted slightly off the designer paper. 

 To complete my card, I attached the image panel to the card base. For some added interest I scattered a few red glitter enamel dots. And that's my card sample for this week. I hope I have given you a fresh idea for a way to use this new die. See you next Saturday!

dies I used to create card: 


Friday, October 23, 2020

Baking Spirits Bright

Happy Friday!  It's Jeanne today with a card that was very hard to make - but only because it made me hungry while making it.  All I could think about were freshly baked cookies! 

Gingerbread is one of my favorite Christmas themes and although these are snowmen in this die they fit that general idea.  I had some gingerbread themed patterned paper and knew that combined with this die it would make the perfect stand up card!

To begin I cut my pieces from white, red, crumb cake and a small patterned paper and cardstock.

I used Copic markers to color the nose and holly leaves and I shaded the snowman, cookies and cupcake with Distress Oxide inks.

Next, I cut a piece of crumb cake cardstock to 4 1/4 x 11 inches, then scored and folded it at the 5 1/2 mark (in half, top folding).  On the top flap I scored at the 2 3/4 mark and folded this, essentially folding the top of the card in half.  This will become my easel for the image.  I cut a piece of patterned paper to 4 x 5 1/4 inches and folded it in half at the 2 5/8 inch mark.

I cut two white rectangles using the 2nd largest of the Stitched Scalloped Rectangle dies, one red rectangle using the 3rd largest of the Stitched Rectangles, one white oval using the 2nd largest of the Stitched Scalloped Ovals and one crumb cake oval using the 4th largest Stitched Oval.  I like the Stitched dies but the plain, pierced or double stitched dies work too!

To build the easel, I glued the patterned paper to the top of my card matching up the folds.

I stacked the two white rectangles and adhered the red to the top.  The two pieces of cardstock allow the folded front to have a barrier to stand against when you open the card.

Using a fine tipped glue pen, I glued down my sentiment and a few extra sweets and baking tools.

 I glued my completed sentiment to the inside of the card, about 1/8 inch from the bottom.

I assembled the medallion for the front of the card...

and glued the bottom of it to the lower half of the front of the card.  I left the top free to pop up when the card is opened as an easel.

Finally, I tied a narrow ribbon behind the medallion on the upper part of the card for a little bit of interest when the card is closed.

I hope you enjoyed my card today!  This card would be perfect for someone who loves baking! Be sure to visit the online store where the new Christmas Release (Parts 1, 2 and 3) and the new Halloween release are on sale for a limited time!

Dies:


Thanks for stopping by.  I hope you have a fun and creative weekend!


Thursday, October 22, 2020

Frosty Snowman

Hello Scrapping Cottage Friends,

It is Pam creating with you on the blog today!

I am continuing to work on my Christmas cards and I send some special ones out to my little niece and nephews.  I thought this Joy Snowman is just the perfect card for the younger kids! And it was pretty fast and easy!


Design Steps:

1.  Cut out all of the pieces using the Joy Snowman die.  I cut out 3 J's and Y's in red.  I also used DP for the scarf and hat band.  The other card stock is brown, green, white, black and orange
2.  Glue the 3 J's and the 3 Y's together.  Assemble the snowman with a fine tip glue.  Also cut a piece of silver glitter card stock with the second largest Pieced Rectangle die

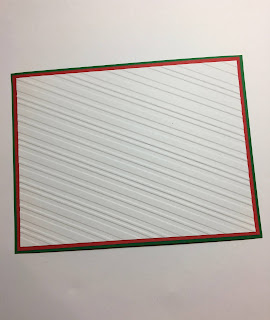
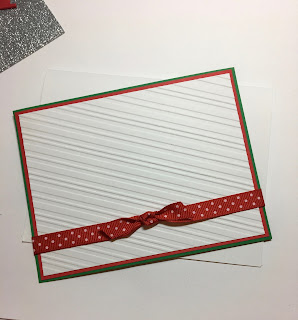
3.  Cut Green card stock 4 1/8 x 5 3/8,  red card stock 3 7/8 x 5 1/8, white card stock 3 5/8 x 4 7/8.  Before glueing the pieces together run the white piece through a diagonal striped embossing folder

4.  After the layers are glued together attach a knotted ribbon and then glue to an A2 white card base
5.  Use dimension dots to glue down the snowman making sure that he is centered.  Then use dimension dots to add the letters J and Y.  For a little extra fun add some snowflakes and your card is finished

Cottagecutz Products


We have 3 releases of Christmas dies in the online store.  I know you will find something you love for your Christmas cards.  So please click here to check all of the adorable dies we have.
Blessings
Pam