Hello Scrapping Cottage friends! Thanks for taking the time to stop and visit with us today. It's Mary Marsh here bringing you the Saturday edition of the Blog. Hope you are doing ok in the midst of the pandemic. Since so many of us have the stay at home orders in place, it's nice to have a hobby where we can create beautiful cards. I put on some music and let my creative juices flow!!!
We have a brand new release of dies in the online store. This one is garden themed and has 19 new designs. These new dies are perfect for birthdays, Mother's Day, Father's Day or even a thinking of you card for the person who loves to garden.
For my card today, I am featuring the new Garden Border and Gardening Hat & Gloves to create a Mother's Day card. It's my first for this year, but I make a lot and send them to my family and friends. This year they will especially like the kind thoughts. So let's get started with some details on how I created my card.
Design Steps:
This week I am using the Splitcoaststampers sketch #798 for my card layout. As soon as I saw it, I thought it would work well for both of the dies I am showcasing today.
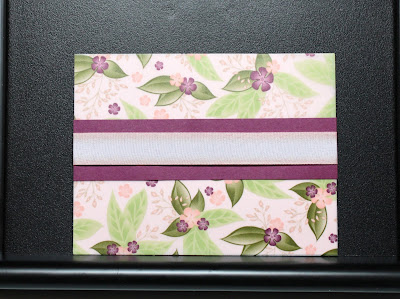
Next, I selected my designer paper and coordinating cardstocks so I could cut the die images in matching cardstocks. The designer paper is a vellum paper. I really liked the floral motif. By layering the pink cardstock underneath it will give the appearance of a pink background.
pear pizzazz card base: 5 1/2" x 4 1/4"
pink cardstock layer: 4 1/8" x 5 3/8"
vellum floral layer: 4 1/8" x 5 3/8"
I cut the die images in pear pizzazz (light green) and the gloves in petal pink. These 2 colors are in the designer paper. The bands are cut in a fig cardstock. Also a color on the designer paper.
I started card assembly by attaching the pink cardstock to the floral vellum layer. For layer 2 of the sketch I cut a piece of fig cardstock 1 1/4" x 5 3/8". I used a subtle pink ribbon to overlay the cardstock.
I wanted a small sentiment on the front of the card. I decided to stamp directly on the watering can. With the help of my MISTI, I was able to triple stamp to get the depth of color I wanted. Used a fig ink. I will have the Happy Mother's Day sentiment on the inside of the card.
I attached the die images to the front panel with double sided tape . On the garden hat, I used dimensional adhesive to lift it slightly off the background.
To finish off my card, I secured the image panel to the card base. I added a few pink rhinestones to the flower centers.
Well, that's it for me for this week. I hope I have given you a fresh idea on a way to use both of these new dies. See you next Saturday!
dies I used to create card:


4 comments:
I like the layout and combination of both dies. Beautiful!
Such a pretty card! Great take on the sketch! Your color choices are very striking!
Love the colors and pretty DP they are perfect for your gardening dies!
Love the colors and paper you chose Perfect for these dies.
Post a Comment