Hello Scrapping Cottage friends! Thanks for taking the time to stop and visit with us today. It's Mary Marsh here bringing you the Friday edition of the Blog. Hope you are doing ok in the midst of the pandemic. It's a great time to make some cards. I find it so relaxing being able to create and have my mind off all that's going on.
The new release of Spring dies are available in the online store and 25% off for a limited time. There are 27 new dies in the release and each one is cuter than the next. They are perfect for your Easter and Spring card making.
Today, I am featuring the new Spring Daffodils & Eggs die to create another Easter card. I love Daffodils and they are now in bloom all over my neighborhood. Such a pretty welcome sight after the winter season. So let's get started on some details of how I crated this card.
Design Steps:
This week I am using the Splitcoaststampers sketch #795 for my card layout. As I have said so many times before, having a layout in mind at the start of my card is always a big boost for me. It jump starts my creative thought process. I love working with the sketches that are out there in the online world. That way I just choose the colors and designer paper and I am good to go.
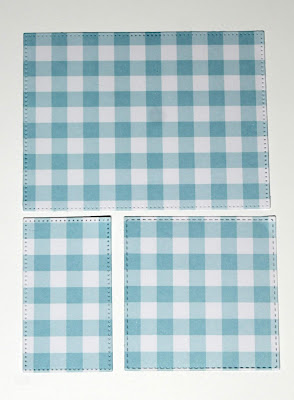
I looked for some spring like designer paper in my collection and found this pretty gingham paper. I coordinated the paper with matching cardstock. My thought was one sheet of designer paper and cut it in 3 pieces for layer 2,3 and 4 of the sketch.
Blue card base: 4" x 5 1/2"
Gingham designer paper: 4 1/8" x 5 3/8"
For layer 2 & 3: I used the Pierced Rectangle set- the 2nd & 7th largest dies.
Layer 4: I used the Stitched Square set - the 6th largest die.
Next, I die cut the Spring Daffodils & Eggs using the packaging colors and selected similar colors of cardstock.
Now that my card elements are cut, I am ready to start card assembly. I attached the panels to the card base for my first step.
Then I started with my image panel. I stamped my sentiment first using a grape ink. I thought an angled sentiment would work well. I used my MISTI for placement. Because it's a clear stamp and they usually require a second inking.
For the image panel. I again used the same size (7th largest) Pierced Rectangle die and cut layer 5 of the sketch in white cardstock. I used a combination of glue dots and Ranger multi matte adhesive.
The image panel was attached to the card base using dimensional adhesive. I wanted it lifted slightly off the designer paper. I added some yellow enamel dots for added interest.
See you next Saturday. Stay safe!
dies I used to create card:


4 comments:
Very nice card, Mary.
Very pretty love the checked background panels!
Great card Mary! I love how you used the sketch.
Very pretty card! Your take on the sketch looks great with the pretty background!
Post a Comment