Here is some good news that comes in the middle of winter! We have a new release of dies. There is a In-Stitches release with 12 new dies and a Spring release with 21 new designs. And, some other good news is that for a limited time, you can get the new dies at 25% off.
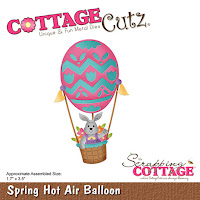
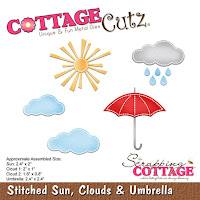
Today, I am using the Spring Hot Air Balloon die and the Stitched Sun, Clouds and Umbrella die. I thought I would create a thinking of you type card today. So let's get started with some details on how I created my card.
Step 1: With the hot air balloon die, I knew I would be creating a sky scene with some clouds and the balloon floating. I found this pattern paper in my stash from a serene scenery collection that worked well for this card.
I used a kraft cardstock as the layering panel for the patterned paper and a cardstock called island indigo for the card base.
Card Base: 4 1/4" x 5 1/2"
Kraft panel: 4 1/8" x 5 3/8"
Patterned Paper: 3 7/8" x 5 1/8"
Step 2: I cut the hot air balloon and the stitched clouds. When I cut my dies, I used different color cardstock as opposed to coloring each piece. I like how colorful the balloon turned out.
For the balloon:
kraft for the balloon basket
berry burst for the balloon
lemon-lime for the chevron and other shapes - I did an inlay technique here
light gray for bunny
pink for her outfit
Step 3: Now that the dies are cut and assembled, I started the card assembly. I adhered the base and panels with double sided tape. I did that before I stamped my sentiment. It's not how I usually like to do it but my ideas were running ahead of me this week (lol)!!
Used the stamp-a-ma-jig to get the right placement for the sentiment. I stamped with black ink since it was going right on the patterned paper.
With the stamp-a-ma-jig you first use the purple positioner and place against the plastic stamping card. You stamp your sentiment using the purple positioner as your guide. Then you take the plastic and place it over your cardstock in the area where you want to stamp. Once its straight you remove the plastic.
You again use the purple positioner as the guide for your stamping block and stamp the sentiment.
This photo is showing the plastic piece placed over the paper and the purple positioner holding it in place.
The balloon and one of the clouds was adhered with dimensional adhesive.
I felt like the card still needed something else so I scattered a few sequins. They seem to be my go to embellishment these days. I think they were a good finishing fit for my card.
Well that's it for me for this week. I hope I have given you an idea on a way to use this new die. The Design Team will have lots of samples to show over the next weeks. Lots of cute and fun ideas for Easter or Spring cards.
And remember, these days are currently 25% off the regular price for a limited time.
Dies I used to create card:


9 comments:
This is really cute, Mary! I love anything with hot air balloons on it!
So pretty. I like all the details.
Adorable card! I love the hot air balloon with the added dimension!
I am so glad I have this die in my collection! Your card is so so cute!
Mary, this turned out great and I love the background paper you chose.
Hugs,
Sherry
Super cute Mary! It’s so fun starting to see the new designs. Great write up too!
Nice work, Mary! This baloon die is so cute and you combined so well with the stitched clouds.
Wonderful card - Live the colors for the balloon and the use of the stitched clouds.
This die is one of my favorites! You did an awesome job. I love sequins too. They really set off and balance everything.
Post a Comment