Basics:
Card base: 4 1/4 x 6 inches (cut 4 1/4 x 12 inches, fold in half)
Additional piece of kraft cardstock: 3 3/4 x 5 1/2 inches
Some kraft cardstock scraps to cut out the die cuts and strip for sentiment
Other Supplies:
CottageCutz dies: listed below
Cardstock: kraft cardstock
Distress Ink: Brushed Corduroy, Gathered Twigs, Fired Brick, Aged Mahogany, Peeled Paint
Other: brick embossing plate (optionally), scissors, paper trimmer, Sizzix machine, scor-buddy, brush, light blue and white watercolor paint from a tube or white acrylic paint, piece of sponge
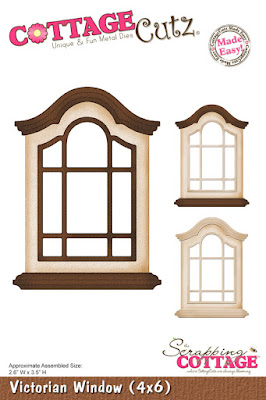
1. With the Victorian Window die cut the window out of some kraft cardstock. Use a sponge to color die cut pieces with white watercolor paint straight from the bottle but you can use white acrylic paint. After they are dry, distress all of them with brown Distress Ink. When putting the window together, tear apart some pieces to give it an old and damaged look.
2. With the Floral Spray die cut flowers and greenery out with some kraft (or white) cardstock. Color flowers with red Distress Inks and greenery with green ink.
3. With Stitched Square die cut the second biggest square (eight from the center). Put it together with the same Stitched Square die on the cutting plate (as shown on the photo) and cut it out again. This will give you the perfect stitched strip to stamp the sentiment on.
5. Use white paint on the base of the card as well.
Finally, preparations are finished. Let's make the card!
Apply adhesive on the back side of additional piece of cardstock (the embossed one) and add it on the card base. On the front of the card, glue the window, flowers and greenery. Stamp sentiment on the strip and glue it under the window.
Card is finished and you can enjoy the view :)))


10 comments:
This is so beautiful
This card is gorgeous. Beautiful scene that attracts the eye.
Gorgeous!
Gorgeous!
Love the distressing on this vintage beauty- awesome work
Beautiful card. Thank you for sharing how you made it.
Well, Vladka, this one had me gasp out loud. Oh, it is such vintage goodness and you do it masterfully.
I love it!!!
Karen
Another GREAT card! Love the vintage feel of this one. I can't wait to make one of my own!
Like the card😄😄 love the Windows die that i must own.
Like the card😄😄 love the Windows die that i must own.
Post a Comment