Good Morning Scrapping Cottage Fans!
It is
Pam sharing with you today! I really love the Cottage Cutz dies. They are extremely detailed and make such sharp wonderful cuts! I love to create little scenes so I am sharing a A2 size box card with you today.
Here are my design steps:
Start with a 5 1/2 x 9 inch piece of kraft card stock. Score with paper placed horizontally on the scoreboard at 2 1/8, 4 1/4, 6 3/8, and 8 1/2. Then flip card stock vertically on the scoreboard and score at 2 3/4
On the top half of the card cut down to the center line and stop. On the bottom half on the 1/2 inch score line make a diagonal cut all the way to the top and remove that piece as shown
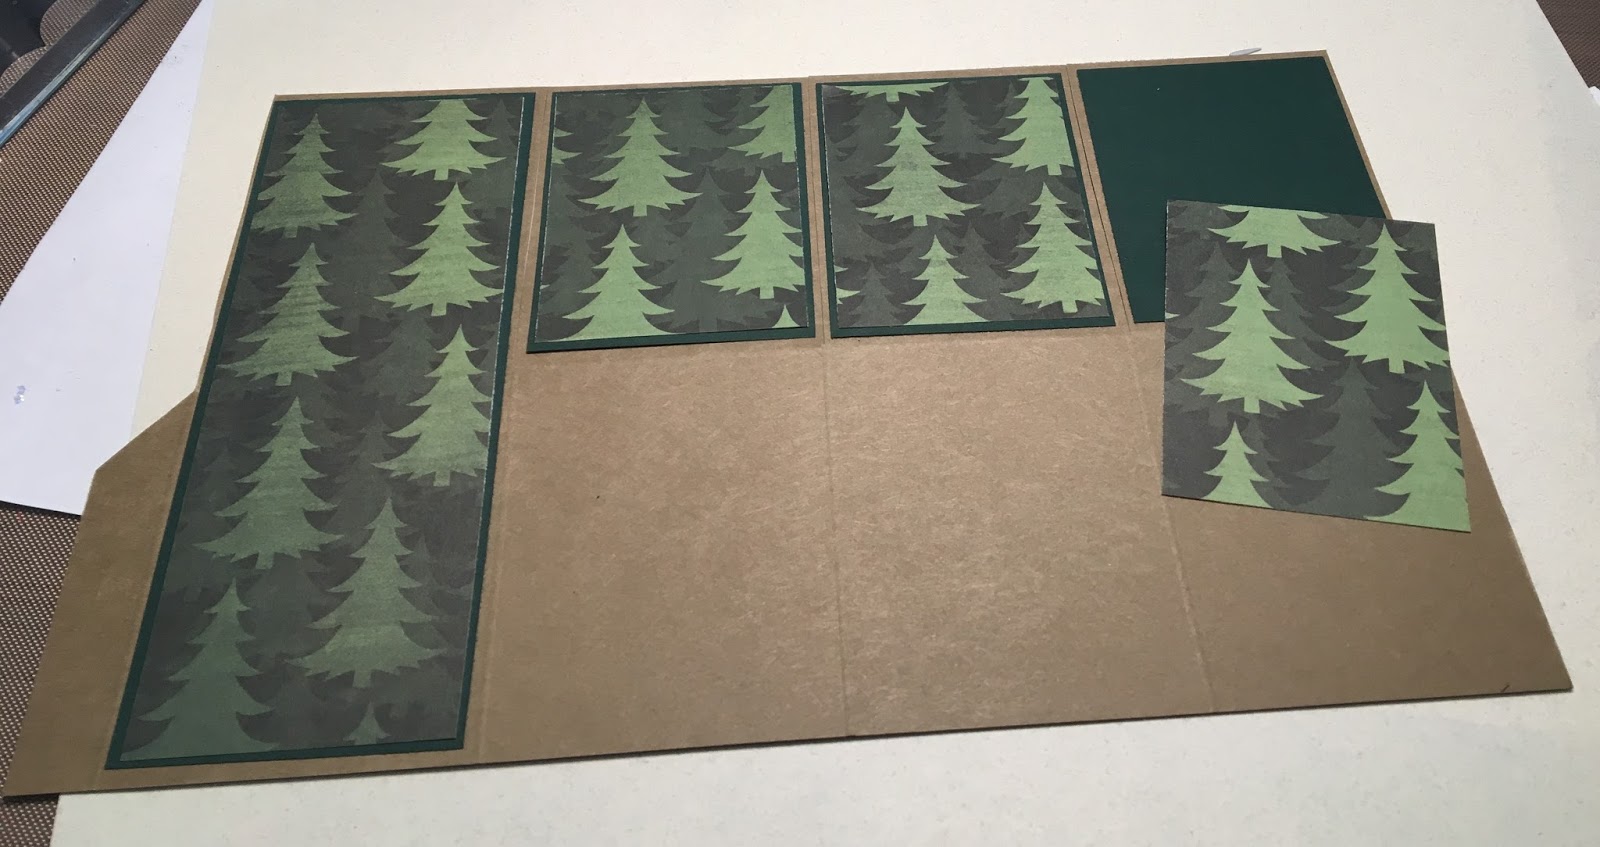
Green mats (2 Pieces) 2 x 5 3/8 glue the mats to the card closest to the 1/2 flap on the front and the back. These pieces of the box will not bend
Cut the green mats for the rest of the box (9 pieces) 2 x 2 5/8. Glue the green mats to the outside of the box as shown below
Glue the rest of the green mats to the inside of the box as shown below. The bottom that is not covered is the inside of the box which will not be seen
Cut one piece with white card stock 1 7/8 x 5 1/4 for the outside of the box and glue down. This is where you will stamp your sentiment and sign your name. You should do your stamping and signing now because it is much easy at this point
Cut one piece of designer paper 1 7/8 x 5 1/4 for the inside of the box and glue down
Cut designer paper (3 pieces) 1 7/8 x 2 1/2 glue to the inside of the box
Cut different designer paper (6 pieces) 1 7/8 x 2 1/2 glue to the outside of the box
Using a sturdy tape place several pieces of tape to the small flap and close up the box. Make sure that you have the side of all the rectangles covered with designer paper on the outside of the box
Cut (2 pieces) of kraft card stock 3 x 1 score them on each end 1/2. Fold them and add sturdy tape to each folded end as shown below
Place the first brace toward the front of the box as show making sure to really press down the tape
Place the second brace about an 1 1/4 behind the first brace as shown
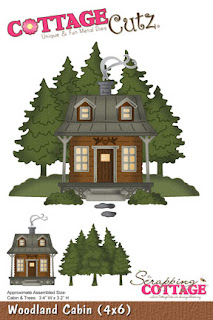
Using the following dies:
Rustic Sign and Trees for the big darker green tree and bunny,
Woodland Cabin for the ground, trees in the background,
Garden Accessories for the fence, vines, and flowers, -Seasons Greetings for the deer, Thanks for the sentiment. I inked many of the pieces for some added depth.
To begin assembling I glued down 4 pieces of ground for all of the braces and the front and back, then the background trees, added the dark green tree and the deer to the back brace, next I added the fence to the front brace, the bunny and all of the yellow tulips and last I added the vine with the red flowers.
For the final touch I added the Thanks and the raffia bow!
I hope you enjoyed looking at this little woodland scene! It was really fun to create. Give it to someone special. They will love receiving this awesome surprise!
Blessings
Pam


7 comments:
Love the woodland scene. The instructions for the box card are excellent. You so creatively used all these dies as if they were a set and made to go with each other. Shows you how you can stretch your die collection by thinking "out of the box" a little (pun intended!). :)
What a cute little forest scene you've created, Pam. I love box cards, and this one is wonderful!
Oh so very beautiful. I love all the details.
What a lovely woodland box, Pam! I love all of the elements on the box, which is a great design. All of the little die cut pieces are gorgeous, and you certainly are skilled at using several dies to create a masterpiece! Your tutorial is easy to follow and makes me want to create the box! Great artwork, Pam!!
What a beautiful woodland box. Great tutorial Pam!
Great tutorial. Thats a wonderful scene you have created
What a great card Pam!
Post a Comment