Saturday, October 22, 2011

Halloween Peeker Candy Tube

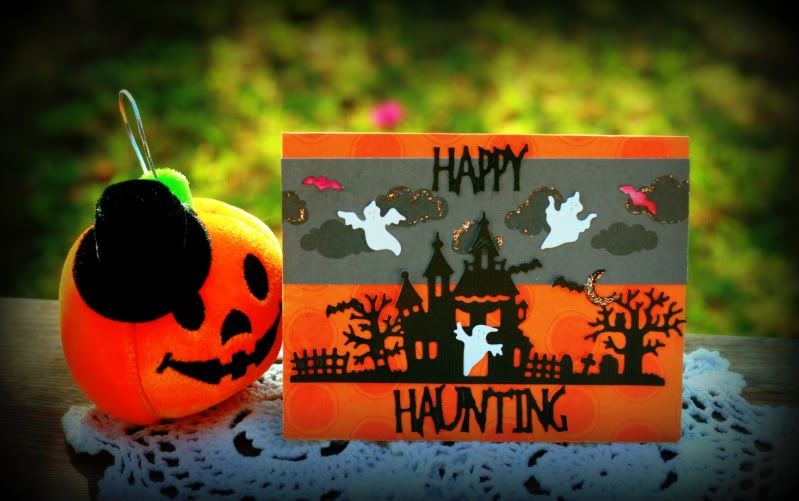
Hello everyone and Happy Saturday to all! Cheryl here with a sweet Pumpkin Peeker Halloween Candy Tube that i made using the DARLING Cottage Cutz Dies.
Right now im laid up in bed after i had my ankle surgery, I had 2 plates and lots of screws put in to hold my ankle in place.Next week i get my stitches out and hard cast put on, woohooo!!!!  So while im in bed ive been starting to slowly craft this week and it feels sooo good!!!!

I wanted to use the sweet frog from the Cauldron Peekers Cottage Cutz and the pumpkin from the Trick or Treat Puppy Cottage Cutz.

For my frog i cut him out using a light green card stock, and then black for his hat, and orange for his moon. The purple band was white, and i just colored it.

The pumpkin was dusted using the tim holtz ink and a duster, i do have a video on how to do this technique here.

The tubes i bought out of the bead section at the craft store and used it for the candy instead. I added some funky halloween lace to the back of my cottage cutz piece, and then hot glued to the tube.

for the top of the tube I tied on the polka dot ribbon and then added a double bow to it. lastly i added a pumpkin sticker to my bow.

I hope you enjoyed todays post with using the Cottage Cutz Halloween collection found here. Have a lovely day!!!

Hugs,
Cheryl

Friday, October 21, 2011

Happy Haunting !


Hello from Sunny Singapore once again , everyone ! 
Trust you've had a great time soaking in all the Halloween 
inspiration that we've been featuring for the past month. 

For my card today, I wanted to create a ghoulish scene 
and wanted to see what would come out 
when I combined the following 2 dies : 


I used white cardstock to die cut the 3 ghouls and
 inked up 2 bats with distress ink in purple for a pop of color . 
The Haunted House border was diecut using self adhesive cardstock.
I've used patterned papers here from My Little Shoebox's Trick or Treat line. 
 Definitely simple and easy to create a new scene each time 
with different die combinations in our Halloween release

I can't wait to see more sneak peeks with our second Christmas Release  
here on our blog in the following days ! 
Do keep a close eye 
and I'll be back with Christmas projects the next time ! 
Can't wait ! ;)  


Thursday, October 20, 2011

Spooky Iron Shelf

 This week I have a couple Halloween cards using the Cottage Cutz Spooky Iron Shelf and Haunted House Border (for Happy Halloween title) dies. The first is using all the parts that come with the die. The wrought iron looking shelf, jar of bones, two books and skull candle. I also took the bones that are used in the jar to make a border on the card.  The eyeballs were done with a 1/4" and 1/8" hole punch, colored to look like bloodshot.

 The second card I used two Cottage Cutz Halloween dies. The Spooky Iron Shelf (the shelf, jar, and two books). Cauldren Peeker die (the peeker frog). 
 The peeker frog comes with a head, hat and two front feet. I needed the frog to show a bit of body behind the books (he's a bit chunky, he really is not comfortable talking about it!). I took the face and flipped it over (shown in darker green). to create a rump and added another front foot to be his back foot. It worked really well.
 On both cards I need labels on the books and jar. I used my Dymo Letratag maker with clear tape to make the labels. I have showed you the sizes on the machine. In this case I needed to use the VERY SMALL setting for all the labels. By using the clear tape you are able to use any color card stock.

I am really excited to be able to follow Kay with another Sneak Peek of Cottage Cutz Christmas #02 release. You will have to wait juuuuust a bit longer, but it will be well worth the wait.

 This is a two part die, the first is the Cottage Cutz Snowglobe, it is a 4x6 die with a snowglobe with bow. This globe can be used for any holiday or event. Just think of a Halloween globe. . or  an Easter globe. WOW what a lot of uses. If you look really hard on the package you can see you can also use it as a Gumball Machine (yes there is a couple circles on the die just for gumballs).
The second Cottage Cutz die is Snowglobe Winter Accessories. This die has three groupings that can be used in the snowgloge die. A Santa with sign, A Snowman with tree. . and the Penguin fishing on Ice Cube (that is the first one I tried first). You can mix and match any of the accessories. I will be featuring several other techniques for the snowglobe throughtout this month.

Keep checking back. . there are several more sneak peeks coming from some very talented Cottage Cutz Design Team members.

Keep it shakein' . . .Thanks Barry  

Wednesday, October 19, 2011

We interrupt this fall....

...to bring you a "Sneak Peek" of The Scrapping Cottage Christmas release #2!!! Yes, there is another Christmas release coming and we have the dies to prove it :)
One of my favorites is the Eskimo w/Igloo 4x4 die. Isn't he cute??

I made a door hanger out of him. I simple cut out a rectangular shape and used a die to cut a circle for the doorknob and then cut a slit for easy use. Do you think if I had my door shut with this on the outside that people would get the hint to leave me alone??? I hate it when I finally get a chance to take a little nap and someone comes in and wakes me up or the phone rings...
I used MLS letter stickers for my "Chillin Out"
So be watching this coming week for the Design Teams Sneak Peeks as we lead up to the Christmas release #2.
P.S. - I'm glad it's still fall :)
Kay

Monday, October 17, 2011

Scrapping Cottage Challenge #6

Hello everyone, Erika Taylor here today with a late October Challenge. I do apologize for my tardiness and I hope that all the Cottage Cutz/Scrappers Cottage Fans understand and forgive me. We have had a bad bout of Pneumonia in our home that has really put the strain on things. But brighter days ahead and the first bit of bright news is Septembers winner. Random.org selected this one, and I couldn't agree more.

Here are your random numbers:

9

Timestamp: 2011-10-16 00:32:52 UTC

#9 is Barbara. Congratulations to you, Barbara! You've won a $25.00 gift certificate to The Scrapping Cottage. Please email scrappingcottage@cox.net to claim your prize.

Now onto this months challenge. I'm absolutely loving the frames from Scrapping Cottage and this month I challenge you to create a project using Frames. You can use any Cottage Cutz die from any season or collection. I've got a Halloween card and a Christmas Card using this beautiful frame.


For these card I used the  Gothic Frame w/Witch. This frame is so ornate, yet works so well with Vintage and Grunge designs.

Now lets see your frame creations.Just add your project below using the InLinkz tool and remember to use Cottage Cutz dies to win!!!


Fall Harvests

Hello Cottage Cutz fans!
Today I have a few cards to share with you.  They were inspired by things that remind me of fall or of summer's end.

  Nothing says the end of summer like giant sunflowers.  The sunflowers were cut from the Mouse with Sunflowers die and the rooster was stamped with a Cottage Impressions rubber stamp.

A lot of people can some of their fall harvests.  I know jelly isn't canned in the fall but that is what the jars reminded me of.

Finally, apple pie is definitely a Fall treat.  Apple pie or caramel apples.  YUM!!  I hope you are all enjoying a beautiful  Fall!  I used  the Oven Mitt and Stuff die for this card also.

Hugs and smiles,
Janice


Sunday, October 16, 2011

Halloween Greetings

Good morning and happy Sunday!  I'm still loving my Halloween cards, so today I have yet one more to share with you.  This one was made with the Spooky Sign Post Cottage Cutz die.  This was cut with white card stock and colored with Copic markers.
I added the sentiments by hand, giving each sign a different word.  A few rhinestones for sparkle, and some wide grosgrain ribbon were what I used for embellishment, so this one was really quick and easy.  I really think this would make a cute Halloween party invitation by just putting the words "You're Invited To A Party" on each little sign. 

I hope you're enjoying a fabulous weekend, and I'm so glad you could stop by today.  Have a blessed day and happy crafting!


Saturday, October 15, 2011

Everything's coming up Poppies!

I love poppies! I have to say they are one of my favorite flowers, so I decided I needed to figure how to make one using my CottageCutz dies. I used the Pink Peony Flower for the petals and the stamen is from the Orchid Flower.


Step 1. Cut one base flower, 2 petal pieces and 3 stamens.


Step 2. Ink the petals. I used Distress Ink ( Spiced Marmalade, Barn Door and Black Soot).


Step 3. Cut into the base flower to form four separate petals (but don't cut all the way through). Cut the end off of the stamens, so you just have a tip with three balls.


Step 4. Shape the parts with a flower shaping tool or ball stylus.


Step 5. Assemble the flower. Add a little Flower Soft in Sage Green for the centers.


Here's a layout that I made using some of the poppies. This is a picture of my nephew at the Land of Oz festival with the Wicked Witch. The quote says, " And now my beauties, something with poison in it. Poppies...poppies. Poppies will put them to sleep." ~ Wicked Witch of the West


Hope you get a chance to try these beautiful flowers!

Friday, October 14, 2011

Boo To You


I'm so excited to share my card double z fold card with you today...I LOVE IT!!!  I really am never sure what a project is going to be when I start and I sure was happy to see how this one came to life.  The puppy is just to cute.  I've attached him with twine where he will pull up and wish you a "BOO" but he won't come all the way out and get lost.  Nothing any sadder than a lost puppy, LOL.


Once you untie the bow a Happy Halloween sentiment is ready to greet you. 


Here are all the dies that are a must to make this card...be sure to scoop yours up as I hear they are selling out.


Hugs,


Thursday, October 13, 2011

It'll be OWLright!


Good Morning Scrapping Cottage friends! Angelica here and I have a sweet little card for you today that would be perfect if you need to cheer someone up!

I love this cute owl (Stylized Owl) and thought he'd be the perfect focal point against my Woodgrain background from Market Street Stamps.


I wanted him to look a little nervous so I placed the pupils closer together and towards the top of his eyes. The packaging shows them looking down.

I used just a bit of Vintage Photo and Antique Linen Distress Ink to give his little wings, eyes, and body some depth. I opted to leave the leaves off and added some Prima sculpted flowers to the side instead.

I finished off the brown cardstock piece with a bit of whimsy faux-stitching (I didn't want it to look too perfect) and a piece of "Ripe Avocado" ribbon from Papertrey Ink. The sentiment was heat-embossed with Seafoam White (Ranger) Embossing powder and is from my Night Owls set (Market Street Stamps).

This owl will be adorable on all your Halloween projects too!! I used a die cut from My Little Shoebox, and for Halloween, I could have simply layered some black behind it so it looked like he was in front of a moon!

Hope you enjoyed today's inspiration! Have a wonderful day! - Angelica