Wednesday, January 20, 2010

Watch for it Wednesday #44

My tip for today is to discuss ways you can take your die-cutting to the next level. Now, there is certainly no right or wrong way to make and use die cuts! Especially our Cottage Cutz dies that are so doggone cute on their own that they hardly need anything extra. And much of the time, these die cut shapes look great just as they are.

However for today's tip, I thought I would give you a few suggestions with some examples in order to get your own creative juices flowing in new and different ways so that you can experiment with some new die cutting tips on your next project.

Probably the easiest and quickest way to add some extra pop to your die cut shapes is through your choice of paper. There are so many cool and unique types of specialty paper available today that you can use to to make your die cut shapes look really authentic and also really POP off the page.

Some of my "staple" specialty papers that I always like to have handy are gold and silver. I just use a little bit here and there when I need it. I can't even begin to tell you how long I have had the two pieces of gold and silver that I am using right now because most of the time, all I need is just a tiny little piece of the paper.

Silver paper is great for anything metallic looking on your die cut shape. Just a little touch of shiny silver paper makes such a difference. Think about how great the new Cottage Cutz Lock and Key Shape will look using silver paper for the metal lock and key - or what about some of the mini shapes like the Chocolate Kiss or just use a small piece for the heart cookie cutter from the Valentine Baking Set Shape.

Here are a few more examples of die cut shapes where I have used specialty silvery paper in small amounts to give the appearance of metal on my finished shape.


Gold is another type of specialty paper I always keep on hand. Gold works so great for buckles, bells, jewelry, crowns, etc. I just cut out a tiny piece to lay directly over the part of the die I want cut out of the gold. Here are some examples where I have used my gold paper for accent.


The third type of specialty paper that I keep in my stash is a glitter paper. For me, I like to always have some white and black glitter paper, but I find myself using a lot of pink, too (but I scrap mostly girly layouts). And just think how cute the new Valentines Cottage Cutz dies would look with pink glitter accents on the hearts what about glittery pink icing on some those adorable cupcakes, etc!!

Now, I personally LOVE glittery accents (as evidenced by my collection of Stickles) so I actually try to keep a larger variety of glittered papers in my stash besides just the basics. For instance, nothing brightens up a Halloween pumpkin like orange glitter cardstock! My favorite collection is the Glitter Cardstock Matstack from DCWV. The smaller size papers allow me to get lots more color variety for my $$ which I really like!

Let me show you a few examples of die cut shapes where I have used some glitter paper on all or part of the die-cut shape.

I hope this post has inspired you to dig into your stash and see what types of fun and unique papers you have hiding in there that you could be using on your die cuts. Come back tomorrow to see a layout I created using the Cottage Cutz Bear Shape - but not how you think! Hmmmm.......what could I have done :) Guess I'll see you back here tomorrow to find out!

Tuesday, January 19, 2010

I'm Nuts for You

Last week we saw Ruth Ellen use this same BoBunny Bandit paper for her cute layout show casing the CottageCutz Raccoon. I couldn't resist using this cute paper to make a card showing the CottageCutz Squirrel/Whimsical.

I think it's pretty cool to be able to take dies from a Camping release and adapt them for all kinds of other occasions. I made the nut look Valentiney by cutting it out of pink cardstock and putting a little heart punch piece on it just like they did in the paper.
So whether your making camp layouts or not these dies are so versatile for all your projects.

Monday, January 18, 2010

HIKING CD


Happy Monday! This past summer and fall, I did a lot of hiking with my sister and her family. I wanted to give my sister some of the pictures I took, so I put them on a CD.

I had just received some of the Cottage Cutz Camp release and thought it would be fun to decorate the CD.
I wanted to try something different with my paint dabbers (I used them in the Watch for It Wednesday #42) so I painted the inside cover of the CD. The best way to use the dabbers on acrylic or plastic is to paint on one side and embellish the other side.
On the front of the CD. I used the Cottage Cutz Whimsical Squirrel and the trees from the Cottage Cutz Cabin.

Friday, January 15, 2010

How would you like to be a guest designer on the Cottage Blog??

We are looking for a few guest designers on the Cottage Blog. Here is what we need you to do:
Make 2 cards and 1 altered project or mini album using CottageCutz dies and email them to:
scrappingcottage@cox.net by Friday, January 22, 2010 midnight PST. You will receive $75 in CottageCutz dies of your choice and be required to make 5 posts on the blog.
So get creating with those CottageCutz dies and we might see you here on the Cottage Blog!

Thursday, January 14, 2010

You stole my heart

When I saw this adorable Mother and baby Raccoon shape from the Cottage Cutz Camping release, I knew I had to have it!! Raccoons have always been my favorite animal ever since I was little. I have collected raccoons of every shape and size for years so of course it was only natural to add this Raccoon Die to my collection!

I picked up this Bo Bunny paper over the weekend for the same reason - I can't resist the raccoons! This is actually supposed to be a Valentines line but I thought it would be fun to use for sweet baby pictures. I used several old heart punches to create my different shapes hearts.
The Raccoons were so easy to cut out and piece together thanks to the handy cheat sheet included with the die. I simply ran the die through my machine three times with each different color of brown I had picked out to use. All I had to do then, was pull each piece as I needed it until I had two raccoons pieced and ready to go!

Don't forget about our Guest Designer Contest going on right now!! You have until Friday January 22nd to get in your entry. Click here for more details :)

Wednesday, January 13, 2010

Watch for it Wednesday #43

Today's Watch for it Wednesday is a couple of quick and easy tips I have found helpful.
The first is Goo Gone.
Many of you probably have this on your shelf at home to remove the residue from price tags etc. I have found this cleans my scissors wonderfully. As I use my craft scissors to cut adhesive and mounting tape my scissors gum up over time.
Goo Gone takes off the sticky like it was butter.
I cleaned out a little sample bottle I had and put a little Goo Gone in it to keep in my craft room so I didn't have to find a place for a big bottle of it.
The next tip is dryer sheets.
I keep one of these in my craft room as well, these
are wonderful to use on your diecut mat to keep the pieces from clinging.
I simply wipe off the mat every once in awhile when I notice static starting to develop.
If you live in a humid area you may not have this problem, but here in Utah it's pretty dry.
We'll see you back tomorrow for another wonderful layout from Ruth Ellen.

Tuesday, January 12, 2010

Dam cute Beaver!

I was pretty excited to work with this cute CottageCutz Beaver, I mean what's not to love about this darling little critter?
If you've been following this blog for awhile you know clever sentiments are part of my style when making cards (at least I try to be....)
I kept trying to come up with one for this beaver and then it hit me and made me smile pretty big. Remember I'm only swearing if it has a "n" at the end LOL!

I also used the new CottageCutz Pine Tree Forest for my background. You've got to love these trees, you can make them 4 different sizes to meet your scrappy needs, all on one die.


Monday, January 11, 2010

And the new winner is...........

I used Random.org to generate a number between 1 and 25 for all of the comments we received about the newest Valentine Shapes Cottage Cutz release is it picked lucky number 13.....
TXAngel528
Congratulations to our latest winner of a free Cottage Cutz die from the new Valentines Release. Please contact The Scrapping Cottage to select your free die (up to $19.95).
Thanks to everyone who left comments for the contest and don't forget to get your entries in for our Guest Blog Designer spots! Click here for more details!

FUN WITH SNOWMAN

To my delight this cute little cookie box reminded me of scrapbook paper. All it need was a bow and it made the perfect home for these darling Cottage Cutz snowmen.
On the front, I used the Cottage Cutz snowman with the broom. I added a few snowflakes to give it a little sparkle.
On the top, I used the Cottage Cutz mini snowman.
There are so many wonderful Cottage Cutz dies to choose from to enhance all of your wonderful projects!!!

Saturday, January 09, 2010

It's a SWEET Day at Scrapping Cottage!!!

The Cottage Cutz Valentine's Release is up and it is just scrumptious!!! Sooooooooooooooo much to choose from I don't hardly know where to begin!

Don't miss out on your chance to get your favorites from the Valentine's Release on sale by pre-ordering now!
And with a new release, comes a new posting contest!! Just leave a comment at the end of this thread telling us about your favorite dies from this release. We will select a winning comment at random and that person will be able to select a FREE Cottage Cutz die of their choice (up to $19.95). You have until Sunday, January 10th at midnight to leave your comment!!!
See you over at the Scrapping Cottage!! I know that's where I'll be!!

Thursday, January 07, 2010

Going Outside!

Yesterday was a GREAT day at the mailbox because I had a package from The Scrapping Cottage!!! Brand new dies from the Cottage Cutz Camping Release! As much as I have enjoyed working with the Christmas dies, I was anxious to dive into something new with some of these fun outdoorsy shapes.

I am so lucky because my parents have a lake house and we have been taking the girls there since they were babies. Consequently, I have oodles and oodles of lake pictures - most of which involve water activities in some way. My Dad has always loved fishing so he has worked with the girls to get them interested in it, too and boy has it worked! They absolutely LOVE fishing with Granddaddy!!!


My layout today features the Fishing Shapes Set. This is a really fun die because it comes with so many fun little shapes. For my layout, I added a thin piece of thread to the fishing pole so that I could hang one of the fish off the pole. This is an easy trick to really make your die cut shapes stand out.
I used my Copic markers to color the individual shapes from the die so that allowed me to get some nice shading especially on the two fish shapes. Anna technique from yesterday would work great on the different hooks on this die as well!!
Just think of all the catchy phrases (no pun intended - well maybe a little) you could come up with to go with the different shapes on this die...What a catch!...I'm hooked!...Catch me I'm falling for you...Got net?...Put a cork in it (funny card to a fisherman)...Something fishy this way comes - just to name a few.
I hope you enjoy seeing all the fun projects this month using the new Camping and Fishing and just all things Outdoor Shapes!!

Wednesday, January 06, 2010

WATCH FOR IT WEDNESDAY #42

Welcome to Watch for it Wednesday. For this technique I used two of my favorite Cottage Cutz dies along with Silver and Gold Arcylic Metallic Paint Dabbers. I cut out the die using white paper.
Next, I tapped the dabber over the die until I got the color I wanted. For the Cottage Cutz candelabra I used the gold dabber .
and for the Cottage Cutz basket of eggs, I used the silver dabber. This technique gives the dies a metallic look without having to buy the expensive speciality paper. The dabbers are easy to use with minimal to no mess and unlike a lot of paint, they dry very fast.

Tuesday, January 05, 2010

Snow Much Fun!

OMGosh! This CottageCutz Penguin w/Ski's is so cute - I just love him!

Some of my all time favorite color combonations are just perfect for winter cards and layouts and this penquin fits right in. I shaded around his scarf, feet, bill and ski's with ink and added some pen detailing around them too. I tore some white cardstock for a strip of snow and added some mounting tape to the back of the finished die to pop him up just a bit.

This cute little guy will be popping up on lots of my wintertime projects!


Sunday, January 03, 2010

NAUGHTY OR NICE


Naughty or Nice...... I vote for Nice and it looks like Santa did too!!!
The love of family and friends during Christmas time gives me a warm and cozy feeling just like the Cottage Cutz Fireplace.
This is a must have Cottage Cutz die for your scrapbook pages. It can be used for so many layouts (winter nights, and camping to name a few).

Thursday, December 31, 2009

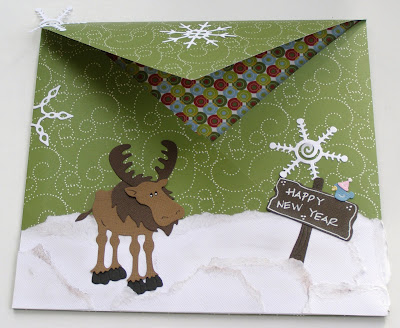
Happy New Year!!!!!

May 2010 be a wonderful, prosperous, and
joy filled year for all! May everyone have
good health, lots of love and grateful hearts!

January is a special month for me. Both of

my parents have birthdays early in the month

and their wedding anniversary is at the end

of the month. This year they are celebrating

their 40th anniversary! It is hard to believe!

To honor our parents, my brothers and I

thought it would be a lovely idea to send

them to a beautiful Victorian Bed and Breakfast

along the northern coast of California for

a few days. We are presenting their gift to

them today, New Year's Day (my precious

dad's birthday), and I wanted to make a special

little package to put their reservations in!

CottageCutz

Snowman with Sign

Moose with Hat

Snowman Family

Trimming the Tree

I fell in love with this Cottage Cutz Poinsettia Shape from the Winter Wonderland Release the moment I saw it! I love all the layered leaves because it really allows you to customize your flower how ever you would like and is just such a true to life representation of a poinsettia.

I was working on this Trimming the Tree layout and I thought the poinsettia shape would make such a lovely addition to the layout. See, I always decorate with poinsettias each year, but they don't necessarily make it into my Christmas photos because of where they tend to be placed (bathrooms, foyer, that kind of place). So by adding the poinsettia die cut to my layout about decorating the Christmas tree, it reminds me of the poinsettias that are all around us but you just can't see them in the pictures.


I hope everyone has had a chance to start looking over your Christmas pictures so you know which Cottage Cutz dies you need to add to your next order to go with all of your upcoming holiday layouts!!

HAPPY NEW YEAR!!!!!!!!!!!

Wednesday, December 30, 2009

Watch for it Wednesday #41

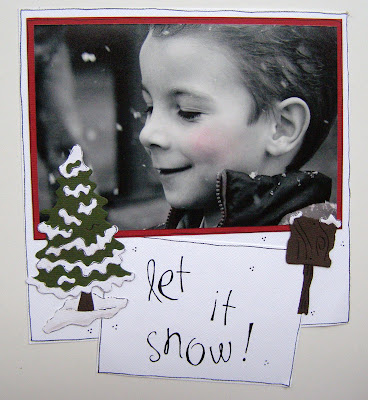
Let it Snow!

I hope everyone had a wonderful Christmas
and a joyful, lovely season! It is a very
special time of the year in so many ways.
There are so many pictures to be taken
during this time and if you are anything
like me, your camera is very tired! lol


I stumbled across a really neat tip and I
wanted to share it with all of you! First,
I want to say that I have a very nice
camera but I don't have one of those
REALLY nice cameras that have the ability
to practically create a scrapbook page
for you! lol Some of those awesome
cameras have the ability to take a black
and white picture and add shades of
color to it. In fact, there are plenty of
computer programs that can do the
same thing! But I don't have any of
those! So my tip is for everyone who
wants to add color to a black and
white picture the old fashioned way!


CHALK!! Chalk! CHALK!

I used regular chalk to touch up my
picture! I put some chalk on a Q-Tip
and gently rubbed it right onto my
picture where I wanted a hint of color
to be. It is subtle but adds a like flair!
It won't harm your pictures and is
very easy to do! Go have fun with
this and be sure to send pictures of
your wonderful work our way!!!


CottageCutz
Snowcapped Tree

Wood Sign

Monday, December 28, 2009

Winter Thanks

As the Christmas season comes to a close I find it so handy to have a few thank you cards on hand to give to those people in my life that have touched me this holiday season.
This CottageCutz Polar Bear on Sled die is perfect.
I used a little chalk for his cheeks, a fine tip Zig pen to add some details around the edges, a gray Copic marker for some depth and lots of Stickles on his scarf, around the edge of the bear and on the sled and a bit on the snow hill.
This die would also be great for a winter birthday card, not to mention all those snowy winter layouts.


Join us tomorrow for Rochelle's Watch for it Wednesday post!


IS THIS MY PRESENT?

Christmas is such a magical time of the year but when you have the pleasure of celebrating with children it is spectacular.
And then......remembering those precious moments again when we scrapbook our pages. For this layout I used the adorable Cottage Cutz Festive Penguins! I also used Quickutz Alphabet-Chick-a-dee!

Thursday, December 24, 2009

North Pole Friends

This year for my Mother's birthday, my brother and I "bought" her Santa to come to her annual Christmas party - the real Santa! This guy was amazing!!! He just embodied Santa. And it was an extra good present for me because I was able to get some wonderful photos of Santa with my girls.

For these pictures, I wanted to create a layout that was different than just the ordinary sitting-on-Santa's-lap layout. As I started looking through my Cottage Cutz, I got the idea of doing a North Pole kind of scene as the perfect background to my special Santa pictures. I borrowed an idea from one of Natasha's layouts where she cut this tree border and layered it. I loved how she did it and always wanted to try it out on one of my own layouts.


I used the Cottage Cutz Elf Workshop as well as these adorable little Cottage Cutz Festive Penguins. These little penguins were so fun to put together!! I think they are a must have for any Winter layout. This was definitely one of those dies that I am so glad I got because it is so much cuter when you have it in your hands and start thinking of all the different things you can use them for! The Cottage Cutz Mini Holly shape is absolutely the perfect decorative photo corner! I could see putting this holly on all kinds of different things for just a little added flair. I also used the Cottage Cutz Mini Christmas Tree to add to the Elf Workshop. Be sure to click on the layout so you can get a close-up of the Elf Workshop and Festive Penguins.
I hope everyone has a very Merry Christmas!!!

Wednesday, December 23, 2009

Merry Christmoose Everyone

My boss is an avid hunter so I knew I had to make his Christmas card with this
CottageCutz Moose with hat. The rest of the year I simply leave off the santa hat and he's great for those camping/hunting projects.
Merry Christmas Everyone!

Watch for it Wednesdays!! #40

I feel like we have sort of reached a milestone with our 40th Watch for it Wednesday post! I guess 50 will really be exciting!!

My post today is a memory preserving kind of a tip. I think around the holidays more than any other time, you end up taking a lot more pictures in a much smaller period of time, am I right?? Every family gathering big and small, parties, children's pageants, you name it - the photo ops during this time of year way out number the scrapping hours available.

Sometimes, us scrapaholics can get bogged down by wanting to scrap every single picture we have in order to truly commemorate the holiday season. If you have that kind of time and patience, go for it!! But for the rest of us, we need another system.

What you need to remember is that there is a difference between a scrapbook and a photo album. Photo albums exist so you can print every picture you took of each and every Christmas present and proudly display it in the album. But scrapbooks are for telling the stories and the memories behind the pictures you see. That's why we scrap, right?! To tell and preserve the stories.

I want to share with you something I have started doing for my Disney album which I think would also work great for these holiday times. Why not have a combination scrapbook/photo album?! There are no rules saying you can't have layouts and photo pages in the same album!! In my combination Disney album, I scrap the pictures I want, and then in between the layouts, I include photo pages filled with all the "extras" that go along with the story of the layout. For instance, I scrapped a page detailing a parade we watched in Magic Kingdom. Then following that layout, I added photo pages to hold all of the parade pictures I took. It is like the best of both worlds, plus it keeps all of my pictures and stories together in one place.

I hope this tip has been interesting and has inspired you to stay "caught up" this holiday season!

Merry Christmas!!!!

Tuesday, December 22, 2009

Believe

The minute I saw this CottageCutz Dog w/Santa Hat die I knew what I wanted to do with him - make lots of different colored dogs. Isn't he cute??
This CottageCutz Believe Phrase die is also a fun one - I ran it through my Revolution with green and red cardstock and one more time for the extra "e" and I had all the letters I needed. It has the solid letters as well as the ones with the holes so you don't have to keep cutting it out or worry if the holes pop out while cutting.
I used a tiny stylus to punch out the tiny holes and glued that letter to the solid one. For the "B" I also mounted it on an extra red "B" for added emphasis. I used a little distress ink and one little gem for the "i".

These are both 3x3 dies and remember the dog can be used all year round as he's complete even without the santa hat. His ears are all one piece which makes him so simple to put together.
I cut these dogs out of one color and then colored in his ears, nose and spots with my Copic markers.

We'll see you back tomorrow for Ruth Ellen's Watch for it Wednesday post!


Monday, December 21, 2009

Christmas Train Book

I wonder if every little boy loves trains as much as my little grandson. He knows all the names of the Thomas the Engine trains. So, hopefully this will be the perfect little book to help capture his Christmas memories.


I am using the Cottage Cutz Holly Jolly and Winter Wonderland minis to help me embellish this fun book. On the front page, I used the Cottage Cutz Holly Berry.
For the second page I used the Quickutz Revolution Train and the Cottage Cutz Santa Hat mini.
This will be my next page. I used a circle punch to make the wheels and then used some sliver stickles for the center of the wheel and gold stickles for the back light. The Cottage Cutz Snowman mini is so cute, I used it on this page.

I am working on this train book daily. I sure hope I can finish it before Christmas........ Have a wonderful, exciting and fun filled day...Merry Christmas!!!

Saturday, December 19, 2009

My Christmas Elves

I know I usually post my projects on Thursdays but we had a little Christmas pageant issue come up at my youngest daughter's preschool on Thursday. So, instead of taking a picture of my layout and uploading it for you guys, I was helping out with some last minute costumes. I figured y'all would understand :)

Sooooooo.................I am loving these Cottage Cutz Elves from the Holly Jolly Christmas Release!! They are so cute and SO much fun to put together!! I especially love the little bells on the shoes of the CC Elf with Present Shape. Another great Cottage Cutz touch!! I added gold stickles to the bells to really make them shiny and fun. Doesn't he just look like is running across the page!


If you haven't ordered your Christmas Cottage Cutz shapes, you don't know what you're missing!!

Thursday, December 17, 2009

Winter's Sweet!

I am just amazed by all of the
beauty in winter. Glistening
trees, icicles melting, smoke
rising from tall chimneys,
white snow falling....it is a
wonderful time of the year!
The wonder of it all inspires
me to the core. I love winter
but I love Christmas most of all!

Wednesday, December 16, 2009

Watch for it Wednesday #39

Let it Snow!

Today's Watch for it Wednesday is a pretty quick and easy tip. When you want to make snow on your layout or card all you have to do is take some white cardstock and tear off a strip, trim the sides to the size you need and apply it to your project. You can tear several strips and layer them for more depth. You can ink it with lt.blue ink or add glitter or Stickles to make it shine. You can also use tan or Kraft cardstock and make sand the same way.


Tuesday, December 15, 2009

Once there was a Snowman

I find it kind of interesting that the blog team has a tendancy to pick the same dies to work with.
When Ruth Ellen posted her Snow Day layout last week I thought "here we go again" because I knew I would be posting this card with the same Snowman w/broom die.
He's so cute and such as basic snowman to have in your die collection.
He's goes together quickly and has several options:
With or without the broom
With or without the hat
With or without the snow on the hat
I used Copic markers, a fine tip Zig pen, Baby blue & Black diamond Stickles, some pink chalk for the cheeks and white Memento ink to shade his hat. I also inked around the scarf and cut some slit marks at the bottom for some fringe.
You'll want to add this die to your collection - he's great for the holidays and your wintertime projects.

Monday, December 14, 2009

BELIEVE

'Twas the night before Christmas and through the house, not a creature was stirring, not even a mouse. The stockings were hung by the chimney with care, in hopes that St. Nicholas would soon be there....


The miracles of Christmas. It is so fun to Believe.......
I love making Christmas books for little grandsons. This year I am making a BELIEVE album to help cherish this years Christmas memories.


I used the Cottage Cutz Santa with reindeer along with several Christmas dies to embellish this book. It is a work in progress and I will be adding Christmas pictures and other dies. I also tied different colors of ribbon on each of the rings.

Saturday, December 12, 2009

Whimsical Christmas tags!

At Christmas play and make
good cheer, for Christmas
comes but once a year!!!!


I was so excited to make these
cheerful Christmas tags for
all of my packages! Sometimes
it is the little things that
make a big difference.


Have a very Merry Christmas!

CottageCutz
Snowflake Trio Shape
Whimsical Stocking (my favorite!)

Thursday, December 10, 2009

Snow Day!!

We had a December snow over the weekend so of course I couldn't wait to grab this adorable Cottage Cutz Snowman from the Holly Jolly Release for my layout. Now before everyone starts laughing at our pitiful little snow, you have to know that flakes of any kind are a big deal in Alabama!! And the fact that we actually had some accumulation in December is almost unheard of for us!! My poor children are now expecting snow for Christmas (which I am trying to explain just doesn't happen in Alabama!)

To really bring this snowman to life, I cut him out of white cardstock and then covered the cardstock with Icicle Stickles. The reason I did it this way instead of just using glitter cardstock, is that I knew that as the Stickles dry, they will curl up the paper a little bit which would give my snowman a more 3-D feel. I also used black stickles for his eyes and buttons. I used my Copics and chalks to outline the body and to add a little rosy cheek before I added the stickles. You can choose whatever color or patterned paper you want for his scarf to really personalize his outfit to your layout!

I'll have to make a layout next of our little snowman that we built - although I will probably need the Cottage Cutz Mini Snowman for that one!! ;) You can see how much we had to work with for our snowman!