Wednesday, March 09, 2016

Flower Thanks

 
Hello CottageCutz Fans! Thanks for taking the time to visit with The Scrapping Cottage Blog. It's Mary Marsh here with the Wednesday edition of the blog.

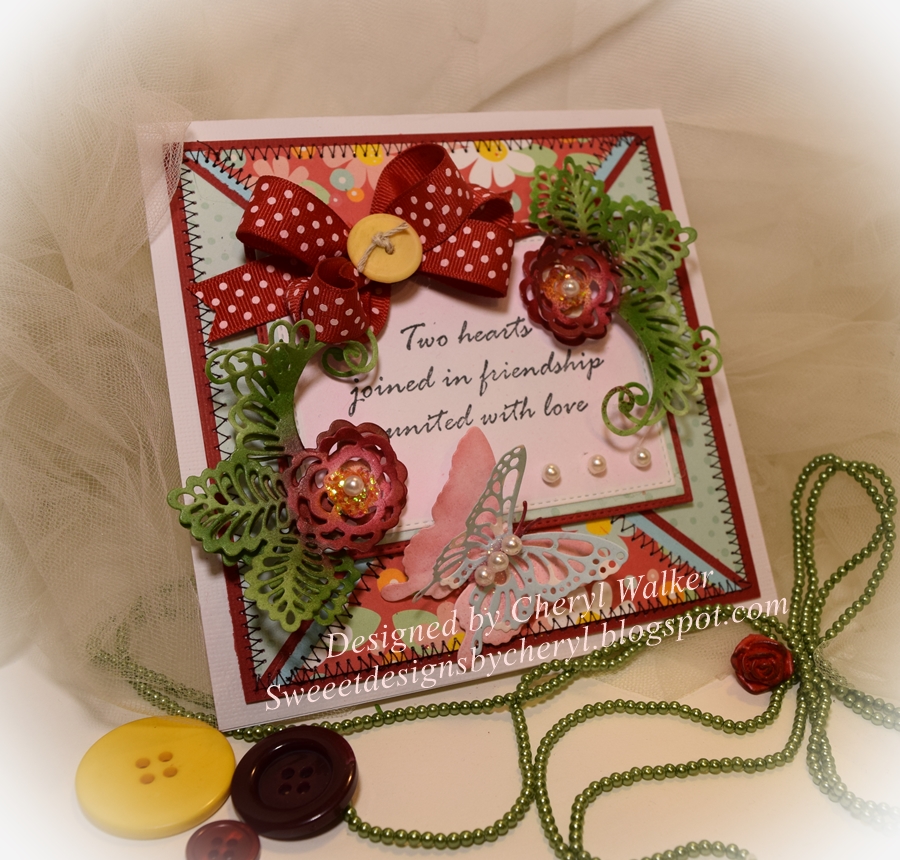
For my card this week, I have created a thank you card with several different dies from CottageCutz. My idea was to create a leaf frame with a flower surrounding it. So let's get started with the details of how this card is put together.


I started off my card with some background stenciling. I chose a diamond patterned stencil and some light green ink. Using a sponge dauber I sponged the pattern  onto my cardstock going both darker and lighter.


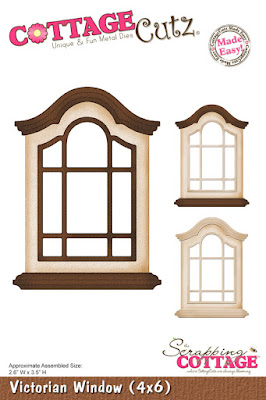
My next step was to create my leaf frame. I did that with the Cottage Cutz Square Set Dies. I used the 3rd and 4th largest dies for my frame. Ran them through my die-cutting machine and the next photo shows the frame that I ended up with.

 
The open frame is what I used for my card. The smaller square I will use on another project.
 
At this point, I die cut my flower with purple cardstock using the Cottage Cutz 3D Flower #3. The leaves with a light and dark green cardstock using the Cottage Cutz Strawberry Petites die. I layered the leaves around my frame and assembled my flower. My thanks word is from the Cottage Cutz Thanks Die and I cut in the same purple cardstock. I cut it twice and layered for more dimension.
 
Also, to give my flower more dimension, I used foam squares between each layer. This next photo gives a close up view of the flower.
 
 
To complete my card I added a butterfly cut in light pink from the Cottage Cutz Butterfly with Flowers Die and then scattered some candy dots in light pink for added interest. That's it for me for this edition. So until next time........inky hugs!

Card Stock sizes:
Purple Card Base: 4 1/4" x 5 1/2"
Green Layer: 4 1/8" x 5 3/8"
Stenciled Layer: 3 7/8" x 5 1/8"
Leaves: light and dark green cardstock
Butterfly: light pink cardstock
Dies: pictured below

http://www.scrappingcottage.com/cottagecutzstrawberrypetites.aspx
http://www.scrappingcottage.com/cottagecutzsquaresetbasics.aspx
http://www.scrappingcottage.com/cottagecutzexpressionsthanks.aspx
http://www.scrappingcottage.com/cottagecutz3dflower3.aspx


Tuesday, March 08, 2016

Sweet tooth bear

Hi, Janja here!
Creating children's cards for me, as grandmother of three little boys, is the greatest joy. Today I am sharing with you a fun birthday card.


For the card base I chose a brown cardstock. The folded card measures: 5.3" x 5.3" (13.5 x 13.5 cm). With a paper cutter, I cut 2 squares, both a little smaller than the size of the card. One from the patterned paper and another from the same cardstock as the base card. 


To make the framed bases, I used the 2 largest dies (from the basic set: stitched square and square) and cut out the openings for the image and that creates a frame. 
For patterned paper I used a die stitching square in the size 3.5" x 3.5" (8.9 x 8.9 cm) and for the brown cardstock, square die in the size 3.3" x 3.3" (8.4 x 8.4 cm). I glued frames to each other so that the edges are aligned.
To begin assembling the card I first applied a script patterned paper centered on my base card front. I applied adhesive foam pads to the back of my double frame and centered it over my patterned paper.


The whole basis of my card is created using dies from the CottageCutz birthday release: stitched cupcake and balloons, which I combined from a previous Christmas release: peeking Santa bear.
Just look at how cute he is, curiously peeking over the cupcakes!


All the cutouts are made with colored cardstock that have the edges shadowed with Distress Inks (Mustard Seed , Wild Honey, Moved Lawn and Vintage Photo).


When card was finished, I applied glitter on the cupcakes and the balloons. I also added white gel pen lines on the balloons for reflections.


I hope you give this adorable card a try and make one for the child in your life!

List of dies used:


Have a nice day!
Janja

Saturday, March 05, 2016

ALTERED GIFT BAG WITH ANITA KEJRIWAL

Hello! It's Anita Kejriwal here and I am super excited to begin my first post at the CottageCutz blog. I feel so happy to be a part of this wonderful team and would put my best effort to feature the best of CottageCutz dies.
 
For my first post, I have altered a juice carry bag into a gift bag for a baby. I like to alter many such things and give them a new look. Dies really help to bring out the beauty in my projects.
 
This is a picture of the bag before I altered it.


Here are the instructions on how to altered the bag:
 
(The bag measures 6.75 x 7 inches)
Remove the green string from both sides and paint the edges with white acrylic paint on both sides of the bag. Cut two red pieces of card stock to 6.5 x 6.75 inches and adhered it to both sides of the bag. Add another layer of pattern paper. Two pieces for front and back measuring 6 x 6 inches. This is adhered on both sides on top of the red card stock.
 
Cut two pieces of die cuts in white card stock from the Cottage Cutz Baby Border (7" long). Distress the edges of this die cut with Candied Apple Distress Ink. Emboss the die Cottage Cutz Bella Floral Frame (Elites) on a piece of white card stock and cut out the frame with scissors. Cut another die cut from the same die and color it well with Candied Apple Distress Ink. Emboss the frame with Twisted Citron Distress Ink. Adhere it on the bottom die as shown.
 
Cut two die cuts in white card stock from the Cottage Cutz Baby Blocks (Elites) and color it with Candied Apple Distress Inks.  Placed on top of each other with double sided foam tape. This gives it a 3D look. Finish the bag with some baby sentiment, flowers and a red button and ribbon.
(I added red and green ribbon as handle.)
 
This is my finished bag and it looks really beautiful after being decorated by CottageCutz dies.
                                           

Do stop by the store to view the amazing collection!
An important tip for die cutting- I always place my dies diagonally on my cutting plate to get smooth cutting in one go.
I hope you enjoyed my first post. Please do leave a comment and your feedback.
I will be back next week with more creative inspiration with CottageCutz dies.
Till then........ happy crafting!!!!!!

Friday, March 04, 2016

Victorian Window with Roses

Hi, Vladka here! Today we will travel back in time with this vintage card. Are you interested in how you can create it? Let's start!


Basics:
Card base: 4 1/4 x 6 inches (cut 4 1/4 x 12 inches, fold in half)
Additional piece of kraft cardstock: 3 3/4 x 5 1/2 inches
Some kraft cardstock scraps to cut out the die cuts and strip for sentiment

Other Supplies:
CottageCutz dies: listed below
Cardstock: kraft cardstock
Distress Ink: Brushed Corduroy, Gathered Twigs, Fired Brick, Aged Mahogany, Peeled Paint
Other:  brick embossing plate (optionally), scissors, paper trimmer, Sizzix machine, scor-buddy, brush, light blue and white watercolor paint from a tube or white acrylic paint, piece of sponge


Let's prepare everything first:

1. With the Victorian Window die cut the window out of some kraft cardstock. Use a sponge to color die cut pieces with white watercolor paint straight from the bottle but you can use white acrylic paint. After they are dry, distress all of them with brown Distress Ink. When putting the window together, tear apart some pieces to give it an old and damaged look.
2. With the Floral Spray die cut flowers and greenery out with some kraft (or white) cardstock. Color flowers with red Distress Inks and greenery with green ink.
3. With Stitched Square die cut the second biggest square (eight from the center). Put it together with the same Stitched Square die on the cutting plate (as shown on the photo) and cut it out again. This will give you the perfect stitched strip to stamp the sentiment on.


4. Run the other piece of kraft cardstock through your die cutting machine with your brick embossing plate. This step is optional. You can use any other embossing plate or none at all. Color the surface gently with blue paint on a sponge first then after it is dry use white paint. For a finishing touch, carefully distress the whole surface with brown Distress Ink.
5. Use white paint on the base of the card as well.

Finally, preparations are finished. Let's make the card!

Apply adhesive on the back side of additional piece of cardstock (the embossed one) and add it on the card base. On the front of the card, glue the window, flowers and greenery. Stamp sentiment on the strip and glue it under the window.


Card is finished and you can enjoy the view :)))


Wednesday, March 02, 2016

It's Your Day

 
Hello Cottage Cutz Fans! It's Mary Marsh here and I am so excited to be sharing my first post on the blog. I am starting off my term with a masculine birthday card. We all need cards for the guys in our lives and balloon cards are always a winner.
 
I am using the round mini balloon die for this sample. Looks like this die is out of stock right now, but check out this cute balloon variety die that would work as well. So let's get started with the details of how to make this card.
 
cardstock and patterned paper sizes:
red cardstock base measures 4 1/4" x 11" and scored at 5 1/2".
striped patterned paper layer is 4 1/8" x 5 3/8"
embossed yellow layer is 3 3/8" x 4 5/8"
dotted patterned paper is 3 1/8" x 4 3/8"
image panel is 1 7/8" x 3 1/8" and red layering panel is 2 1/8" x 3 3/8"
 
I used double sided tape to secure my panels. The dotted patterned paper is placed on an angle for some card interest. Before the image panel was secured, I added some red burlap ribbon and then some red and white bakers twine over that.
 
Made a mini bow from the same bakers twine and added a sequin center. Even though I am using ribbon on a masculine card, it's burlap and has a masculine appeal to it. Bakers twine is not feminine or frilly so that's ok also.
 
On the yellow embossed panel, I used a birthday words embossing folder.
 
For the image panel, I die cut the balloons in red, yellow and blue to match the colors in the patterned paper. I sponged the edges of the paper with the corresponding inks to give some depth. Stamped the "it's your day" sentiment and added some red sequins to complete my card.
 
I hope this card gave you some inspiration to make a masculine card using these super cute balloon dies. That's it for me for today. So until next time.............inky hugs!


Tuesday, March 01, 2016

Happy Spring!

Hello Everyone!

It's Donna here and I am so excited to be here. This is my first post as a design team member. This is going to be so much fun to share with you the CottageCutz dies! For my first post, I am sharing with you a Spring card. Spring is right around the corner, and I don't know about you, I am so ready!!! The die I am using on my card is the “Miss Daisy Spring Bunny” 4x4 die.


Here is how I put my card together!

The base of my card is an A2 (5 ½” H x 4 ¼” W ), I used Regal Rose cardstock by Stampin' Up. I have several layers on this card. The first layers are 4 ¼’ H x 4” W and 5 1/8” H x 3 7/8” W. The square layers are 3 x 3 and 2 ¾ X 2 3/4 and the stripe across the middle of the card is 1”H x 4 ¼ W. The design paper is by Authentique – Springtime.

I cut the elements from the “Miss Daisy Spring Bunny” 4x4 die with cardstock; I used a small sponge to ink the edges and shadows. I used the following colors, which is all Stampin Up cardstock: Bunny cut out of Crumb Cake and used Crumb Cake to ink. The leaves Garden Green, inked with Garden Green, and the flowers are cut out of Daffodil Delight and inked with Daffodil Delight. I used a white gel pen to put in the eyes.

The butterfly, I only used the top layer and I colored it with Copics – R81 and 85 and added some clear Wink of Stella so it looks like it is sparkling.

To assemble my card, I used foam tape to pop up the bunny, pieced the flowers on the greenery and adhered it to my card so that it looks like the bunny is sniffing them. I put foam tape on the butterfly and popped it up on the card. I added my sentiment, and to finish the card I added the button with some floss which was from my stash.

I hope you enjoyed my post today and I have inspired you to check out CottageCutz so you can be creative.  Please come back again soon to check out some more projects made with the CottageCutz dies!
 

Sunday, February 28, 2016

Wedding Shaker card

Hi, Vladka here! Today I have Wedding Shaker card for you. Are you interested in how you can create it? Let's start.


Basics:

Card base: 4 1/4 x 6 inches (cut 4 1/4 x 12 inches, fold in half)
Additional piece of white cardstock: 3 3/4 x 5 1/2 inches
Piece of white fun foam (3 3/4 x 5 1/2 inches)
Piece of acetate sheet (3 1/2 x 3 1/2 inches)

Other Supplies:

CottageCutz Dies: Listed Below
Cardstock: White and Red Cardstock
Distress Ink: Barn Door, Aged Mahogany
Other: Scissors, Paper trimmer, Sizzix machine, Scor-buddy, Water, Sheet of Acetate, Another small piece of white foam


Let’s prepare everything first:

1. With the CottageCutz Stitched Heart die, cut 2 hearts out with some red cardstock. Use the two smaller stitched heart shapes. (First and the second one from the center)

2. With the "Just Married" expression die and white cardstock cut both words

3. Cut a piece of red paper to approximately 3 3/4 x 1 inch

4. Take additional piece of white cardstock and with the bigger heart die (the fourth from the center) cut out the heart window. Do the same with piece of white fun foam.

5. Add some Barn Door Distress Ink on acrylic block and spritzed some water on it. Then take a piece of plastic acetate and gentle pressed it against the block to pick up some of the ink. Now, press the plastic to paper with heart window to transfer the ink . This will give you a splotchy look. This technique is called "smooshing". Let dry.

6. Heat embossed the sentiment on the piece of red cardstock (you can also distress the edges with Aged Mahogany Distress Ink) and glue the smallest heart on it.

Now that you have all the prep done, let’s make the card!


On the back side of the paper with the “smooshing” and heart window, glue a piece of acetate sheet. Next, apply the fun foam to the back for the shaker base with a strong adhesive. Align the heart windows. Add some beads, small pearls or something similar (small hearts cut out of the same red cardstock will be nice too) into the opening of the fun foam.  Apply more adhesive and add the card base. This will finish off the shaker. On the front of the card, glue the biggest red heart in the middle of the window on the acetate. Add the red paper to the bottom of the card with your embossed message and apply adhesive to the “Just Married” and apply over the red heart on the front. (See photo for placement)

Now the card is done!

There are several steps but I assure you, they are not hard at all. Give it a try! Have fun creating!


Friday, February 26, 2016

Love you More!


Hello everyone, Cheryl here with another post using the Beautiful CottageCutz Dies from the Birthday Release.

I had so much fun creating my card for today. I did the panels for layering, and then added the frames for additional layering on my card. I LOVE layers, and anytime I can add tons, I do :) hehehe
Products used to create my card are listed below :)
Lacey Rose die, and airbrushed it using Copic markers. For the centers I used a glitter, and some old pearls. I did cut these out in white card stock, and cut 4 of them, so I could layer for a 3-D look

Butterfly Lisbeth was cut in a pink card stock, and a blue pattern paper, layered and I did add some pearls to it as well.

Basics Rectangle stitched frames-  I use the basics to cut the white, and red pieces, I also used the Rectangle for the blue polka dot layer too.

Embellishments- Red polka dot ribbon, old button, twine, pearls, Stamped sentiment,and sewing to complete my card for today.

http://www.scrappingcottage.com/cottagecutzlaceyroseelites.aspxhttp://www.scrappingcottage.com/cottagecutzbutterflylisbeth.aspx

Hope you enjoyed my post for today!
hugs to all,
Cheryl

Wednesday, February 24, 2016

Design Team Announcement for March through August 2016


CottageCutz would like to introduce you to our Design Team for March through August 2016. We are happy to have Janja Albreht, Anita Kejriwal, Donna Idlet, Mary Marsh and our returning Design Team member, Vladka Servinek designing for us. We are very pleased to have these very talented ladies creating for us! We are all looking forward to seeing what amazing creations they come up with!