Hello sweet friends!
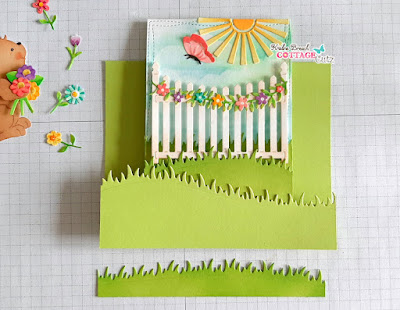
Kris here with a Springy card for someone 'So Bloomin' Sweet'!
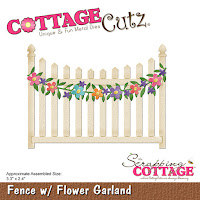
My card today uses 3 brand new dies from the "Flowers & More" Release! For a limited time, the whole bundle is 50% OFF!! Or, if you want to choose individual dies, they are 30% off! ☺
Center Step Fold Card
When folded, this card will be a 5-1/2" square
How to Make It
Photo reference for cutting/scoring your base.
BLACK lines = CUT \ RED dashes = SCORING
You can click on the pic to see it larger.
• Cut base at 5-1/2 x 11".
• Put cardstock in paper trimmer VERTICALLY and line the right side up on the 1" line. Position the blade at 1" and cut down to 6-1/2".
• We need the same cut on the parallel edge. To do so, you can flip it over (side to side, not bottom to top) and repeat that step.
• Turn card horizontally and score from the outside edge to the cut lines at 1", 2" and 6-1/2"
• Score between the 2 cut lines at 5-1/2"
The 2" score lines are both valley folds. All other score lines are mountain folds ☺
• Die cut the largest die from the Nested Wacky Stitched Rectangles set from white cardstock. If you don't have these or similar, you can cut a rectangle that is 3-1/2" x 4-1/2" - I then sponged it with clouds.
• Die cut 4 grass borders using the Grass Slimline set from lime green cardstock. Trim 2 of them to 3-1/2" wide, and 2 of them to 5-1/2" wide. I sponged Mowed Lawn Distress Oxide ink to 3 of them, leaving one of the 5-1/2" wide ones a lighter green.
• Die cut Bunny with Butterfly | Little Flowers | Fence w/ Flower Garland | Arch Sun - then color and assemble them.
• Glue the sun to the top of the cloud layer, and one of the grassy layers to the lower part.
• Add foam strips to the back of the other shorter grassy layers and pop it to the bottom of the cloud layer, overlapping the glued grass.
• Add foam strips to the back of the fence and attach it between the 2 grassy layers.
• Pop the butterfly up with a foam dot.
• Glue that whole layer to the middle section of card base, aligning top edges.
• Add foam strips to the bottom 1" x 5-1/2" section and attach the lightest widest grassy layer.
• Add foam strips to the bottom only of the shorter grassy section and attach to the front bottom of card. You will want to leave the top part non-glued so you can tuck flowers behind it.
• Glue the lower half of the bunny between the 2 bottom layers of grass and the little flowers behind each layer of grass.
-- I added some Wink of Stella to the butterfly, bunny's bouquet, and the garland flowers for some shine!
• Cut 2 patterned paper strips to 7/8" x 4-1/4" and tape to each side panel.
Hope your week is BLOOMIN' with creativity!
~ Kristine
Products I used:


1 comment:
This is just too cute Kristine and I love the detailed directions
Post a Comment