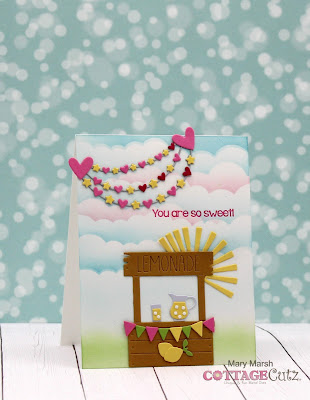
Hello CottageCutz friends! Thanks for taking the time to stop and visit with us today. It's Mary Marsh here bringing you the Sunday edition of the Blog.
We have a brand-new release of dies in the online store. It's our Flowers & More release. The individual dies are currently on sale for 30% off. This release has what we are calling "simple cuts". Meaning not as many pieces to put together so they assemble quickly.
They are so perfect for the many card making occasions that we all have. Birthdays, Thank You, Sympathy, Mother's Day or even a scrapbook layout just to name a few. For your viewing pleasure today I am featuring the Lemonade Stand and Celebrate Banner dies.
I was in need of a thank you card to send to a friend who invited us to visit with them at their Florida home for a week. It was such a wonderful time and a handmade thank you card was in order.
I recently found out she saves all the cards I send her. That's so heartwarming for a card maker to hear. So, let's get started on some details of how I made my card.
Design Steps:
I started my card by stenciling clouds on white cardstock with tumbled glass, broken china, spun sugar and mowed lawn distress inks.
Image Panel: 4 1/4" x 5 1/2"
Next, I cut the lemonade stand and the celebrate banner from different colored cardstock. You could cut in white cardstock and then use your favorite coloring medium to color the images. Our team does a variety of ways. I usually use cardstock.
My card elements are prepared and ready for card assembly. I attached the lemonade stand with double sided tape. I decided to use the Arch Sun die and attached it to the side of the lemonade stad for added interest.
Before I added the celebrate banner, I stamped my sentiment in a bright pink ink. I used my MISTI for placement, and this also needed a double inking. The MISTI is so perfect for this feature alone.
Added my celebrate banner with clear drying glue.
To finish off my card, I attached the image panel to a white card base with double sided tape. I kept the base the same size as the image panel.
White Card Base: 4 1/4" x 5 1/2"
That's my card for this week. I hope I have given you an idea for a way to use the lemonade stand die. See you next Saturday!
Dies I used to create card:


.JPG)


1 comment:
Love this Mary!! Love the pink and blue clouds and the heart Banner is sweet.
Post a Comment