We have a brand new release of Birthday dies in the online store. There are 25 new designs and they are currently on sale at 25% off. This release is filled with cute little whimsical animals, birthday cakes, cupcakes and birthday phrases. Everything you need to create some outstanding birthday cards.
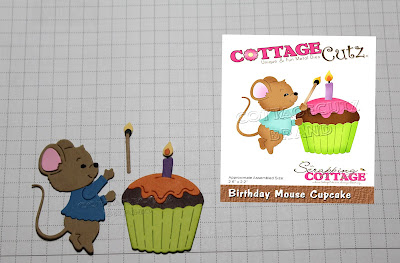
Today, I am featuring the Birthday Mouse Cupcake die. I needed a birthday card for a 4 year old boy and these new images are perfect for kids as well as adults. So let's get started on some details on how I created my card.
Step 1: I selected my designer paper first this time around. I wanted something festive with balloons and presents, and I found the perfect pattern in my collection. The card base is an 1/8" longer and wider than an A2 card. I wanted more of the card base to show around the designer paper.
Pacific Point (royal blue) Card Base: 4 3/8" x 5 5/8"
Designer Paper Layer: 4 1/8" x 5 3/8"
Pumpkin Layer: 2 11/16" x 3 11/16" (2nd largest rectangle die)
White Image Panel: 2 1/2" x 3 1/2" (3rd largest stitched rectangle die)
Step 2: Next, I cut the mouse and cupcake image. I used the colors from the designer paper and then added a couple. I wanted to keep it more on the boy side with the colors. I used pacific point for his shirt, lemon-lime twist for cupcake holder, pumpkin for icing and choc chip for cupcake.
I stamped my first sentiment at the top of the image panel. It was a bit too long for the panel so with the help of my MISTI, I stamped on 2 lines. The first stamping was a bit light so without moving the stamp I reinked and stamped again. That's the great thing about a MISTI, it allows you to stamp an image multiple times.
Since I didn't want the images "floating in air", I decided to cut a flag in pacific point cardstock and stamp another sentiment. I used the MISTI again just in case I needed a 2nd stamping and it turns out I did.
Step 3: Now that all the card parts and cut and stamped, it's time to start assembling. First, I attached the designer paper to the card base with double sided tape.
Next, I attached the image panel to the pumpkin layer.
For the images, I used dimensional adhesive. I wanted them lifted off the panel for added interest and dimension.
To finish up my card, I attached the image panel to the card base and again I used dimensional adhesive. I cut a few streamers with the Festive Birthday Greeting die in pumpkin and red cardstock and scattered them on the designer paper.
Well that's it for me for this post. I hope I have given you an idea for this cute little mouse with his cupcake. See you next Saturday!
dies I used to create card:


3 comments:
That's an adorable card, Mary.
Very sweet card! The papers are so fun and festive! Great card Mary!
Love the birthday paper perfect background for your little mouse!
Post a Comment