

Hello CottageCutz friends! Thanks for taking the time to stop and visit with us today. It's Mary Marsh here bringing you the Saturday edition of the Blog.
They are so perfect for the many card making occasions that we all have. Easter, Birthdays, Thank You, Sympathy, Mother's Day or even a scrapbook layout just to name a few.
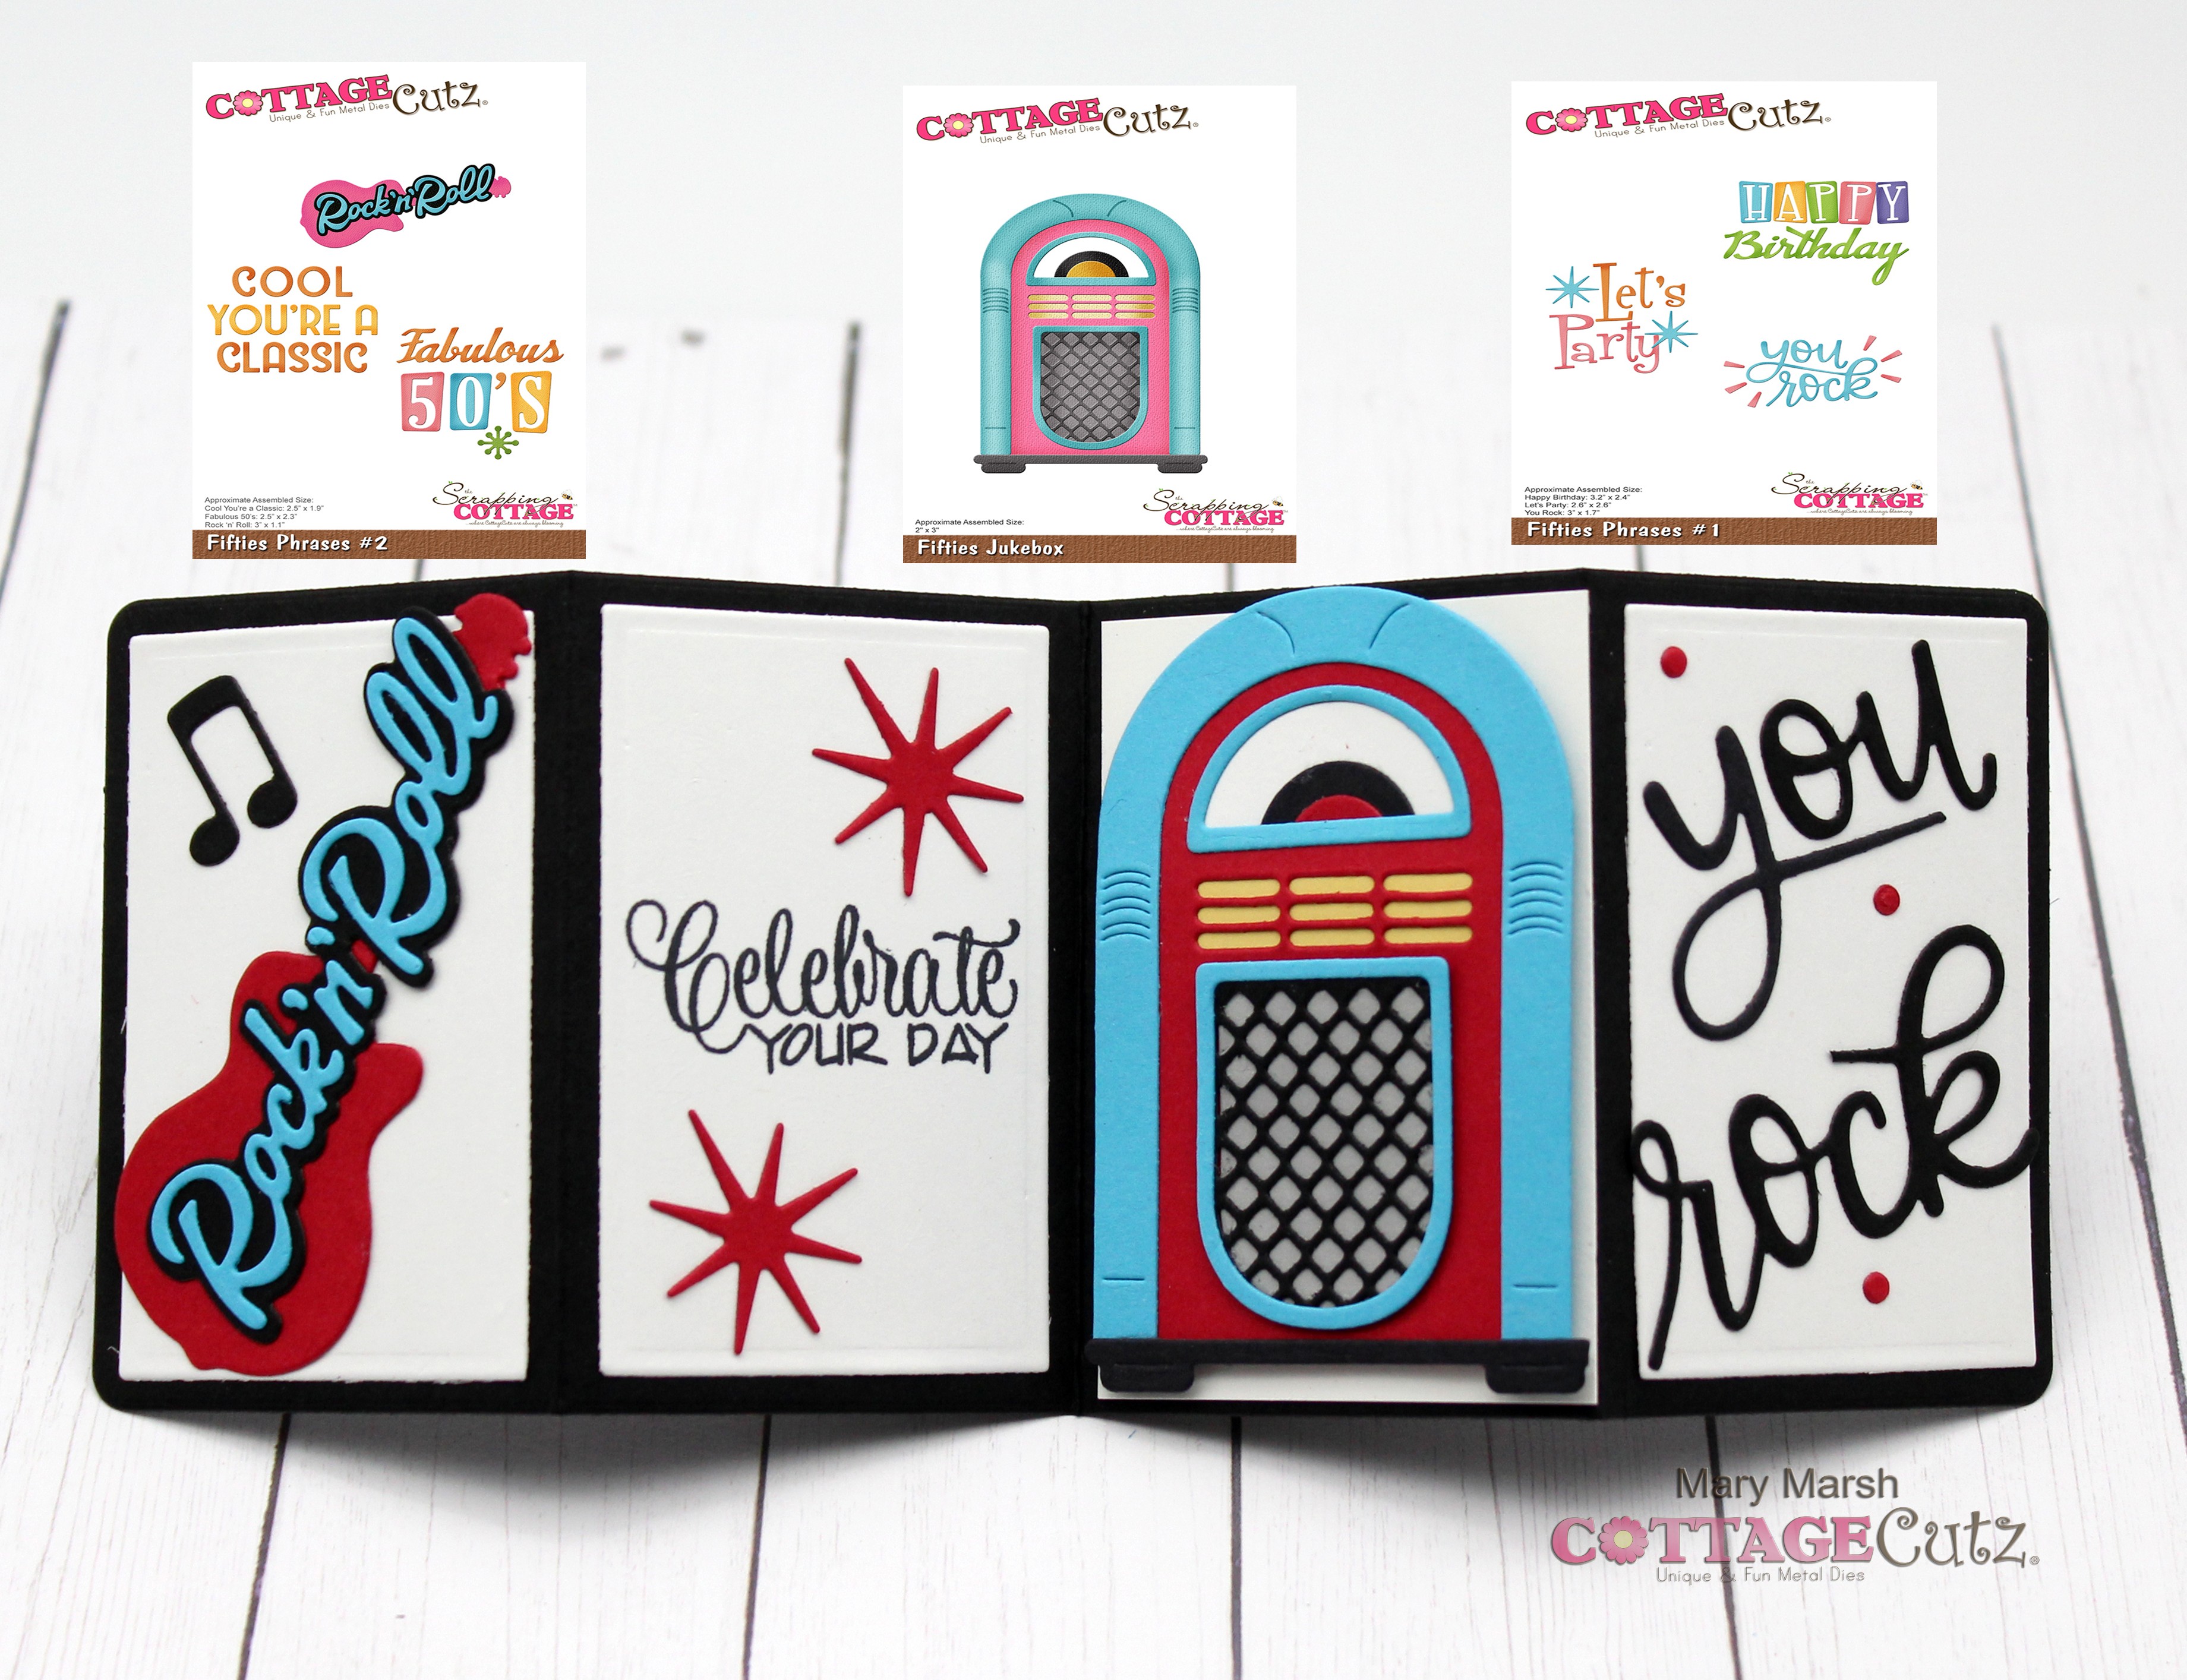
Today for your viewing pleasure I am revisiting the Black Friday Classic 50's release. These dies are currently 40% off. I needed a special birthday card for my son. He's not 50 but he definitely likes rock music. So, I decided to use some of these dies and create a pop-up fun fold card. Let's get started with some card info.
Design Steps:
I started with my card front. I used the Guitar, Music Notes and Records die and the Fifties Phrase #1 die.

Then I cut my card base and layers.
Turquoise card Base: 4 1/4" x 5 1/2"
Red Layering Panel: 41/8" x 5 3/8"
White Image Pael: 4" x 5 1/4"


I started with decorating the four inside panels. I used the guitar image from the Fifties Phrases #2, the Jukebox die and the "you rock" phrase from the Fifties Phrases #1 die. I layered the images on white panels and then attached to a black rectangle panel. This will get attached to the pop-up mechanism.
White Image Panels: 1 3/4" x 2 3/4"
White Image Panels: 1 3/4" x 2 3/4"
Black rectangle panel: 8" x 3"
Next, I started on the pop-out mechanism. I cut a piece of white cardstock at 8" x 3 1/2". I scored it at 1 3/4" on the short side. then on the long side I put a tick mark at 2 1/4"& another at 5 3/4".


Here is a short video that shows the card open & close.
Reminder: Our YouTube Channel has a new video from Linh Van. There is a giveaway for being a subscriber, liking the video and leaving a comment. Click here.


Dies I used to create card:


1 comment:
Fun pop up card and great directions
Post a Comment