Hello CottageCutz friends! Thanks for taking the time to stop and visit with us today. It's Mary Marsh here bringing you the Saturday edition of the Blog.
It's new release time!!! We have new dies in the online store. It's our Strawberries and Bees release with 16 new designs. You can pick up the individual dies at 30% off.
The new dies are perfect for all your cardmaking needs. They would work for so many occasions as our design team have been showing.
And speaking of sales, we are having a Christmas in July sale with savings of up to 65% off retail. The sale runs through July 29th. So shop early to get the best buys.
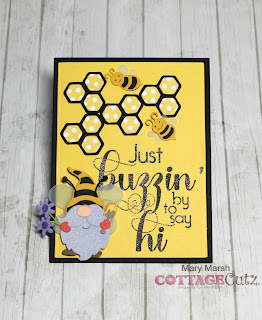
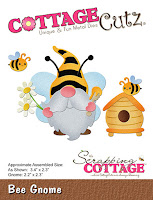
Today for your viewing pleasure, I am featuring the new Bee Gnome and Bee Phrases die. My friend has been sick with a lingering sinus infection and her hubby with complications from Covid. I want them to know I am thinking of them as well as praying for them. So, let's get started with some details on how I created my card.
Design Steps:
I started my card by stamping my sentiment. It is such a large one that I wasn't sure how many images I would be able to use. I wasn't getting a good image with this stamp even using my MISTI. After wasting several pieces of cardstock, I tried Versafine instant dry pigment ink. That was the ink that worked on this stamp.
After I stamped the sentiment, I used a Nuvo glitter gloss pen for some interest. It looks splotchy in some of the photos but IRL it's a nice even sparkle.
Daffodil Yellow Card Base: 4 1/4" x 5 1/2"
Black Layering Panel: 3 7/8" x 5 1/8"
Daffodil Image Panel: 3 5/8" x 4 7/8"
Next, I cut the images from cardstock. For the gnome wings I used velum and then shaded with some tumbled glass distress ink. I was going to use the hive from the Bee Gnome die But I thought the gnome would be perfect with the sentiment wording. He looks like he is saying "hi" and bringing some flower love!
My elements are prepared I am ready to start card assembly. I secured the image panel to the black layering panel with double sided tape. The gnome is attached with dimensional adhesive.
I laid out the honeycombs until I was satisfied with their placement and then secured them with Art glitter glue (clear drying). For a little added interest, I paper pieced some dotted designer paper in the honeycombs.
To finish off my card, I attached the panels to the card base and scattered a few sequins and black enamel dots. That's it for me for this week. I hope I have given you a fresh idea for these new dies. see you next Saturday!
Reminder: Our YouTube Channel has a new video from Linh Van. There is a giveaway for being a subscriber, liking the video and leaving a comment. Click here.
Dies I used to create card:


1 comment:
Super cute card love that gnome!
Post a Comment