Saturday, August 31, 2019

Sending Hedgehugs


Hello Scrapping Cottage friends! Thanks for taking the time to stop and visit with us today. It's Mary Marsh here bringing you the Saturday edition of the Blog. 

The new release of Birthday dies have been restocked in the online store and on a 25% off sale So if you didn't get the ones you wanted previously, all 25 designs are in stock. This release is filled with cute little whimsical animals, birthday cakes, cupcakes and birthday phrases. Everything you need to create some outstanding birthday cards.

Today for your viewing pleasure, I am featuring the Birthday Hedgehog die. I created a card of encouragement for a friend who needs some hugs and encouragement. So let's get started with some details on how I created my card.  

Step 1: Since I knew what die I was using and I also had my designer paper and coordinating cardstocks selected, I just needed my layout. The sketch #764 over on Splitcoaststampers caught my eye. It would allow me to cut the designer paper in varying sizes. This paper is a bit busy and having it broken up just a little with a cardstock layer underneath would work out just right. 
I decided to add an additional layer to the sketch. I liked the coral and green coordinating colors so I went with both. 
garden green card base: 4 1/4" x 5 1/2"
calypso coral layering panel: 4 1/8" x 5 3/8"
designer paper layer: 3 7/8" x 5 1/8"
 
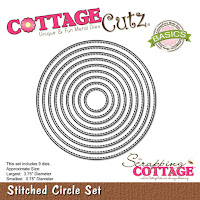
I cut my hedgie in 2 shades of brown cardstocks - soft suede and taupe. I layered him on a cantaloupe circle cut with the 6th largest die from the Circle set. For a layering panel I used coral cardstock and the 6th largest die from the Stitched Circle set.
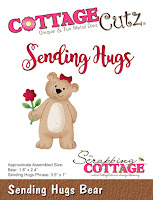
The Sending phrase is from the Sending Hugs Bear die. I cut it 2x in garden green cardstock to make it stand out on the designer paper. It's an older die but still available in the store and currently on sale. 

Step 2: I am ready to start assembly of my card. I cut the designer paper at 7/8", 1 1/8", 1 3/8"and 1 5/8". Adhered that to the coral base with double sided tape.
I stamped my "hedgehugs" sentiment on a coral flag banner. It also had the word sending but I just masked that with tape before inking. I used my MISTI for placement.
Attached the hedgie to the circle panels using dimensional adhesive. I added the flag to the bottom of the circles. I wanted it to look like the hedgie was standing on it.

Step 3: I am ready for final steps. I added the hedgie image to the designer paper layer.
The "sending phrase" was attached with Ranger multi medium matte. I like this adhesive because it dries clear unlike some other glues.  
To complete my card, I added this panel to the garden green base. I decided not to add any other embellishments because I thought the background scallop design was sufficient.

Well, that's it for me for this week. see you next Saturday. There is a big Labor Day sale going on right now. Check it out here.

dies I used to create card:
http://www.scrappingcottage.com/cottagecutzbirthdayhedgehog.aspx
http://www.scrappingcottage.com/cottagecutzsendinghugsbear.aspx
 

http://www.scrappingcottage.com/cottagecutzstitchedcirclesetbasics.aspx


Friday, August 30, 2019

Celebrate You!

Happy Friday!  It's Jeanne today with an easy, fun birthday card featuring the Mouse with Cake die from the new birthday release.  I love  this release; the dies make adorable birthday cards.
For this card I started with the color challenge colors on Splitcoaststampers this week.  They were chosen by none other than our own Mary Marsh!  She chose Lovely Lipstick, Gorgeous Grape and Coastal Cabana.  Just perfect for a festive card.
I cut the pieces from the Mouse with cake and Party Favors dies using the colors plus the neutrals Very Vanilla, Sahara Sand, and Mossy Meadow (my cherry stem.)  I used just a touch of the Lovely Lipstick ink to color the mouse's ears.
For my card layout I chose to use a sketch challenge that was on Splitcoaststampers awhile back.  A hint to make cards go faster - I download the sketch challenge each week from SCS, print it out and keep in a file.  I may not use it then, but I have it for future use.
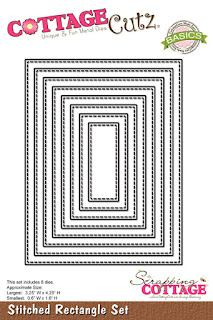
I flipped this sketch and used two of the third smallest Stitched Squares in white, one of the largest Stitched Square in Grape and one of the fourth smallest Stitched Rectangles in white.
I glued them to an A2 card base.
I heat embossed the sentiment on Lipstick card stock and trimmed it close to the embossing.  I glued all the die cuts to the card, popped up the sentiment using foam dots and added a few glitter enamel dots in the corner.  Super easy!

Dies used:
http://www.scrappingcottage.com/cottagecutzmousewithcake.aspx

http://www.scrappingcottage.com/cottagecutzpartyfavors.aspx
http://www.scrappingcottage.com/cottagecutzstitchedrectanglesetbasics.aspx
http://www.scrappingcottage.com/cottagecutzstitchedsquaresetbasics.aspx

Thanks for stopping by today.  I hope you have a fun and creative weekend!

Thursday, August 29, 2019

Birthday Fox!

Hello Scrapping Cottage Fans!

It is Pam creating with you today.

I am continuing to use the dies from the new Birthday Release.  There are so many cute dies that it makes card making for birthdays so much fun.  Today, I am using the cutest fox I have ever seen.  Living in South Carolina we actually have these darling little red fox running through our neighborhood. Now on to the card for the day!
Design Steps:

 1.  Cut out the fox using the Birthday Fox die.  Use rust and tan cardstock for the cut
 2.  Shade the piece with rust ink and then assemble.  Color the nose and eyes with black marker.  Use a white gel pen to add dots to the eyes
 3.  Use a white A2 card base with a piece of DP 4 X 5 1/4 layered on orange card stock.  Cut a yellow striped piece of DP 5 1/4 x 1 layered on orange.  Assemble the card with the striped strip near the bottom of the card as shown above
 4.  Cut out the party hat and package in orange, pink and striped yellow DP
 5.  Assemble the package and hat.  Glue the hat onto the fox's head
 6.  Pop up the package and fox onto the card as shown below.  Stamp Happy Birthday and glue to the front of the card.  Add the rhinestones to finish the card


CottageCutz Products

Have a wonderful day and make sure to get crafty!
Blessings
Pam


Wednesday, August 28, 2019

Fall Card

Hello!  This is Sukie and today I have a fall themed card to share for my design team post.  After such a hot summer, I'm definitely ready for fall which inspired this card!
I found the perfect fall themed papers in my stash.  The colors are so vibrant and fun.  I especially love the yellow and green mixed with the burgundy!
I used a couple of punches from my stash, one to create a border and the other to punch a scalloped circle for my card.
I used the Flatbed Truck with Accessories, Fall Phrases, Pumpkin Pie & Latte and the Mail Tag Set dies to cut out the pieces for my card.
I created my card base with the patterned papers, added the scalloped border and layered the tag on top of the background.  A small twine bow was used to accent the tag.
Next I placed the Flatbed Truck in the center of my card.  The "fall" sentiment was added to the tag along with the tiny pumpkin on the scalloped circle.
Here are the dies used on my card, available in the shop:


Tuesday, August 27, 2019

Sweet Birthday Wishes


Hello Scrapping Cottage friends! Thanks for taking the time to stop and visit with us today. It's Mary Marsh here bringing you the Tuesday edition of the Blog. 

The new release of Birthday dies have been restocked in the online store. So if you didn't get the ones you wanted previously, all 25 designs are in stock. This release is filled with cute little whimsical animals, birthday cakes, cupcakes and birthday phrases. Everything you need to create some outstanding birthday cards.

Today for your viewing pleasure I am featuring the Mouse with Cupcake die. I created this card using the colors from the Splitcoaststampers color challenge #754. I am the hostess of the challenge this week.

I don't have a lot of photos but I will give details on all dies used as well as paper sizes. So let's get started.

Step 1: I started my card with the challenge colors. They are lovely lipstick (red), gorgeous grape (purple) and coastal cabana (tropical green). I used these colors on the mouse apron, the cupcake and the birthday present. I used Ranger multi medium matte to secure.
gorgeous grape, lovely lipstick, coastal cabana
I came across a nice sketch online that I used for my card layout. I kept it on the simple side to allow my mouse image to be the star attraction.
gorgeous grape card base: 4 1/4" x 5 1/2"
designer paper background layer: 4 1/8" x 5 3/8"
coastal cabana striped sentiment panel: 1 5/8" x 4"

Step 2: I used the 4th largest die from the nested wacky stitched circle set for my 2 circles. One is cut in white and I cut another in coastal cabana and offset it slightly. The birthday present is from the Birthday Hedgehog die set.

I stamped the sentiment directly on the striped designer paper in gorgeous grape ink. To finish off the card, I scattered a few gorgeous grape enamel dots.

That's it for this post. I will be back on Saturday featuring another card from this whimsical new release.

dies I used to create card: