

Hello CottageCutz friends! Thanks for taking the time to stop and visit with us today. It's Mary Marsh here bringing you the Saturday edition of the Blog.
It's new release time!!! We have new dies in the online store. It's our Baseball and Golf release with 16 new designs and currently on a 30% off sale. These new dies are so perfect for a masculine themed card.
Or for the kiddos (boys and girls) who are baseball or softball players. Don't forget about the golfers either. If you are a scrapbooker and are putting together the summer season of your child's baseball season, we have you covered.
 Red Z-Fold: 2 1/4" x 8 1/2", score at 1 1/2" & 3”
 Baseball themed Designer Paper: 4” x 5 1/4 - attached with double sided tape.
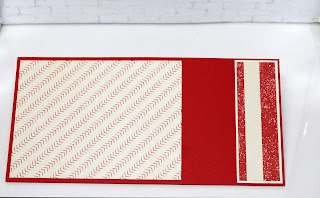
 Now I am going to attach the z-fold panel to the card base. I only want adhesive on 1 1/4" of the long panel. I used a pencil to tick mark the 1 1/4" point and added double sided tape.


 Here is photo of wiper card when it pops up.
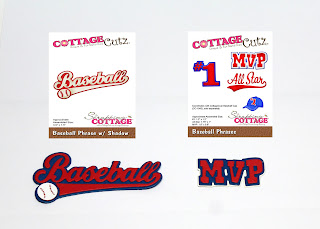
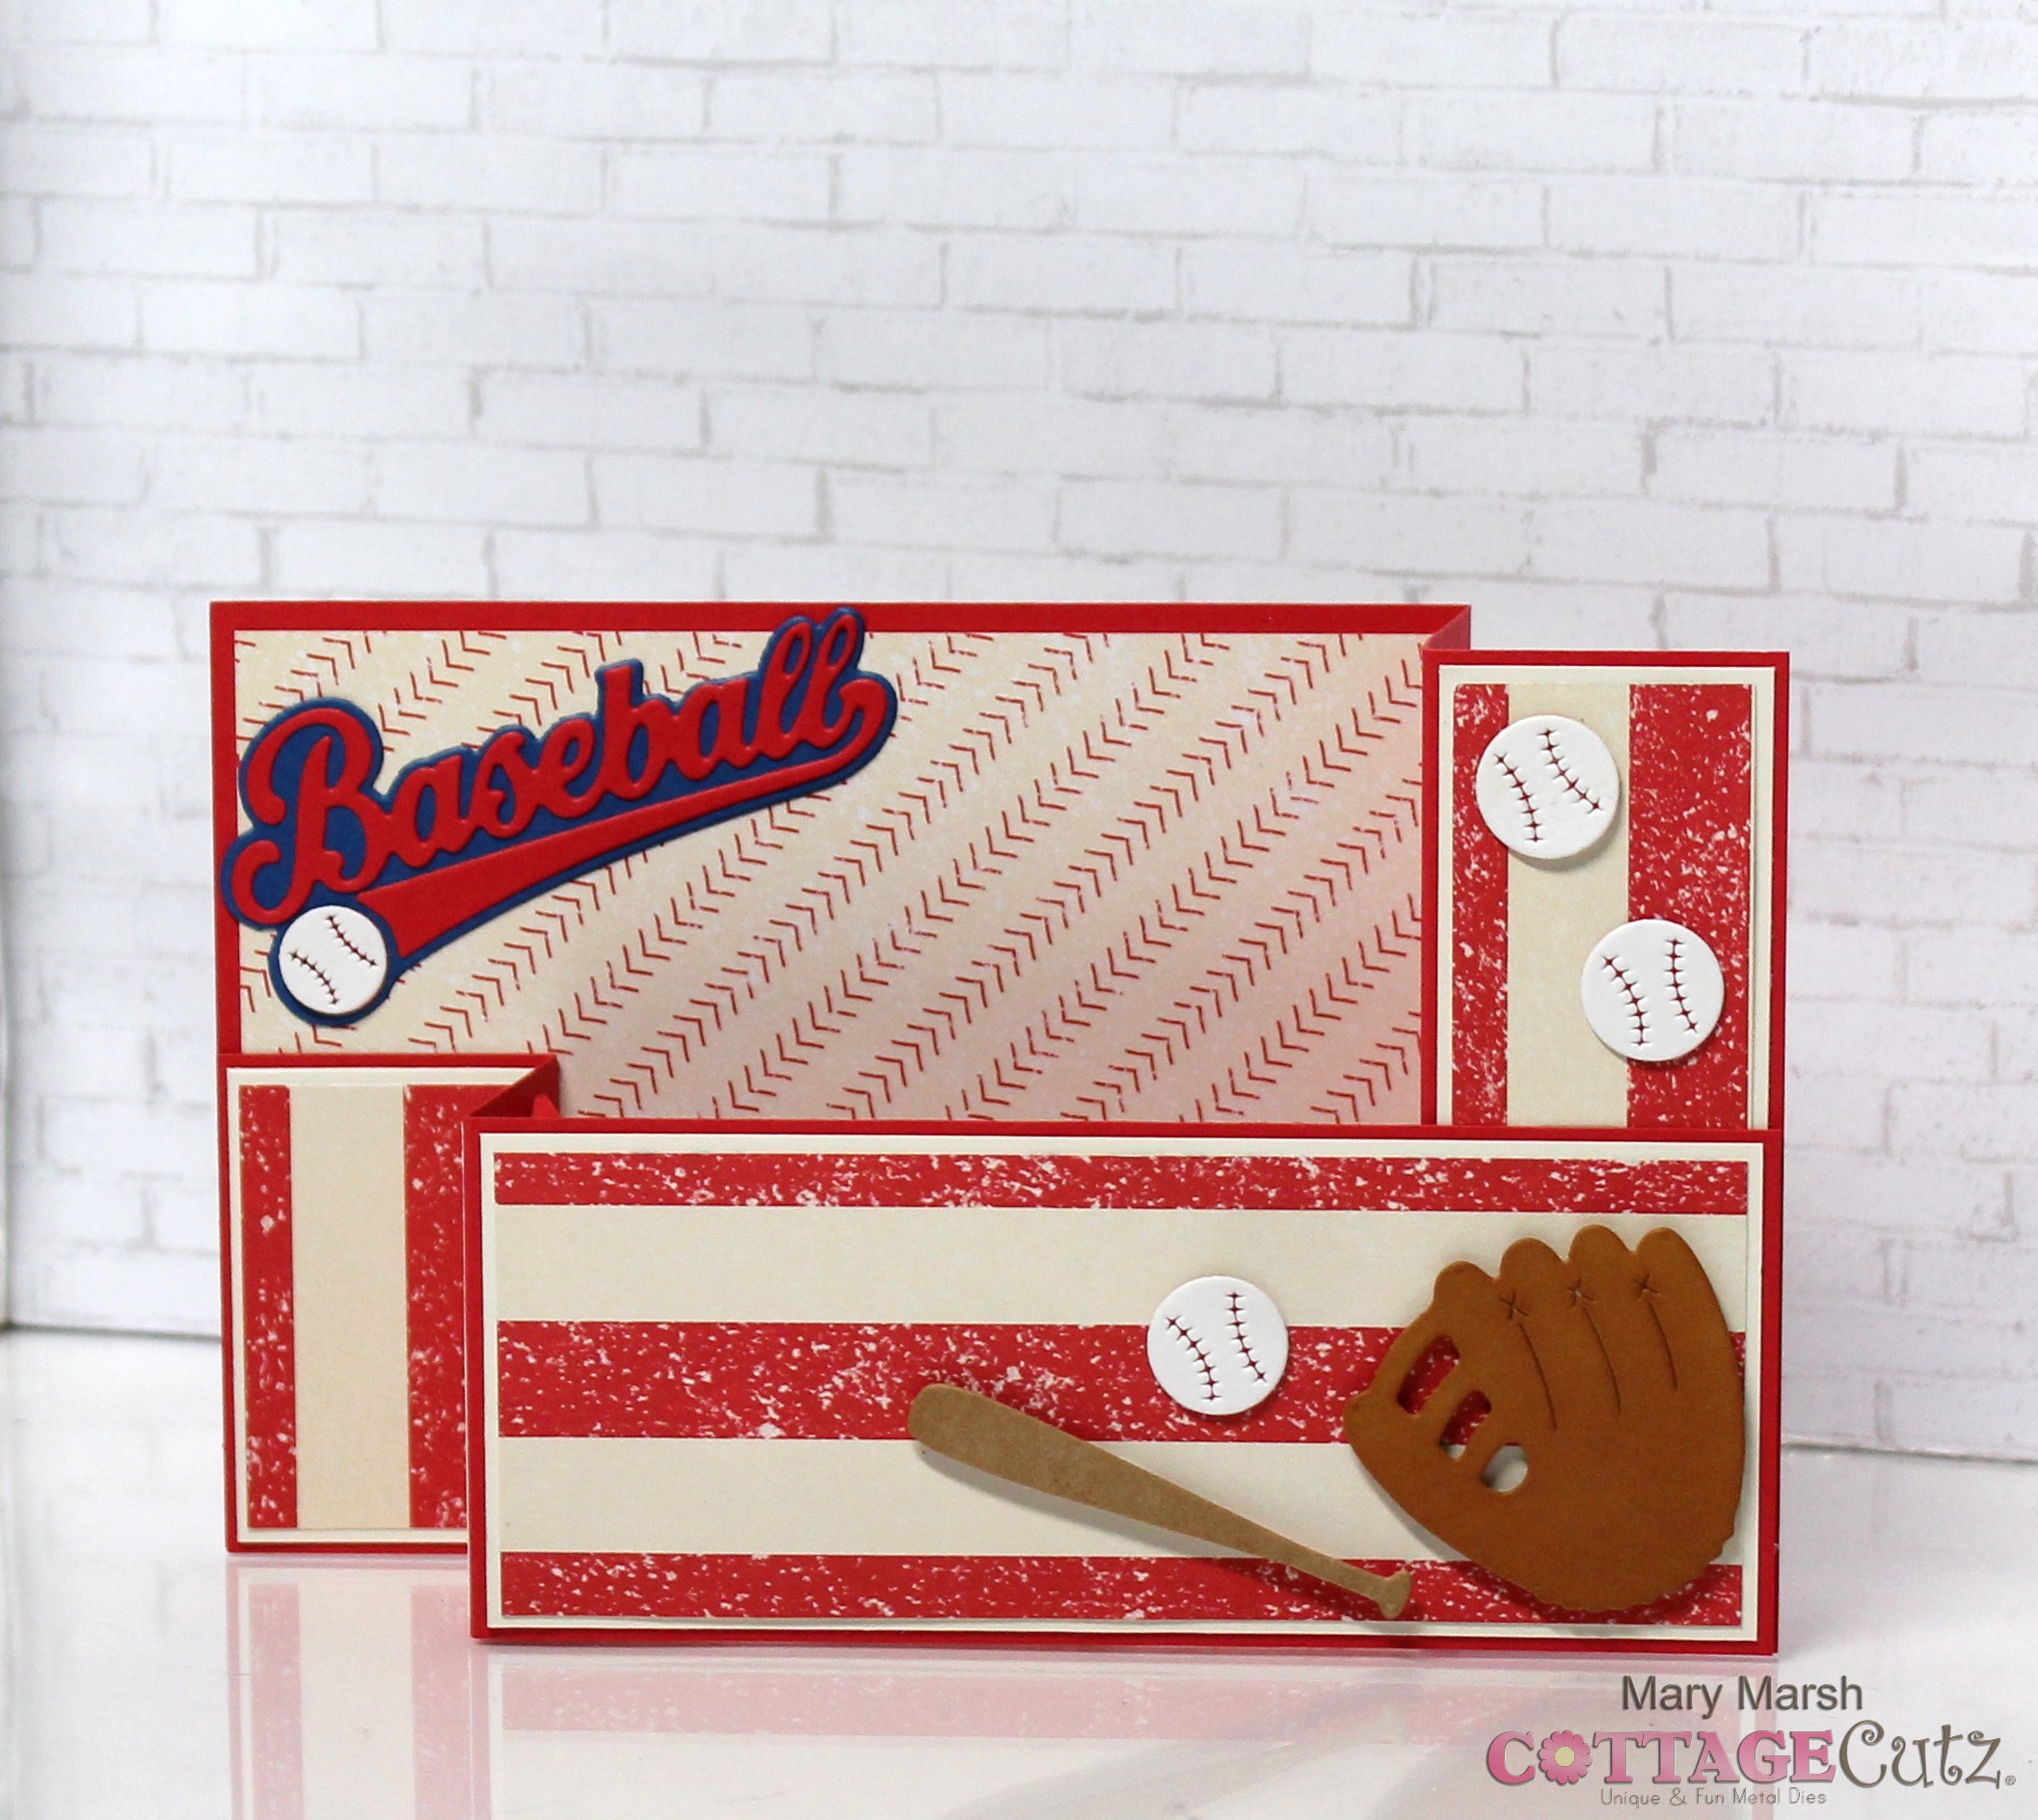
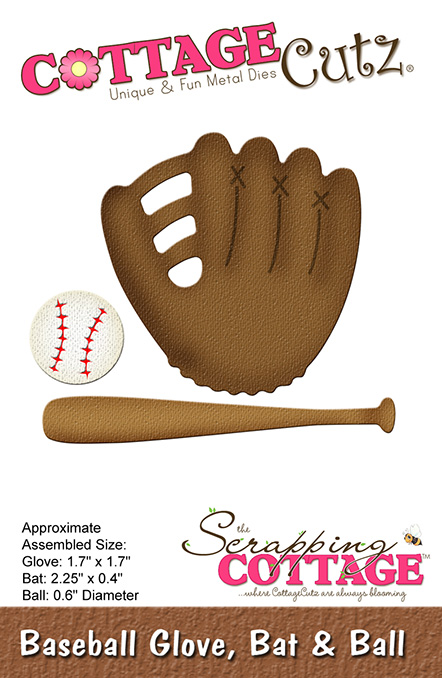
My card today is featuring the new Baseball Glove, Bat & Ball die, Baseball Phrases die and the Baseball Phrase w/Shadow die. I created a fun fold wiper card for my friend's little boy (9 years old) who loves baseball. His birthday is September 4 and when I saw these new dies, I thought of him immediately. He loves baseball and was the MVP for many games this season. So, let's get started with some details of how I created my card.
Design Steps:
I saw this wiper fold technique demonstrated on YouTube so if you like visuals, here is a link.
I started my card by cutting all the cardstock and designer paper needed for this fun fold technique.
Red cardstock base: 4 1/4" x 8 1/2", score at 5 1/2" & 7”


Far Right Panel vanilla cardstock: 1 3/8” x 4 1/8”
Striped designer paper: 1 1/4" x 4 -attached with double sided tape.

Z-Fold Panel vanilla cardstock: 2 1/8” x 5 3/8”
Striped designer paper: 2” x 5 1/4" - attached with double sided tape.


Lined up with right side of panel and secure to card base.

Now I am ready to cut my baseball images. I used a toffee shade of cardstock for glove and sponged with dye and rusty hinge distress inks to get more of a deeper shade. For the bat I used a kraft card cardstock and sponged lightly with antique linen distress ink for a deeper wood shade.
Attached the images to the card base with dimensional adhesive and glue dots.

Next, I cut the MVP and Baseball phrases word from red, white and blue cardstock.

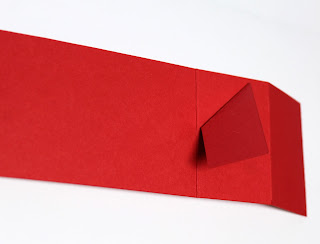
For the wiper mechanism I cut a piece of 1" x 2" red cardstock. Folded the right corner upwards. This is what allows the MVP phrase to move up and down.

When attached it should be just inside the score line and make sure it doesn't extend beyond the front panel. I used a glue dot to secure in place.

You also need a piece of acetate (1/2" x 2") to anchor the MVP phrase. I also secured this with a glue dot.

Now to close the z-fold bridge I used double side tape on the left panel only. You line it up with the bottom of the card base just like on the other side. I added the baseball phrase with liquid glue and a couple more baseballs to finish off my card.

Here is a short video showing the card wiper card open.
Well, that's my sample for today. I hope I have given you an idea for a baseball themed card. See you next Saturday!
dies I used to create card:


3 comments:
Cute pop up card! Love the baseball theme
SO AWESOME Mary!! I love interactive cards so much and fun folds and this has both! :) Great card.
What a cool card Mary! I am so going to have to "case" this! Love it.
Post a Comment