
Happy Monday Scrapping Cottage friends! Kris here, and I hope you had a wonderful summer weekend! I'm actually looking forward to the cooler crisp Fall season which makes it much nicer to get outside and do more...like golfing!
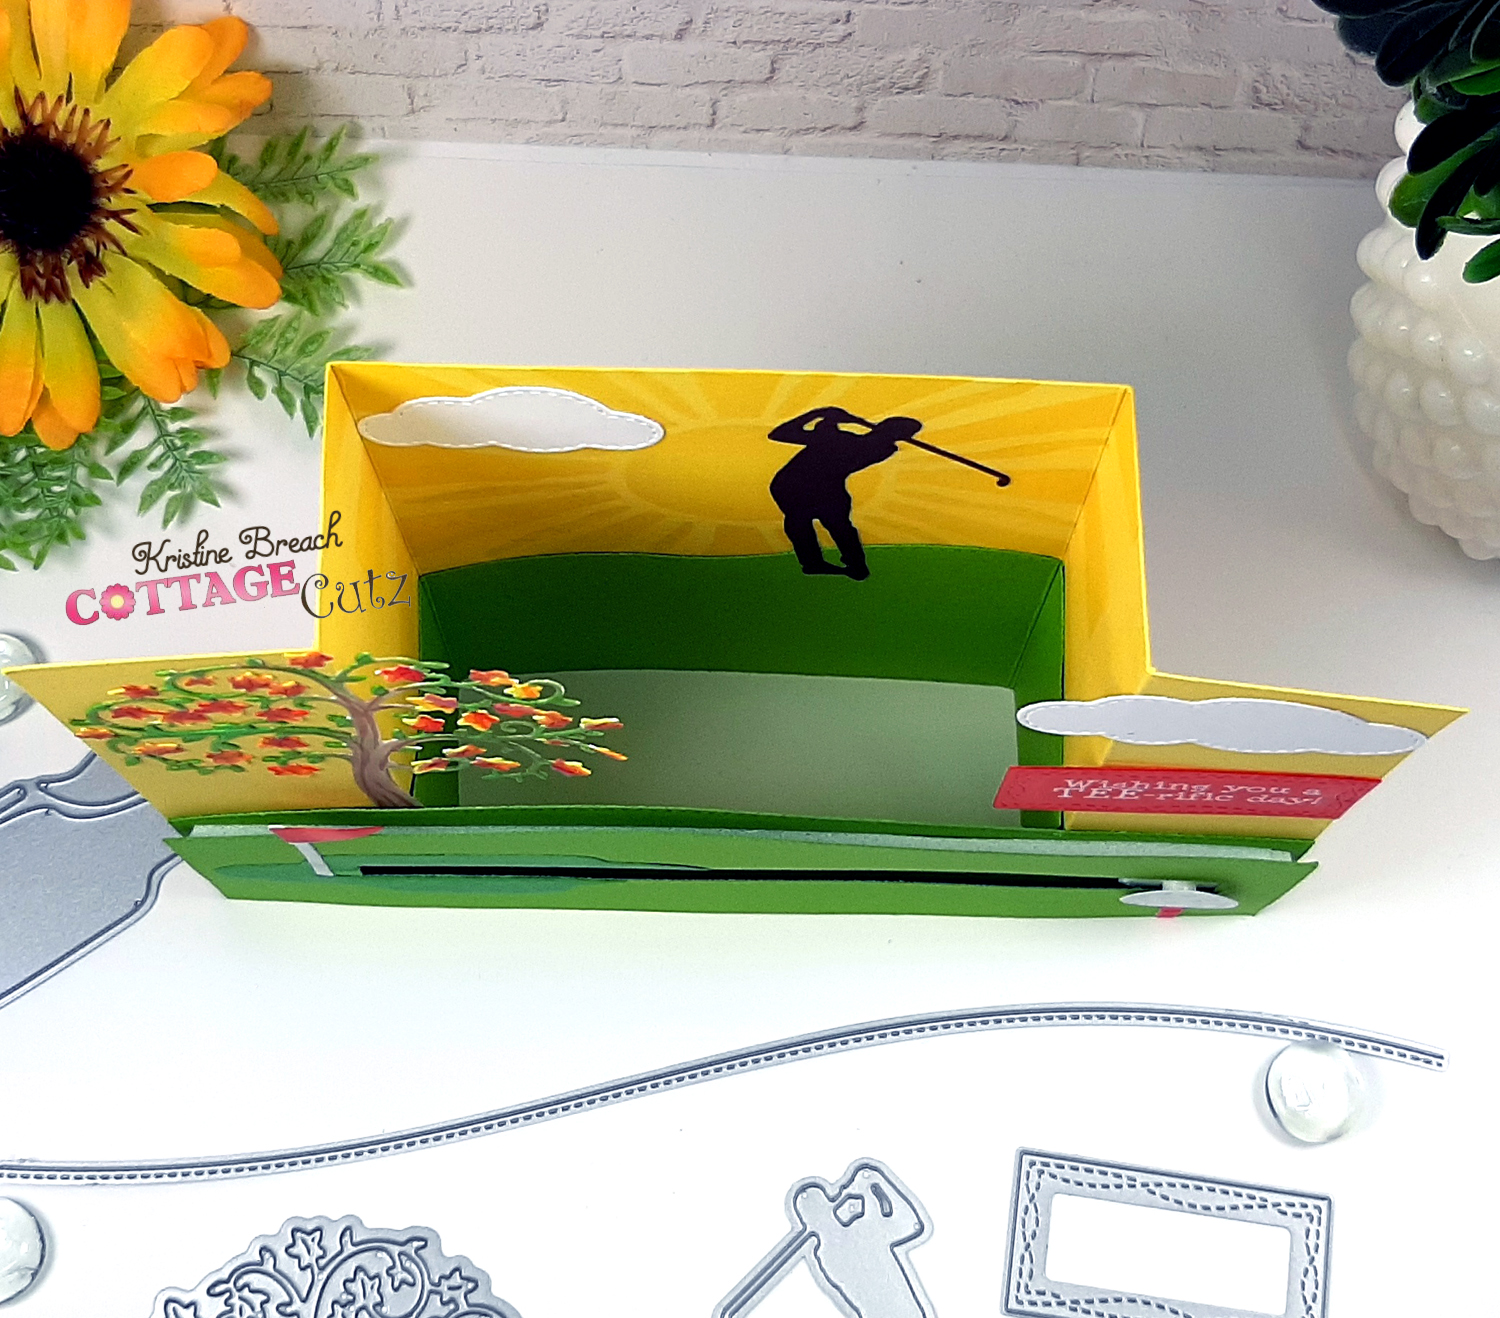
This is another fun fold card & it's interactive!! I combined the bridge fold card and a spinner! And Don't forget - the newest release is BASEBALL & GOLF themed and the individual dies are 30% off!

Here's a short clip of the golf ball spinning ☺
(You can click in the bottom right corner to make it larger!)
All the dies I've used are pictured and linked at the end of my post.
Design Steps:
I cut my yellow card base at 10" x 5"
Scored at 1-1/2", 3", 7" and 8-1/2"
(When it's all put together, it will collapse to a 5" x 7" card.)
Next, I used a sun stencil from La-La Land Crafts and blended classic ink in the same color as the cardstock.

I then cut a piece of green cardstock to 3-1/4" x 7" and cut the top with a die from the Hills Slimline set. I scored 1-1/2" in from each side and adhered to the inside as shown below.

Once I folded the card, I saw that my green ends were slightly over-hanging, so I used my scissors to trim so they were flush with the fold. (see below).


Next, I cut 2 pieces of green cardstock the same size at 2-1/4" x 7" and cut the top of each with the straightest die from the Hills Slimline set - making sure that the 2nd piece has the die exactly in the same position as the first piece. These will serve as my front spinner piece.
I die cut the Putting Green in same green color, then ink blended Mowed Lawn Distress Oxide Ink to make it a bit darker so it stands out.

I then glued my Putting Green to the left side of one of my spinner pieces, with the hole on the left.
Next I die cut my spinner channel using the smallest die from the Nested Rectangles Slimline set. It fit PAR-fectly (there's so many great golf puns!) except that it was a li'l too tall for the size golf ball I was using, so I manipulated the die a bit. I taped the die as shown below, leaving space on the right for my foam tape, and put the top cutting plate down just so it covers the top HALF of my die. And ran it through machine.

Then, I turned my piece around and moved my die down so it was lined up on the sides, and you can see where it cut the first time (see photo below) Then covered just the top HALF again with my top cutting plate and ran it through.
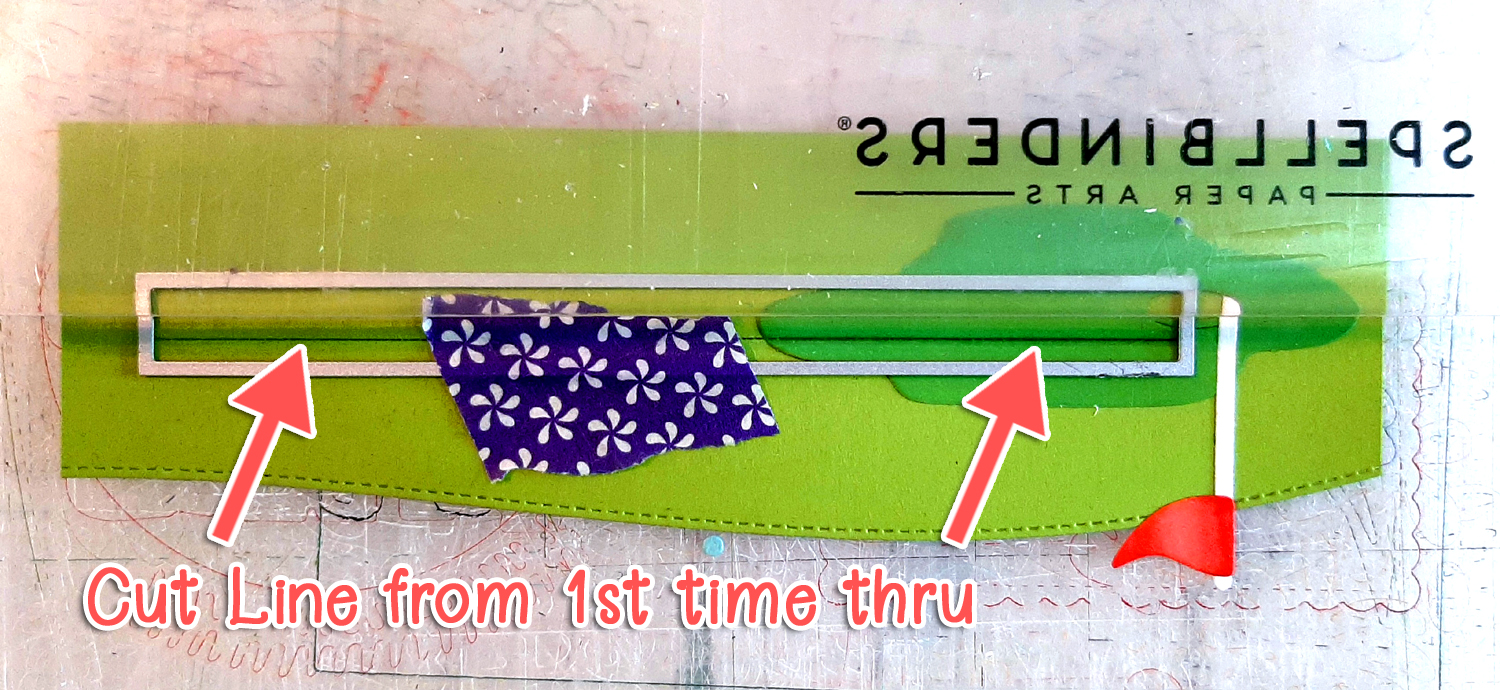
I'm left with a nicely cut narrower rectangle - you can see the difference in the photo below.

I then stacked that top piece onto the 2nd green piece - I did not attach it, just laid it on top. Then I glued that strip that was die cut out back into the opening and lifted off the top piece. (see photo below)
Using the smallest die from the Pierced Circle set, I die cut 2 white circles. I added some grey divots with my Copic marker to make it look like a golf ball.
I turned my top green piece upside down, placed my golf ball centered on the channel opening, and added 1/8" foam strips all around as shown. You don't want to get too close to the ball or it won't spin. (the ball laying there just serves as a spacer so I don't get my foam strips too close to the opening.)

I then added some glue to a small spinner disc and attached it to the backside of my golf ball. I then turned it upside down so the disc is sticking up and laid my front green piece so that the disc is popping up through the rectangle opening. then I added more glue to the top of the disc and attached my 2nd circle on top, lining it up exactly with the front circle (golf ball). Sorry I don't have a photo of this. If you don't have a spinner disc, you can stack 2 foam circles on top of each other.
I peeled my backing off of my foam strips and attached my back green piece to complete my spinner.
I then die cut the TEE (from the Golf Ball & Tee die), colored it red with my Copic marker and glued it on the far right of spinner, under the ball and cut off the remainder of tee. (see photo below)
I die cut the Fall Tree, the Golfer Silhouette and the clouds from the Stitched Sun, Clouds & Umbrella set. I colored the tree with Copic markers, and die cut the golfer from Espresso brown cardstock. I glued all die cuts onto card as shown below. For the sentiment, I printed one I made on computer, adding a red block behind it and making the font white. Then I cut it out with the smallest die from the Nested Wacky Stitched Rectangles set, and attached it to the right panel of card.

I then added glue to the bottom side panels only and attached my spinner piece.

Voilà and done! ☺

and YES! It folds flat to fit into a 5 x 7 envelope! ☺

Products I Used:
I hope I inspired you somehow today to get crafty with your CottageCutz dies!
~Kristine
3 comments:
You created a great funfold card Kristine- A bridge + a spinner – creative idea – love it
Love the movement in your card it is just so cute!
Thanks Mary & Pam ❣ sorry my tutorial is so long! I'll do a simpler one next week 🥰
Post a Comment