Hello CottageCutz friends! Thanks for taking the time to stop and visit with us today. It's Mary Marsh here bringing you the Saturday edition of the Blog.
It's new release time!!! We have new dies in the online store. It's our Baseball and Golf release with 16 new designs and currently on a 30% off sale. These new dies are so perfect for a masculine themed card.
Or for the kiddos (boys and girls) who are baseball or softball players. Don't forget about the golfers either. If you are a scrapbooker and are putting together the summer season of your child's baseball season, we have you covered.
Or for the kiddos (boys and girls) who are baseball or softball players. Don't forget about the golfers either. If you are a scrapbooker and are putting together the summer season of your child's baseball season, we have you covered.
My card today is featuring the new Baseball Cap, Baseball Phrases and Baseball Glove, Hat & Ball dies. I made this one for my precious little California granddaughter who likes baseball and her SF Giants team. So, let's get started with some details of how I created my card.
Design Steps:
I love trying different fun fold techniques. I had this diamond easel technique saved on my Pinterest board and I thought it would work today for my images. I have all the steps and sizes below but if you like watching a video - here it is
I started by picking my card colors. I wanted a pink hat and then I found this pink variegated paper in my collection. I had another matching color of pink designer paper to use for the angle cut.
Card Base: 4-1/4″ x 11″ scored at 5-1/2″ on the 11″ side then scored on the front on the diagonal from the top right corner to the bottom left corner.
This is what it looks like after the score line is burnished. Striped Designer Paper: - 4″ x 5-1/4″ cut on the diagonal the same as the scoring on the front of the card. Attached the designer paper to the card base with double sided tape.
Next, I cut my baseball cap and the #1. I used the largest of the Stitched Rectangle (4 1/4" x 3 1/4") die for the card front. I stamped my sentiments in the pink shade that matched the cardstock and designer papers.
I attached the baseball cap to this panel with dimensional adhesive. Then the panel was attached to the card base with double sided tape. I only taped the bottom right of this panel so when the easel is opened the top left of the panel will move freely.
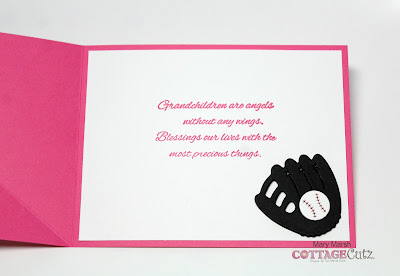
Now for the card inside, I cut a piece of white cardstock 4″ x 5-1/4″. I stamped another sentiment and added the glove and ball as the anchor to hold the easel card when opened.
Well, that finished my card for this week. I hope I have given you a fresh idea for another way to use these new dies as well as a fun fold idea. See you next Saturday.
Dies I used to create card:


3 comments:
Love the pink cap for your granddaughter so cute!
Such a cute card Mary! I loving the pink too.
Oh my goodness... FUN!! LOVE it in pink Mary :) We were thinking alike in our designs this weekend. I'm gonna try a girly one next.
Post a Comment