It is Pam sharing with you on the blog!
Today, I am sharing another whimsical die from our new collections call Magical Fantasy! This group of dies are so much fun to work with because you can really let your imagination go wild! I have created a fun bokeh background for my fairy.
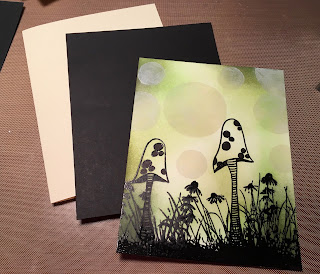
1. Use a 4 x 5 1/4 inch piece of smooth white card stock. Before I stamped I used an embossing buddy to remove any oils on the card stock. Next stamp the mushrooms with Versa Mark ink. I used black embossing powder and heat set
2. On the bottom of the card I stamped a field of flowers and grass with Versa Mark ink. Then I used black embossing powers and heat set
3. Using 3 different colors of green ink to create the background by sponging it on
4. Get some unwanted card stock and the Cross-Stitched Circle dies to create your 3 different size circle stencils
5. Use white opaque ink and a dabber to ink inside the different size circles. I just placed the circles randomly on my background
6. Using the Magical Fairy die cut out the fairy in black then trace her dress to back it with black card stock
7. Stamp your sentiment and layer it onto black card stock
8. Use a cream colored A2 card base and a slightly smaller piece of black. Glue the black to the card and then add your stamped background. Place your fairy on top of the tall mushroom add the glitter to the wings and mushroom stem. Then add the sparkle stars and white dots to the sky. Glue down your sentiment and your card is complete
Make sure and stop by our sale this brand new collection is 25% off! You really don't want to miss out on this fantastic sale!
Blessings
Pam


2 comments:
Love the bokeh technique you used on your background Pam - so perfect for a fairy image
Fabulous card Pam! I love all of the different techniques you used on your card, it all came together beautifully!
Post a Comment