Hello Scrapping Cottage friends! Thanks for taking the time to stop and visit with us today. It's Mary Marsh here bringing you the Saturday edition of the Blog.
If you haven't seen the 36 new Spring dies, take a peek at them in the online store. You definitely won't be disappointed.There are a variety of designs so perfect for Easter or Spring card making.
For my card today I am using the new Spring Potted Bunnies die. This is such a cute die and would be great for an Easter card for your special little one. So let's get started with some details on how I created my card.
Step 1: As I have said so many times before, having a layout in mind at the card start is always a big boost for me and jump starts my creative thought process. I love working with the sketches that are out there in the online world. That way I can just choose the card colors and designer paper and I am good to go. I liked this unique sketch #743 on Splitcoaststampers. I thought the potted bunnies would look so cute across the rectangle panels.
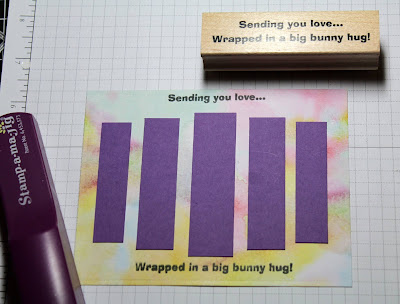
I used a watercolor look designer paper for the background and paired that with a grape cardstock base. I cut the rectangle panels (element 2) in the same grape cardstock in graduated sizes. I started off with smaller panels but once I cut the bunnies I realized they needed to be just a bit wider and longer. The sizes below are the ones I ended up using.
Grape Cardstock Base: 5 1/2" x 4 1/4"
Designer Paper Panel: 5 3/8" x 4 1/8"
Rectangle panels: 5/8" x 2 1/2", 3/4" x 2 3/4", 7/8" x 3"
Next I moved onto cutting the bunnies. I used cardstock that I thought matched the designer paper. The bunny pots are cut in coastal cabana, highland heather and daffodil delight cardstocks. The bunnies are a naturals white. It has a pale gray hue to it so I like using it for bunny images.
Step 2: Now that the card elements are cut, I am ready to start card assembly. I first attached the rectangle panels with double sided tape.
I wanted to stamp a sentiment at the top and bottom of this image panel. I settled on this one because it worked nicely as a split sentiment. I used my Stamp-a-Ma-Jig for help in stamping as well as placement.
I attached the bunny images with dimensional adhesive. I didn't want them flush against the rectangle panels. It also allowed the rectangles to be seen a bit more.
The image panel was attached to the card base with double sided tape. To finish it off I scattered a few light green enamel glitter dots. And, that completes my sample for this week.
I hope I have given you an idea for a way to use this new die. There is still time to order it and have it in time for Easter card making. See you next Saturday with a sample of our new Magical Fantasy release. They are currently on sale at 25% off. Also, check out the big anniversary sale. You can get some real deals on CottageCutz dies up to 70% off retail.
die I used to create card:


4 comments:
Very cute card! Those bunnies are so adorable and I love how you added them to the panels!
Love this cute bunch of bunnies! Adorable card Mary!
Adorable card Mary! Love these potted bunnies!
This card looks very cute.
Post a Comment