Wednesday, November 23, 2011

Black Friday Sale!!! New Die Release

We're so excited to present you with the 2011 Black Friday Winter Release of 8 new dies.
Our Design Team has created a card or project for each of the new dies.


Jingle & Twinkle Elves


Christmas Fairy

Snowflake 1 & 2

Chilly Willy Penguin

Ginger Boy Chef

Ginger Girl Chef


Skating Polar Bear

 Cookie Cafe


We hope you enjoy our new winter release!
Happy Shopping :)

Tuesday, November 22, 2011

Mr. Chef Mouse & Snowlady Chef

Hello everyone and happy Tuesday to all! Sorry im a little late this morning posting, i havent felt well for the last few days. Anyways I do have a couple of DARLING Cottage Cutz to share with you today! :) 
First I have Mr.Chef Mouse, he is sooo SWEET I really wanted to make a Recipe card for todays post  and just didnt have enough energy to do it, so instead i figured i would share what i had put together :)  Now I used Tim Hotlz distress inks for most of his highlighting, the bow,bowtie,and spatula i colored with copics. His chef cap, and his apron i distressed with antique linen, Mr. Chef was cut out with grey card stock and then distress a tad with a shade of blue. For his green outfit i used a tim hotlz green that i had next to me.

I cut all her pieces out with a wide column card stock, thats what gives the lines in her. Next I distressed her with a blue ink, for her apron i distressed with a pink and same for her cupcake top. The heart,bottom of apron,holly berry,cupcake wrapper,and wooden spoon are all colored with copics. Her pan hat is colored with 3 different grey copic markers. Lastly I added some stickles to her pearls and the cupcake icing.

I hope you all have a wonderful Thanksgiving, and thank you for stopping by!!
Hugs to all,
Cheryl


Monday, November 21, 2011

You melt my heart !

Hello from Singapore, everyone ! 

Today I want to share a Christmas card project 
where I explore using a new medium to me - 
that is using chalks to color die cuts cut out of white cardstock.  


For my snowman diecut here , I've used Pebbles' Inc light blue chalk to add
a little subtle shading to the body of the snowman, black chalk for the top hat and blue for the snowman's scarf . 
I also used 2 shades of green chalk on the pinetree
For more definition on my snowman's scarf, 
heart, hands and red band on the top hat, 
I've used American Craft's Glitter Gel pens . 

I so love this discovery of using this 
new combo of using chalks with gel pens on my diecuts. 

The patterned paper used here is from the Winter Wonderland line


Happy Crafting ! 


Sunday, November 20, 2011

Santa Treat Box

 This week I made a project using the Cottage Cutz Santa Peeker die. I wanted to trim a triangle treat box. I thought the shape of the Santa worked well with the triangle. I added a belt and buckle to the box. The handle was made with a metallic red pipe cleaner and I wrapped the pipe cleaner with the new Martha Stewart metallic eyelash yarn.

 The Cottage Cutz Santa was highlighted in Copic markers. If you can see above I used #C5 grey (left) than blended it out with #W0 grey (right). . than went back with the blender and worked it all out. Mrs. Clause likes a little grey in Santa! She thinks it makes him look a bit frisky!
 These two cards were a little demo, make n' take class I did. I needed two simple cards . The first is using the Cottage Cutz Ornate Poinsettia die. You can't tell from the photo. . but the gold and the white is sparkle paper. I used Stickle red for the berries.
 This card I used the Cottage Cutz Snowflake Doily and the Cottage Cutz Snow Globe Accessories die.
 This is a second snowflake I made, I really liked the tree on the other side of the snowman away from the dark scarf.
Thanks for stopping by. .. .  .Barry

Saturday, November 19, 2011

You're an Angel

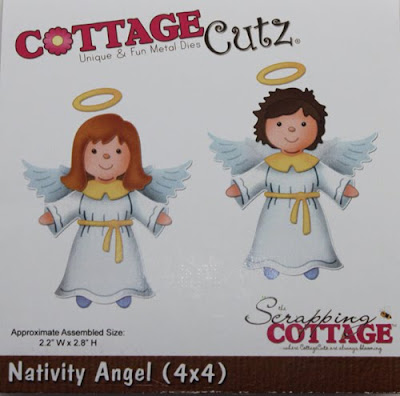
I'm so excited that CottageCutz dies have ventured into people. The faces are so adorable!
I made this Christmas card with the Nativity Angel 4x4 die.

This die (as well as all the others...) makes such cute gift tags or cards for holiday giving.
Here's a closer look at these darling angels.

I also used the Boxwood Vine Wreath to get my banner and Merry Christmas stamp. I have to say as I opened this die to put on the foam I thought WOW! this die is loaded with goodies, it has so many possibilities!
I think winter has hit here in Utah. We had our first snowfall last night.
I hope you have a wonderful Saturday!
Kay

Thursday, November 17, 2011

My Little Shoe Box Thank You

I'm loving these sweet little birds, clothes and flowers in the Laundry Line Die Set. So many options and oh so sweet. These My Little Shoebox inspired dies are perfect. Hi everyone, Erika Taylor here today to share with you, and card I created using the Laundry Lines Die Cuts from The Scrapping Cottage.

For this card I used some wonderful MME and Teresa Collins papers and I absolutely adore how these little birdies and dress turned out. Super sweet indeed.


Super cute indeed. Check out all the wonderful My Little Shoebox inspired dies that are available at The Scrapping Cottage. There is one for everything I think. Thanks so much for stopping by today. Hope you all have a fantastic Friday.

Don't forget to take a try at the new Tic Tac Toe challenge here too. You can find it Here

Until next time
Toodles
Erika Taylor


Cards Made With My Little Shoebox Designs

Good Morning!  Today I have a couple of cards to share using some My Little Shoebox papers and the MLS Cottage dies.  I used the Ornate Circle Frame on both cards.  The silhouette was hand cut from some MLS designer paper and framed with the ornate die cut frame.  I used ribbon and lace to finish the card.
For the next card I used the Orchid Flower die.  I love this die.  I think the flower is really beautiful and easy to assemble.  I also used MLS designer paper on this card as well.


I added another card using the MLS Summertime fun.  I hope you have enjoyed my cards for today.

Have a great day!
Hugs and smiles,
Janice

Wednesday, November 16, 2011

Be Merry

Good morning!  Lorie here today to share a "less is more" card, if you will.  I had some pretty ribbon and flourish embellishments picked out to put with this die cut image, but after choosing this paper that acted as a beautiful canvas background I just couldn't add those embellishments.
 
Using the Cottage Cutz Whimsical Tree die, I cut the image with white card stock, assembled, then colored with Copic markers.  The rhinestones were all added by hand, and on the star, I added some Stickles for sparkle
 Here's a closer look at the detail and sparkle.  Quick, simple, and outside of the box for me, because I do love my ribbon and embellishments.  Not this time, though.  Less is sometimes very beautifully... more.  So happy you could drop by today.  Have a blessed day!


Tuesday, November 15, 2011

Thanksgiving Basket

We've been having so much fun showing you great creations to make for Christmas, but I wanted to sneak a Thanksgiving project in here before we missed it! I have always had a thing for cornucopias - so this Cornucopia die was a must have for me! If you start looking at all of the mini-shapes that are a part of this set (leaves, corn apples, pears, etc.), I'm sure you can start thinking of all kinds of ways to use this all year long. I cut all of the pieces out of Kraft cardstock, and then colored them with Copics. I think starting with the Kraft, gave everything a nice, rustic look.


Don't you think this would make a great decoration for Thanksgiving?

hugs,
Gini

Monday, November 14, 2011


I'm super excited to share this little box I created this weekend...I LOVE IT!!! It's from a tutorial I saw on Splitcoaststampers "Secret Box" . I've used My Little Shoebox papers from the Audrey Collection and the really cool part is the matching dies from Scrapping Cottage. Honestly it's just so much fun to create. Now let me show you everything this little box has going on.
Top of Box


Box Opened, Revealing Drawers


Front Side

Side

Side

Back with stamping and Dies
Isn't that just the coolest!!! Now here is a list of all the dies I used from Scrapping Cottage if you wanted to make one of these for yourself.
See ya soon,