Showing posts with label sympathy cards. Show all posts

Monday, February 20, 2023

Heartfelt Sympathy

Hello and Happy President's Day crafty friends! 

Kris here sharing some inspiration with you, but first.... we have a HUGE President's Day Sale going on right now thru Friday, 24th!!  Save up to 70% OFF on selected CottageCutz dies in the store! Shop early for best assortment!


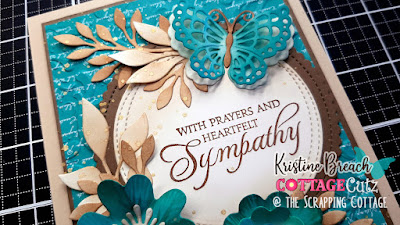
Today's card features flowers & leaves from the new Flowers & More Release -- which are still 30% off -- a great deal and these are a must-have for your all occasion stash!  All the CottageCutz products I've used on this card are pictured and linked at the end of my post.

CUTTING & SCORING:
  • Sand-colored Card Base = Cut 9-1/2" x 6" - then score the longest edge at 4-3/4"
  • Patterned Paper (Teal) = Cut 4" x 5-1/4"
DESIGN STEPS:

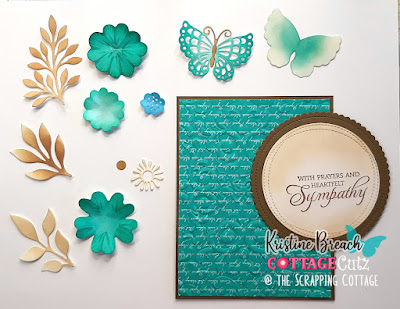
1.  I embossed my teal patterned paper with a Parisian 3D embossing folder, and attached to Suede card panel (4-1/4" x 5-1/2")


2.  I stamped a sentiment on my white circle, then sponged some Gathered Twigs distress ink to tone down the white.  I glued it onto the scalloped circle, then onto my card front, over to the right edge.

3.  I die cut Flower 3, Flower 5, Leafy Branches 1, 2, and 3, and the Butterfly Kayla from white cardstock and then added distress inks to color them; Gathered Twigs for branches & butterfly body.... Peacock Feathers for the blossoms and butterfly wings... Broken China for smallest blossom center.  


4.  I figured out placement of everything and glued in place, then adhered to center of my sand-colored card base. 

5.  I then spattered some metallic gold acrylic paint over my leafy branches (mostly).  I love the look this gives for a nice finishing touch.  


Here's one more look of the finished card...


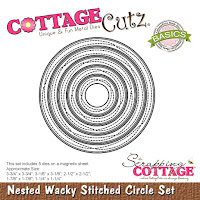
COTTAGECUTZ PRODUCTS USED:


Want to watch CottageCutz designers in action? 

Follow the CottageCutz YouTube channel here.

~Kristine


Saturday, February 11, 2023

Flower 7 Sympathy Card

Hello CottageCutz friends! Thanks for taking the time to stop and visit with us today. It's Mary Marsh here bringing you the Saturday edition of the Blog.

We have a brand-new release of dies in the online store. It's our Flowers & More release.  The individual dies are currently on sale for 30% off. This release has what we are calling "simple cuts". Meaning not as many pieces to put together so they assemble quickly.

Today for your viewing pleasure, I have used the Flower 7 die to create a sympathy card. I never seem to have any of those style cards on hand when I need one. Let's get started with some details of how I created my card. 

Design Steps:

I already had the designer paper pattern in mind so I wanted to use a layout that would allow the paper to be seen. I settled on the layout I used last week for my card. You can see that one here. The layout is from Splitcoaststampers sketch challenge #787. Made a couple of minor changes to the layout. I decided to eliminate layer #4.  I wanted my white flowers on the peacock background. 
I chose this pretty floral pattern paper as the background for my sympathy card. 

Peacock Card Base: 4 1/4" x 5 1/2"
Designer Paper Layer: 4 1/8" x 5 3/8"
Peacock Layer #2: 3 1/8" x 4 3/8"

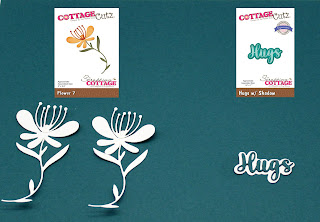
Next, I cut the floral image. I cut these in white cardstock. I liked the contrast of having the darker blue-green background against the white flowers. For a sentiment, I cut the hugs phrase from the Hugs w/Shadow die. 
Now that my panels and images are cut. I am ready to start my card assembly. I started with the image panel. The floral images are attached with clear drying glue and the Hugs phrase with mini glue dots. I had a pack of white sentiment strips with gold lettering that I thought would work to accompany the Hugs phrase. I chose the "from the heart".
For layer 3 of the sketch, I was going to use ribbon and then decided to cut a 1" strip of a pear green cardstock and embossed it with a small branch folder.  This way the image panel would lay flat on top of it. My cards are always a work in progress.
I attached the designer paper layer panel to the card base with double sided tape. The embossed panel -element #3 of the sketch is also attached with double sided tape. 
I attached the image panel to the card base with double sided tape. I added 3 white enamel dots to the corner instead of the image panel base. Sketches are a starting point and as long as they end looking similar to the layout given a few changes are okay.  
I decided to finish off the inside of my card as well. I stamped my sentiment, added a 1" piece of the designer paper and another flower. this flower I cut from cardstock that matches the designer paper. 
That's it for me for this week. See you next Saturday.

dies I used to create card:


Wednesday, January 11, 2023

Empathy or Sympathy Card


Happy New Year!   I am happy to be back with you today after a busy Christmas season.  Today, I am sharing an empathy or sympathy card.  These are the type of cards we don't like to make but unfortunately are needed.  I love the classic elegance of this card.  If you don't need an empathy or sympathy card in your stash, you can use the card's basic design for a birthday, anniversary or wedding card.  The sky is the limit. 

All of the specific design details can be found on the CottageCutz YouTube Channel. I will also be giving away the beautiful "Holiday Dove w/Floral" die.  The die was created for the Christmas Part II release, but as you can see the addition of the dove is perfect for the theme of my card today.  

I have linked all the beautiful dies I used on my card below for easy shopping.  Thank you for stopping by to take a look at my card.  Until next time....Marla