Hello CottageCutz friends! Thanks for taking the time to stop and visit with us today. It's Mary Marsh here bringing you the Saturday edition of the Blog.
It's new release time!!! We have new dies in the online store. It's our
Baseball and Golf release with
16 new designs and currently on a
30% off sale. These new dies are so perfect for a masculine themed card.
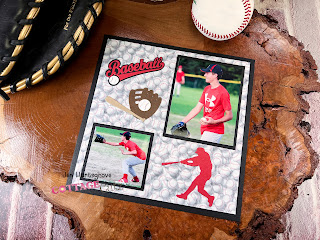
Or for the kiddos (boys and girls) who are baseball or softball players. Don't forget about the golfers either. If you are a scrapbooker and are putting together the summer season of your child's baseball season, we have you covered.
My card today is featuring the new
Golfer Silhouette,
Putting Green,
Golf Cart and
Golf Bag & Clubs dies. I made this for my hubby's friend. He has a September birthday and is also an avid golfer. So, let's get started with some details of how I created my card.
Design Steps:
I love trying different fun fold techniques. I ran across this one while perusing Pinterest one night. You know how that can be! I thought the fold would be great to show off some of the golf dies.
I started by selecting my card colors and designer papers. I decided on these ones that had a masculine appeal and also the one pattern looked like golf balls. At least that's what I thought (LOL)!!!
Here is a diagram of the cardstock size and where it's to be scored.
Fold both these panels into the center and burnish on the folds. Added a piece of white cardstock measuring 4 1/8" x 5 3/8" to inside of card. This will be decorated as well.
Next, I cut the designer paper for the front panels. On the lower panel I used the striped paper and cut it at 2" x 4". The top panel I used the "golf ball" paper and I cut it at 3" x 4".
For my image panel I used the 2nd largest (2 1/2" x 3 1/2")
Stitched Rectangle Die and cut it in red cardstock. I used the 3rd largest (2 1/4" x 3 1/4")
Rectangle Die and cut in white cardstock. I stenciled some clouds and added some grass using the
Spring Grass die. It's an older die but still available.
I cut my golfer silhouette in navy blue cardstock and used dimensional adhesive to secure to card. On the image panel, only use adhesive to the top part of the panel to allow the card to open.
Normally I don't do anything to an envelope, but I am not mailing this card. It will be hand delivered. I already had the golf card die cut and it didn't work on the inside of the card. So, I decided to use it on the envelope and also added the word phrase "par". It was cut from the
Stitched Alphabet die.
To complete the front of my card, I added a "happy birthday" phrase. I stamped on white cardstock and then added blue and red flags for interest. Well, that's it for me for this week. see you next Saturday.
Dies I used to create card:


