Sunday, February 28, 2021

Spring Window


Hi!

It's Anja here. I have a spring inspired card for you today.

For this card I used: 

- Cottage Cutz dies (Spring Window w/Vine, Spring Watering Can, Daffodil Duck, Spring Grass),

- Distress Inks,

- white card base (11x14,5 cm),

- white card stock for die cuts and background (10,5x14 cm),

- embossing folder (bricks),

- silver pigment ink,

- scissors,

- pencil,

- yellow liquid drops,

- paper glue. 


First I made a stencil for the window. I cut all the inner parts and used the frame to draw the window on the background paper. I used scissors to cut it out.

Next I embossed the background. I used grey ink to color the folder before embossing and again to emphasize the edges.

Then I colored the window. I also used the cut frame. I glued the whole window on the back of the background and the frame on top.

Next I cut and colored the can, flowers and all the other greenery. I cut two cans to gain some dimension.

Then I arranged all the parts on the card base and adhered it. Last I added liquid drops to the middle of the small flowers and let it dry.

And my card was done.


Before I go I want to invite you to The Scrapping Cottage online store. All the dies I used for today's post are part of the Spring Sale.

Have a nice Sunday and see you again next week.

Anja Z. 


Cottage Cutz dies I used for today's card:


Saturday, February 27, 2021

Happy Bee-Day

Hello Scrapping Cottage friends! Thanks for taking the time to stop and visit with us today. It's Mary Marsh here bringing you the Saturday edition of the Blog. 

We have a brand new release of dies in the online store. It's our Spring Release with 22 new designs. Everything you need to create Spring, Easter, Birthday, Mother's Day, Father's Day, Thinking of you cards and so much more. 

The Design Team has started showing samples using these new dies. So if you haven't seen them check here, here, here and here

They are currently on a great sale at 60% off, if you buy the entire bundle or 25% off individual dies. There is also a big Spring sale going on with up to 60% off select dies. This ends tomorrow night at 9:00 pm PST so hurry to make your selections today. 

Today for your viewing pleasure, I am featuring the new Mouse w/Flower Cart die. I created a birthday card for my friend's March 20 birthday. It's the first day of Spring so I thought I would give her some Spring flowers (paper that is).

I decided not to use the flower cart for this card. I wanted a playful look with the mouse and bees. So let's get started with some details on how I created this card.

Design Steps:
I already had my colors selected for this card. It's a little sneak peak of the upcoming color challenge on Splitcoaststampers. So I decided to feature this new Mouse die and then I needed a layout. I found this one online. I loved all the layers so I went with it.
Since the colors were pre-determined, I looked for designer paper for the background layer. I chose this striped pattern. The 3 squares are cut from a bright pink cardstock using the 4th smallest die from the Square set
Then for the center layer I decided to emboss some white cardstock. 
For the circle I used the 4th largest die from the Stitched Circle set. I stenciled some clouds and grass for added interest. Then I stamped my birthday sentiment. 
Next, I cut my mouse, flowers and bees images using various colors of cardstock. 
Now that my elements are all prepared, I am ready to start card assembly. I attached the striped layer to the card base using double sided tape;
...then the embossed panel and the squares. 
I added the circle and the flower pots using double sided tape. Then for my mouse image I used dimensional adhesive. For the bees I rolled some glue dots to lift them off the background slightly.  

And that completes my card. I hope I have given you an use for a way to use this new die.  See you next Saturday. 

dies I used to create card: 


Friday, February 26, 2021

The Sky's the Limit

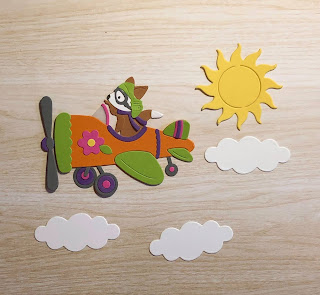
Happy Friday!  It's Jeanne today and I have a fun card using the Fox in Airplane die from the new Springtime release.

This little pilot really caught my eye.  Not only do we have a few pilots in our family, but this works well with encouraging or congratulatory "sky high" type sentiments!

 I started with a sketch from Splitcoaststampers that I rotated 90 degrees.

I went through my scrap box and picked out scraps that coordinated with the papers I wanted to use. Then I cut the pilot and plane from the Fox in Airplane die and the sun and clouds using the older Spring Frogs die.  I used vellum for the windshield.

My card and base is 5 1/2 x 5 1/2 inches.  I cut my base panel from striped paper and two other squares 4 1/4 inches square and 4 3/8 inches square.

I glued the two small panels together and added my sentiment strip (3/4 x 5 1/2 inches) and sun to the panels.

 I trimmed my sun flush with the panels...

... then after gluing that to the base panel, I added the clouds and trimmed the banner flush with the base panel. 

 To add dimension I popped up the plane using foam strips.  I am one of those who uses A LOT of foam strips.  I like my popped up images to feel solid.  But this is purely a personal preference.

 My pilot is taking to the skies!

This die and all the new Spring release dies are on sale right now!  They are 25% off and 60% off if you purchase the entire bundle!  There are so many cute dies - from bunnies to flowers to gnomes!  Click here to go to the store.

Dies used:


Thanks for visiting today!  I hope you have a fun and creative weekend!


Thursday, February 25, 2021

Sending Hugs

Hello Crafty Friends

It is Pam sharing with you on the blog today!

Our new release is called Spring Time!  There are 22 designs and it is everything from Bunnies to Gnomes!!  It is on sale right now in the store.  So head on over and check out this fantastic collection.  You will not be disappointed in fact you will want every single die! 

For today's card I am using Cat in Spring Window.  This card is purrr-fect for sending paper hugs!


Design Steps:

1.  Using the Cat in Spring Window die cut out the pieces in pink DP (Curtain), pink, purple, light purple, yellow, green, and gray, light pink for behind the window (I also ran it through a striped embossing folder and lightly sponged it with TH ink.  Assemble the pieces using a fine tip glue
2.  Using a TH brick stencil and light pink ink stencil in the background on a piece of white 4 x 5 1/4.  The base is an A2 white piece of card stock
3.  Round the corners of your front panel and the corners of your card base.  Ink around the edges of the panel.  Pop up the window, shutters and the window flower box onto the brick background

4.  Add a pink ribbon around the panel tied in a square knot.  Glue the panel to the front of the white card base.  At the least minute I decided to add a little grass to the bottom of the card.  For the grass I used the Spring Grass die and green card stock

CottageCutz Products


As always thanks so much for stopping by and please check out the sweet spring release in the store are ready for you to have some fun!

Blessing and Take Care
Pam


Wednesday, February 24, 2021

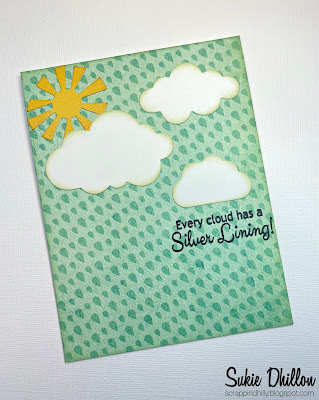
Every Cloud has a Silver Lining!

Hello!  This is Sukie and today I'm sharing a card for my design team day.  Cottage Cutz has a brand new Springtime die release with 22 die sets and they are absolutely adorable! Once again, there's quite a variety of dies which are perfect for those all occasion cards and some Easter creations.  The best part is that they are currently on sale!

The inspiration for my card was the adorable raindrop paper. I die cut the Spring Flower Parasol from card stock and adorned it with some flowers and leaves from the Spring Flowers in Pot die set.  I also cut out some Clouds & Sun.
Next, I created my card base by adhering the raindrop paper to a standard A2 sized card.  I stamped the sentiment directly onto the card panel.
The sun was placed in the upper left corner of my card and the largest cloud was adhered next to it overlapping the sun a bit.
Next came the two smaller clouds, they filled up the empty space above the sentiment.
The parasol was anchored in the bottom corner of my card.  I really like the pop of yellow flowers, they add the perfect amount of cheer to this motivational card!
This card came together quickly and was a delight to create with the newest Cottage Cutz die release.
Here are the die sets used on my card, available in the store: