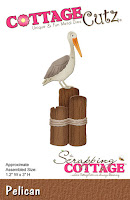
It has been so hot and humid in the Eastern U.S. that my mind keeps going back to our vacation at the beach a couple of weeks ago. So today for your viewing pleasure, I am featuring a beach themed card using dies from the March Nautical release.
You can create amazing cards with a combination of dies, stamps and some background sponging. So lets get started with the details on what I did today using my brayer and sponge daubers.
Royal Blue Card Base: 4 1/4" x 5 1/2"
Image Panel: 4" x 5 1/4"
Brayer Tips: When you brayer, use dye based ink not a pigment ink. A pigment ink stays wet and lays on your paper. If you try to brayer over with another color ink, you will get a muddy look. Dye ink dries fast and the colors stay true.
I used a soft rubber brayer and a smooth white cardstock. Don't use textured paper fro this technique. the brayer will hit only the peaks of the paper and you will get a spotty look.
When you ink the brayer roll it in one direction. If you roll back and forth, you won't ink the entire brayer. To start the brayer, roll right next to the paper and then move the brayer onto the cardstock in a back and forth motion.
Starting the sky: I used the brayer and light blue ink for my sky. I rolled the brayer about 1/3 of the way down this cardstock - approximately 1 1/2".
Sponging the sea: I created 2 masks for this part. The first one to create the horizon line and the 2nd one I tore slightly to create the shore line. I used a medium blue ink and sponged in my sea.
Sponging the Beach: I used my sponge dauber with kraft ink to create the sand. I used a beach stamp to create the sand grains and stamped with the same kraft ink. I used painters tape and masked off the part of the stamp I didn't want ink on.
Masked the stamp again to create some waves in the water.
Once the background was completed, I began cutting and adding the nautical dies. I stained the sky background with kraft ink somehow (grr!) and had to redo my background. It turned out slightly different at the shoreline but it's still the same technique as I described above.
To complete my card, I stamped a sailboat on the water and my sentiment on the sandy beach.
And that is my card for this week. Hope it gave you some inspiration. Let me know your thoughts, I read all of the comments you leave. Also, don't forget about our current challenge. It's all about greenery and you can get more info here. Until next time........inky hugs.


5 comments:
Very beautiful nautical scene. Love it.
Такие милые морские штучки - все отлично сложилось в красивый пейзаж!
Wow, it looks great,and how nice you describe the whole process.
Mary beautiful nautical scene....love it!!!
OMG! I love this card!
Post a Comment