Thursday, May 19, 2011

Sign of Summer

Mowing the lawn is a chore my husband absolutely hates. Don't ask me why, considering our teeny lawn area that takes maybe 15 minutes at the most to mow. It usually takes many "gentle" reminders before he'll wheel out the mower, but this time I nearly fell over when he did it on his own without any prodding whatsoever from me! Go hubby! I keep telling him it's the little things that make me happy...but I guess to him, the mowing is a big thing. Oh well.

Now on to the details. Let it first be known that he doesn't even know I got these pictures. LOL Pattern papers on this page are October Afternoon, Farm Fresh. One of my faves, but most everything OA is a fave really.


I used the Cottage Cutz lawn mower cuz, well, how could I not for these pics!?? I used the grass from the pumpkin scarecrows and you can see I "trimmed" the grass behind the mower. Hee hee!


For my subtitle, I used one of the flags from the plain pennant die. The top of the flagpole is the dot for the 'i' that I didn't use with the letter.


And the main title banner is done using both the plain pennant and the pinking pennant dies. These are both must-haves for layering. Super cute! I popped the letters with foam tape, and added tiny buttons to the twine for even more dimension.


These pennants have endless possibilties. Great for party invites, thank you cards, birthday or any celebratory occasion. How cute would it be to make a mini banner for a bake sale table at church, or lemonade stand in the summer...endless. :)

Thanks for coming by today. I hope you'll be inspired to create a fun banner for one of your projects this week!


Wednesday, May 18, 2011

Birthday Wishes

Good morning CottageCutz followers, I hope the weather is better where you are than here in Utah. It's been cloudy and rainy since Monday. Today I'm featuring two dies from the Birthday release: the Happy Birthday Phrase and the Presents, Variety, both are 4x4 dies.


I inked the edges and used some foam tape to pop out the Happy Birthday from the busy background and used some Glossy Accents on the presents bow.


The picture below just shows you the pieces you get from this die. They are all individual so you can put it together any way you want it. I love the versatility of these dies!


Have a great day and don't forget our May challenge for your chance to win a $25 gift certificate to the Scrapping Cottage!

Kay


Tuesday, May 17, 2011

Make A Wish Matchbook Card

 Make A Wish, again and again until you get what you want!. If it only worked that way!. This weeks card is made like a giant matchbook. I used two of the Cottage Cutz Party collection dies. The Cottage Cutz Candle and Celebration die. The candles were cut in light pink card stock and highlighted in bright pink ink, in the embossed stripes on the candles I filled in with a white gel pen. The stars and confetti are from the celebrate die.
 The inside of the card looks like a matchbook that all the matches have been used.  (my guess is it took all the matches and candles to get that wish). In lower fold of the card I cut two strips of brown card stock and cut slits about half way down, the torn edge looks like torn matches (torn at different levels). I added another candle and more confetti on the inside of the matchbook along with the finished verse.
 Bad photo. . sorry, but was trying to show you a side view of the folds in the matchbook.
The size card stock on the matchbook card is 4" x 9 1/4" base with score lines on 4", 4 1/4", 8 5/8" and 8 3/4". Just remember when you glue the lip over the matches, to leave enough room for the matchbox to catch under the lip when closed. 

Thanks Barry

Monday, May 16, 2011

Happy Monday Friends!

I hope you all had a wonderful weekend.  Spring is still trying to make it's presence known here in New England.  Rain is expected most of the week. Darn!  Oh well, something to look forward too.


For today's card I used the Cottage Cutz Funny Flowers die by Peachy Keen.  The die comes with 7 clear stamps.  I used white cardstock to cut the flower pieces and colored them with copics.  The background paper is from The Girls Paperie.  Finished card is 5 1/2 by 5 1/2.

Don't forget to participate in our new challenge for a chance to win a $25.00 gift certificate to The Scrapping Cottage!  Have a great day!

Hugs and smiles,
Janice

Saturday, May 14, 2011

Cottage Blog Challenge #1

Hello Cottage Cutz Fans!
Today we are excited to start our first challenge!  We will start a new challenge the 2nd Saturday of each month.  I am the host for this month's challenge and I chose to use a photo for inspiration.  I think this photo is so pretty! When I started making my card, I really struggled with it.  I thought, great, I chose the photo and now I am  feeling really challenged.  I was inspired by the colors in the photo.  How does it inspire you?  Is it a feeling it evokes in you?  Are you drawn to the actual image, or the colors?  For this challenge you are to create a card, layout, or whatever your inspiration leads you to create.  It will be fun to see how each person interprets the challenge.


Here is my card and the projects of the other designers that were able to participate.

Here is Shar's beautiful card!


Play along for your chance to win a $25.00 gift certificate to spend at The Scrapping Cottage store.  To qualify for a chance to win you must use a Cottage Cutz die or dies in your project.  Please use Mr. Linky to link to your project post, not just your blog.  Most importantly, have FUN!!
Hugs and smiles, 
Janice


Friday, May 13, 2011

Under The Weather & Picnic Ant

Hello!  Happy Friday to you, and welcome to The Scrapping Cottage Blog.  Boy, Blogger has been very contrary the past few days, as I've been trying for two days to log on to my Blogger account to make this post.  Whew!!  I'm sure glad the problem has been solved.  I have a couple of cuties to share with you today, and I'll make it short and sweet, because I'm off to visit my Granny.  

Barry showed you an adorable card on Tuesday made with this cute as can be duck from the newest release of Cottage Cutz/Peachy Keen Stamps dies.  I guess great minds think alike, because I've been playing with this adorable little duck, too.  I used the Duck with Egg die and Duck Accessories to make this little fella.   I cut him out with white card stock and colored him up with my Copics.
 This 6x6 recipe card was one I made for a swap I was in on Splitcoaststampers.  There's usually an abundance of ants at a picnic, but I don't think many ants bring something yummy along with them.  I thought this little pot brad was so cute in this Picnic Ants hands.  This IS a really yummy recipe, BTW, so feel free to click on the image to see a larger version and copy the recipe. 
Thanks so much for visiting today.  I'm so glad I was finally able to log on and share something fun with you!  Have a wonderful day, a blessed weekend, and happy scrapping!


Thursday, May 12, 2011

Surprise Party!

Have you seen the cute birthday release dies from Scrapping Cottage. Look how fun! I've used two different dies for this simple card. The balloons are from the party puppy and the sentiment and noise maker from the surprise phrase die. Great for an invitation to any surprise event.


Glue string to the back of the balloons to make them look more realistic.


For this card I used the party puppy again, but this time he's pulling down the cute little birthday banner - naughty puppy!


For the banner, I used one of the flags from the plain pennants die and the pinking pennants  to cut a little valance at the top of each flag. If you look closely, you can see that I trimmed the ends of the flags to make it look like fringe.


Here's a close up of the naughty little party puppy with the banner in his mouth. I also added bling to his collar.


Thanks for looking! 


Wednesday, May 11, 2011

Gotta Love Presents!

I love this CottageCutz Birthday release! From making cards to scrapbooks these dies will be sure to get used. I ran this Presents, Variety die through my Revolution in several different colors to match my papers and then started assembling them. I have lots of different presents for future cards or layouts. Striped ones, plain ones & polka dotted ones!


If you haven't checked out the birthday release then now is the time to do it - there are lots of fun and very useful dies that are must haves!

Have a great day!

Kay

Tuesday, May 10, 2011

Surfs Up Dude

 Surf's Up Dude. . . Where do young hip ducks go in the Spring (after their Easter job is over) . . on Spring Break like the rest of the youthful. All hoping to be in the next DUCKS GONE WILD Video.
 This guy was made with the Cottage Cutz Duck w/Egg 4x4 and Duck Accessories 4x6 die. The accessories die as an umbrella, inner tube/goggles, flower hat and a combo rain slicker/Sherlock Holmes hat. There are a lot of options as to what the little guy can be dressed as. I used the inner tube and goggles on the surf card. I added acetate to the goggles frame so there was a glass over his eyes.
Here is the same duck with the umbrella.. . .O' and also included in the duck die is four clear stamps so you can add different expressions to your duck. Smile you never know where your picture could end up!

Thanks Barry


Monday, May 09, 2011

Change is Coming to the Cottage

We have some fun challenges that will be starting Saturday, May 14.  And what's a challenge without a prize?  How about a chance to win a $25.00 gift certificate to The Scrapping Cottage!  Every 2nd Saturday of the month The Scrapping Cottage will have a new challenge, so we will be looking forward to seeing how you use your Cottage Cutz dies.  I will be hosting our first challenge on Saturday, so please do come back and play along.  It is so fun to gain inspiration from each other.


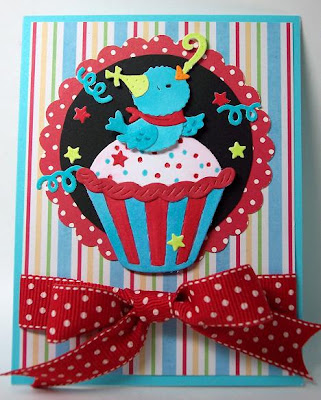
So on to my card.  Today I used the new Birthday Bird die.  What a cute die this is!  Of course, I think all the Cottage Cutz dies are cute!  I like to use bold, bright colors most often, I think.  So bold and bright it is!  This little birthday bird is having a wonderful time.  He is celebrating because he is excited about the new challenges!
I will be back on Saturday to start our first challenge.  Have a great day!
Hugs and smiles, Janice

Saturday, May 07, 2011

Mommy I love you thissss much

 Happy Mother's Day. . . .I made this Mommy card with the Cottage Cutz Bunnies Die, this die will allow you to assemble your bunny is several different poses. You also have the clear stamps to do three style faces. I added beads to the side of the card, baby blocks with mom and a girl angel charm. 
 Here you can see the bunny stretching her arms out so hard that one eye is closing. . the one eyed stamp adds so much personality. I highlighted the bunny in ink and added a few thread lines to the overalls. I embossed A, B, C in the background. The Verse "I Love You This Much" was done with my DYMO Machine

Here is the same basic bunny, but I made both ears up and used the stamp with eyes wide open!. Rather than used the feet as normal I cut them in black as if they were bottoms of shoes. Ran a string under to show on each side. . shoe laces. I also used the Cottage Cutz Stitched Flower Die to cut the buttons and the Cottage Cutz Rick Rack Border Die for the stripe.

OK here is just a added note for today. .I am trying something new with the 4x6 Cottage Dies. I have people ask me all the time how do I store the bigger dies. Well!!!! When the Cottage Cutz Die and Stamp sets came out I thought. . how do I keep the stamps protected and with the die. Above you will see the DVD size cases that Stamping Up sells for cling rubber stamps. They have a sleeve on the outside to put the paper label and I stick the stamps to the inside cover of the case. Also you can see how I stamp the stamps in black on the back of the picture before slipping into the sleeve. . so I have a clear view of what the stamps will do. So what are the negatives. . the case is to big too thick. . waist space !!!! . . Well it also fits the really big seed packet die, I have four border dies in a case also. You can put two 4x6 dies in each box if you want. There is two sides of the box sleeve to put your picture label. As you see with my second picture. I was able to put the Ducky Die and the matching Accessory die together. You can also add a zipper bag inside the box with extra pieces that you may have cut with the die but not used (waist not . . loose not). The CD Boxes do really stack neatly on a shelf.  This is really a possible solution for the bigger dies. **** at least for now.
Thank You   Barry