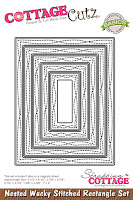
Showing posts with label Nested Wacky Stitched Rectangle set. Show all posts

Friday, October 20, 2023

Vintage Holiday Lantern

Welcome friends!

Thanks for dropping in today ☺  Kris here to share some Friday inspiration with you!


Today's card features the new Vintage Holiday Lantern from the CHRISTMAS 2023 RELEASE!

DESIGN STEPS:

I die cut the Vintage Holiday Lantern from white and gold foil cardstock, then I colored up the white ones with Copic markers and distress inks.


I used patterned papers from the Cozy Winter pad (P13).  I cut and die cut my layers and stacked them from bottom up as follows:

White card base = 6" square top folding
Green patterned paper = 6" square
Gold foil cardstock = 5-13/16" square
White pinecone paper = 5-11/16" square
Green patterned paper = die cut largest Nested Wacky Stitched Rectangle 
Gold Foil cardstock = 3-1/16" x 4-1/16" 
White star patterned paper = die cut 2nd largest Nested Wacky Stitched Rectangle


I attached the layers as shown below, then I popped the lantern on foam dots.


I then stuck the greenery around the top of lantern and glued in place.  

As a last finishing touch, I decided to die cut the pinecones from the Holiday Deer die, colored them with markers and added to the left corner.  Then I popped on a gold hot foiled sentiment.


I hope you've come away with something that inspired you today to get crafty with your favorite CottageCutz dies! 

Ink Something Crafty 
~Kristine

Sunday, September 24, 2023

Merry Moose in Wonderland


Welcome friends!  I hope you're having a blessed Sunday ☺

It's Kris sharing with you today and I've got a cute Christmas card using the Merry Moose die from the NEW 2023 CHRISTMAS RELEASE

I had this Winter Wonderland paper (6x6) from Doodlebug Designs that has some moose , polar bears, and other li'l critters on it and thought it'd be a great match for this new Merry Moose!  All the patterned papers came from this paper pad.  I followed this week's sketch challenge at SplitcoastStampers, SC976 


HERE'S HOW I MADE IT:

Cutting/Scoring:

White:
-- card base - cut at 4-1/4" x 11" and score at 5-1/2" 
--stamp sentiment, then die cut top and bottom with an edge of the Nested Wacky Stitched Rectangles
-- die cut Merry Moose

• Glittery White:
-- die cut Snowflakes (retired)

• Patterned Paper #1 (blue w/snowflakes) 
--cut at 4-1/4" x 5-1/2"
-- cut a small corner triangle as shown and die cut the top with the side edge of a Nested Scalloped Rectangle die
-- die cut just the hat from Merry Moose

• Patterned Paper #2 (blue with animals) 
--cut 4" x 5-1/4"

• Patterned Paper #3 (pink w/ pink snowflakes) 
--die cut with largest Nested Wacky Stitched Rectangles

• Patterned Paper #4 (white w/ colored snowflakes) 
--cut a corner as shown and die cut the top (diagonally) with the side edge of a Scalloped Rectangles die 
-- die cut just the scarf from Merry Moose

• cut 2 strips from the patterned paper that has rows/borders.


Design Steps:

1.  I added some DO ink to my moose parts and assembled.


2.  Adhere Pattern #1 to card base, then #2 to that, then #3 centered on top.  

3.  Attach snowflakes as shown, then pop up the moose with foam strips.

4.  Attach Pattern #4 to bottom right corner, and attach the 2 border strips at a diagonal in top left as shown.  Then turn over and trim away the strips that are hanging over.


5.  I thought I was done at this point.  But then I thought I wanted to anchor that corner with a darker color and sentiment, so I added the smaller blue corner (cut the same way as the white w/ snowflakes)


6.  And lastly, I stamped a sentiment on white cardstock and added some detail by die cutting the top and bottom with an edge of the Nested Wacky Stitched Rectangles, turned it over and trimmed away what was hanging over.  Now it's done!


Ink Something Crafty!

~Kristine


Tuesday, September 19, 2023

Hello Cute Witchy Die Cut Card

Happy Tuesday crafty friends,
I hope you are having a wonderful day. Today I am sharing a super cute, quick and easy card I created featuring some fun Cottage Cutz dies! Here's what I created.


My cute and quick card is a standard 4.24 x 5.5 top folding card.


Here's a closer look at the fun hello card. Hello comes from the Spring die cut collection.


Here's a closer look at the cute little pumpkin. I used some glossy accents in the eye nose and mouth to give it a little extra sparkle and shine.

Here's a closer look at the darling little witchy. You can see after coloring her in, I used some Stickles glitter glue for some extra decorative touches.

Here are the pieces of the Witchy die cut. I started with white pieces and then used y markers to color her.


Cute Witchy


Hello Spring Bunny Cottage


Spooky Fence Mini


Wacky Stitced Rectangle Frame set


This was a quick and easy card that you can make very quickly. Here is one last look at it again.


Make sure you head over to the Cottage Cutz You Tube channel and see what they have been up to.

Well that about covers it for today. Be sure to head over to Cottage Cutz and check out all the cute dies. Until the next time, have a wonderfully crafty day!


Thursday, September 07, 2023

Spook-tacular Halloween

Hello Friends

It is Pam creating with you this wonderful Thursday! And before we get started I wanted you to know we have a SALE in the online store.  So be sure to check it out HERE.  

The card I am sharing today is another one for Halloween.  I usually send out about 20 Halloween/Fall cards so I have a few more to make.  Today's card features the Halloween Chair plus a couple of others dies for some added fun.


Design Steps:

1.  You will need a black horizontal A2 card base, purple DP 4 1/8 x 5 3/8, black checked DP 4 x 5 1/4 and an orange frame cut with the largest of the Pierced Frame Rectangle dies

2.  Glue the purple to the black card base then glue the black check to the purple and last add the orange frame to the middle.  Set aside

3.  Using the Halloween Chair cut out the following colors of card stock: orange, green, black, yellow and brown.  For the cat I used the Spooky Tree Gnome and cut it out of black
4.  Assemble the pieces using a fine tip, fast drying glue
5.  Using the largest Wacky Stitched Rectangle cut out a piece of the purple striped DP.  Build your scene on the rectangle
6.  I needed a little something in the upper right corner so I cut out a web using the Spooky Halloween Castle and spiders from the Spooky Tree Gnome.  Add your sentiment to the left of the chair
7.  Place dimension tape on the back of the purple panel and pop it to the center of the card.  This fun Halloween card is complete


We have more inspiration on our YouTube Channel check it out HERE

Thanks so much for stopping by!  And I will see you next Thursday.

Blessings and Take Care