Showing posts with label Jeanne. Show all posts

Friday, August 20, 2021

Wild About You

Happy Friday!  It’s Jeanne today with a card that is on the wild side. My card uses the Safari Friends stamps and dies from the new Lil’ Bluebird Designs release.  These designs are adorable and are on sale right now in the online store.

I was inspired to make this card by a challenge at Splitcoaststampers last week to make a jungle card!

I started by coloring the lion, hippo and zebra with Copic markers.  There are so many cute critters in this set that I had a hard time choosing which ones to use.  I cut them out using the coordinating dies.


Next I cut a piece of patterned background paper 4 1/4 x 5 1/2 inches so I could mount it to an A2 card.  I cut three white scalloped circles using the second smallest of the Nested Stitched Scallop  Circles.  I also leaves from two coordinating green cardstock using the leaves from the Safari Gang dies.

I glued down the two top circles, sentiment and the leaves in the lower left corner.  I love that the sentiments in these stamp sets have coordinating dies.

I popped up the lower circle and placed some linen thread underneath.

Finally I glued down all the animals and added a few metallic dots.

These new stamps are so adorable and fun to color! Be sure to check out all the designs in the online store.

Products used:


Thanks for visiting today!  I hope you have a fun and creative weekend!

Friday, August 13, 2021

A Whole Llama Love

Happy Friday!  It's Jeanne bringing you a card featuring a llama from the new Lil' Bluebird Designs available in the online store.  This set has adorable llamas with fun coordinating designs and sentiments.  The new line has sixteen wonderful stamp sets in a wide variety of themes.  And there are coordinating dies available for each set!

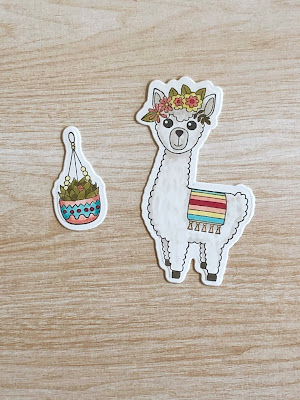
I started by coloring my llama and hanging plant with alcohol markers.  The llama comes bare backed but there are two blankets which can be stamped to give her a more festive look.  I used a warm gray for her fur and soft squiggly strokes to make her nice and wooly.

I used both Copic markers and Spectrum Noir Tri-Blends.

For the card base I cut an A2 panel from white.  Then I used the largest of the stitched rectangles to cut a top panel.  I place the second largest of the heart dies 5/8 inches from the to of the rectangle and centered side to side to cut the window.My embossed panel is 3 inches wide by 2 3/4 inches high.

Next I glued my embossed panel 1 inch from the top of the base and 5/8 inches from each side.

Using thin strips of foam tape I popped up the rectangular panel.

I glued the llama and planter to the front, overlapping the heart window.

Finally I added a few enamel dots in coral.  This card is a wonderful way to say "I love you" to someone far away!

Be sure to visit the online store where this set and the other new designs are on sale for a limited time!

Products used:


Thanks for visiting today!  I hope you have a fun and creative weekend!


Friday, August 06, 2021

It's a Princess Party

Happy Friday!  It's Jeanne today with a card featuring some images from the new release of Lil' Bluebird Designs stamps and dies at the Scrapping Cottage.  These adorable stamps and dies are new line being carried at the online store.  Be sure to check them out.

I was attracted to this set in particular.  I think it is because I have two daughters and although they are grown now, it brings back memories of princess parties when they were little.  It is so perfect for a young girl!

I started by coloring the princess and pony using Spectrum Noir alcohol markers.  These markers come with three shades of the same color in one marker and have bullet nibs.


There are two photos as I used quite a few on this card because I wanted my pony to be rainbow colored.  It reminds me of My Little Pony so I had to use a rainbow!

Next I cut the castle from white cardstock using the Fairytale Castle die.  I used Distress Oxide inks and blending brushes to color it.  I used the Citrus marker to color the windows.

For my background I used two of the slimline dies - the Clouds and the Hills Slimline dies.  I cut stencils using the clouds and then stenciled a sky on a white A2 panel.

 For the grass, I cut panels 4 1/2 inches wide so that I could adjust where I wanted the curves.  I trimmed the sides flush with the sides of the panel.

After I adhered both layers of grass I stamped my sentiment in the upper left.

I decided to use the cloud with the castle.  Originally I was just going to nest the castle in the grass but I thought this looked more magical.

The princess is popped up using foam dots and I added some sequins for sparkle.  After all, what's a princess card without sparkle?


Thanks for visiting today.  I hope you have a fun and creative weekend!


Monday, August 02, 2021

Live Laugh Love

Happy Monday!  It's Jeanne with today's edition of the blog.  I have a tonal card featuring a wonderful new background slimline die and an older seasonal die.  I am enjoying these new slimline dies because they are allowing me to use dies I already have in fresh, new ways!  The new slimline release is also on sale right now for a limited time.

This card was quite easy to make and would look lovely in any color.  All you need are three shades of the same color.  I chose a light, medium and dark green.

I used the lightest of the greens as my base and cut the trellis from the Lattice die in white.  I used self adhesive backing paper on this as I thought it would be easier to adhere than trying to glue it down.

The sentiment used three shades, each word becoming progressively darker.

For my flowers I used a Christmas die - Seasons Floral 2!  I love that this die can be used for other occasions by switching out the colors.  You would never guess that these flowers are for Christmas when cut in white and light green!  This card would make a lovely engagement or wedding card.

Dies used:


Thanks for visiting today!  I hope you have a wonderful week!


Friday, July 30, 2021

O-fish-ally Awesome

Happy Friday!  It's Jeanne with today's card.  Before I get to my card I'd like to let you know about the wonderful Christmas in July sale that is going on right now in the online store.  You can save up to 65% on select dies!

And another big announcement - the Scrapping Cottage is now offering great stamps and coordinating dies from Lil' Bluebird Designs!  I can't wait to begin coloring and designing with these adorable images. Be sure to check them out in the online store.

Now for today's card.

A few weeks back I mentioned that I had saved an extra strip of watercolored paper (click here for those instructions) and extra fish for another card.  Well...here is that other card!  With a few extras.

I used my leftover strip and fish (I ended up using only one fish) and added a crab and jellyfish.  I struggled with what color to use for the jellyfish, then hit upon using vellum.  I love it because he really does look like a jellyfish!

Using the Circle Windows Slimline die I cut a panel from wood grain paper.  I also used the largest of the Nested Slimline Rectangles in dark brown as a backing panel because the Circle Windows die has rounded corners and I knew these would show on the card.  I cut three portholes from brushed gold cardstock using the middle of the Stitched Wide Circle Frames dies.

To get everything placed I laid the wood grain panel over the dark brown and used a pencil to outline the circles.  I then placed my water panel over this (it is slightly narrower than the circles so I could see the tops and bottoms of the circles), placed a frame over the middle circle and traced the center on the water panel.  In this way I knew exactly where to stamp my sentiment.

After gluing down the water panel, I placed the wood panel on top without adhering it. One at a time I placed my creatures underneath and gently lifted the wood panel.  I marked where to place the creature in pencil where it could not be seen.

This method allowed for me to place the critters exactly where I wanted them.  I glued the wood panel to the base and trimmed the jellyfish tentacles (they were a bit long.)  You can see here that the water strip is narrower than the height of the openings for my portholes.  

But not to worry, it was covered up when I added the porthole frames.  Finally I used a few gems as rivets.  A fun card for an awesome friend.

Dies used:


Thanks for visiting today!  I hope  you have a fun and creative weekend!