My tip for today is a quicky but it is something new I have recently started doing with my Cottage Cutz Dies.
I don't know how you store your CC dies, but I like to store mine with the cute cover that comes with them so I always have a good reference to look at when it comes to putting the shapes together. Plus, it also makes it easy to find the shape I am looking for as well as keep track of which shapes I already have.
What I have now started doing with my covers is using the backs, too! This is where I like to keep ideas, titles, sayings, etc. that I think would work well with that particular shape. I don't necessarily write down "obvious" uses, but more out-of-the-box kinds of things. Ideas I have seen or thoughts I have had about the dies that I know if I don't write down, I'll never think of it again! I am all about trying to get the most bang for my Cottage Cutz buck so I never want to forget a good idea!
One example is with my Cottage Cutz Froggy die I used a couple of weeks ago to make the Get Well Card. On the back of the cover I have written down phrases like, "it's not easy being green", "Go Green" (Earth Day), morning sickness get well card, etc. Just some fun things for which a frog would be perfect!
I challenge you to pull out some of your dies and try to brainstorm some new ways to use your shapes or just make a list of the layouts or projects for which you already know that you want to use a particular shape. This activity is also a great way to get your creative juices flowing if you are having trouble getting your crafting mojo going.
Be sure and let me know which Cottage Cutz Shape you pulled out to play with today!!
Check back tomorrow for another fun and fabulous project from Karen!

Showing posts with label Tips. Show all posts
Showing posts with label Tips. Show all posts
Wednesday, May 26, 2010
Wednesday, April 14, 2010
Watch for it Wednesday #55
Today's tip is designed to help when you are piecing together some of the smaller more detailed pieces on your Cottage Cutz dies.
One of my favorite things about the Cottage Cutz shapes is the phenomenal details found in these dies. I feel like this attention to design is one of the biggest things that sets the Cottage Cutz dies apart from all other metal dies on the market today.
Now, that being said, sometimes the intricacies of some of the shapes may be intimidating when you first sit down to begin piecing the smaller accent pieces onto your shape. My tip for today is a technique I have started using that saves me time and headaches!
Let's take for instance the adorable new Ladybug Cottage Cutz shape from the Spring Release. This die really pieces together pretty easily and quickly. However, you do have the small block spots to contend with before your die cut is complete. Rather than try to apply adhesive to the backs of some of these smaller pieces, instead place small dots of adhesive where you want your spots to be placed onto the larger shape.
So you simply need to pick up your glue of choice (I like Zip Dry) and then dot several little dots of glue right where you plan to place the spots. Once you are finished applying glue, just pick up your sticky stick (or whatever you like to use to pick up your smaller pieces of paper) and quickly and easily, place the black spots right onto the dots of glue.
Using this method cuts down the time and energy that would otherwise be spent painstakingly applying adhesive to the backs of each tiny little black spot one at a time and then placing the spots down onto the shape.
I hope this little tip has given you some motivation to get out some of your dies that maybe you haven't tried yet and see what you can come up with yourself!!
Have a great day and be sure to come back tomorrow for another fabulous creation from the very talented Karen!!! And then on Friday, I'll post my layout using an adorable little Ladybug I created using today's tip!
Wednesday, March 17, 2010
Watch for it Wednesday #52
My Watch for it Wednesday post for today is a fun little tip you can use when working with glitter cardstock.
Do you love using glitter paper as much as I do? It is such a great and easy way to add some wonderful sparkle and bling to your projects. However, have you ever noticed that certain papers seem to "shed" glitter more than others?
Next time you are using some glitter paper, go in your bathroom and grab a can of hair spray.
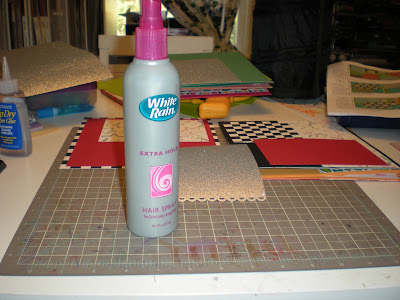 Position your paper so that you have protected the area around it from over spray. Hold the can about 8 to 10 inches away from the paper and lightly spray over the piece of glitter paper in a sweeping motion being careful not to stop over any one area. You don't want to get too much spray on the paper or it will become too sticky and "gunked up".
 After you have finished spraying, give it a few seconds to dry and then it will be ready to adhere to your project.

You may still lose a few specks of glitter if you really rub the paper, but otherwise, you should notice a big difference.
Hope you have fun trying this technique for yourself!
Come back tomorrow for another fabulous project from our very talented Karen!
Do you love using glitter paper as much as I do? It is such a great and easy way to add some wonderful sparkle and bling to your projects. However, have you ever noticed that certain papers seem to "shed" glitter more than others?
Next time you are using some glitter paper, go in your bathroom and grab a can of hair spray.
 Position your paper so that you have protected the area around it from over spray. Hold the can about 8 to 10 inches away from the paper and lightly spray over the piece of glitter paper in a sweeping motion being careful not to stop over any one area. You don't want to get too much spray on the paper or it will become too sticky and "gunked up".
 After you have finished spraying, give it a few seconds to dry and then it will be ready to adhere to your project.
You may still lose a few specks of glitter if you really rub the paper, but otherwise, you should notice a big difference.
Hope you have fun trying this technique for yourself!
Come back tomorrow for another fabulous project from our very talented Karen!
Wednesday, February 10, 2010
Watch for it Wednesdays!! #47
Today I would like to give you a tip I discovered last week while working on my Gingerbread House shape. Since my "so-called" scrappy friends have gotten me hooked into these Copic markers (like I need another scrapping addition!!) I have started using them more and more in my die-cutting. Before when I wanted to add more layers and colors to my die cuts, I cut the shapes out over and over in different shades of paper. Now, I just cut out the shape once in white, and then color in the smaller detailed pieces in whatever colors I need.
Since I have started using this alternative technique some, I have found I only need to tend to cut out my shapes in one or two colors of cardstock. For the Gingerbread House, for example, I ran all three die plates through my cutter using both brown and then white cardstock. In the past, I have always laid one 4x4 die onto my plate at a time and then placed one piece of 4x4 cardstock on top and rolled it through. Well this time, I laid all three die plates from the Gingerbread House shape onto my cutting plate at once and then I placed a 12x4 piece of cardstock on top and rolled the whole thing through at once. By doing this, I only had to make two cuts - one for each color of cardstock I was using. But, the coolest thing I discovered, was how much easier it was to locate and keep up with all my shape pieces because I only had to pieces of paper to handle instead of 12 little 4x4 pieces of paper
I encourage you the next time you are working with one of your Cottage Cutz Shapes that come as 2 or even 3 plates, try this method and see if you like it as much as I do!
Come back tomorrow for our fabulous Guest Designer, Karen's Thursday post!
Wednesday, January 20, 2010
Watch for it Wednesday #44
My tip for today is to discuss ways you can take your die-cutting to the next level. Now, there is certainly no right or wrong way to make and use die cuts! Especially our Cottage Cutz dies that are so doggone cute on their own that they hardly need anything extra. And much of the time, these die cut shapes look great just as they are.
However for today's tip, I thought I would give you a few suggestions with some examples in order to get your own creative juices flowing in new and different ways so that you can experiment with some new die cutting tips on your next project.
Probably the easiest and quickest way to add some extra pop to your die cut shapes is through your choice of paper. There are so many cool and unique types of specialty paper available today that you can use to to make your die cut shapes look really authentic and also really POP off the page.
Some of my "staple" specialty papers that I always like to have handy are gold and silver. I just use a little bit here and there when I need it. I can't even begin to tell you how long I have had the two pieces of gold and silver that I am using right now because most of the time, all I need is just a tiny little piece of the paper.
Silver paper is great for anything metallic looking on your die cut shape. Just a little touch of shiny silver paper makes such a difference. Think about how great the new Cottage Cutz Lock and Key Shape will look using silver paper for the metal lock and key - or what about some of the mini shapes like the Chocolate Kiss or just use a small piece for the heart cookie cutter from the Valentine Baking Set Shape.
Here are a few more examples of die cut shapes where I have used specialty silvery paper in small amounts to give the appearance of metal on my finished shape.


 I hope this post has inspired you to dig into your stash and see what types of fun and unique papers you have hiding in there that you could be using on your die cuts. Come back tomorrow to see a layout I created using the Cottage Cutz Bear Shape - but not how you think! Hmmmm.......what could I have done :) Guess I'll see you back here tomorrow to find out!
However for today's tip, I thought I would give you a few suggestions with some examples in order to get your own creative juices flowing in new and different ways so that you can experiment with some new die cutting tips on your next project.
Probably the easiest and quickest way to add some extra pop to your die cut shapes is through your choice of paper. There are so many cool and unique types of specialty paper available today that you can use to to make your die cut shapes look really authentic and also really POP off the page.
Some of my "staple" specialty papers that I always like to have handy are gold and silver. I just use a little bit here and there when I need it. I can't even begin to tell you how long I have had the two pieces of gold and silver that I am using right now because most of the time, all I need is just a tiny little piece of the paper.
Silver paper is great for anything metallic looking on your die cut shape. Just a little touch of shiny silver paper makes such a difference. Think about how great the new Cottage Cutz Lock and Key Shape will look using silver paper for the metal lock and key - or what about some of the mini shapes like the Chocolate Kiss or just use a small piece for the heart cookie cutter from the Valentine Baking Set Shape.
Here are a few more examples of die cut shapes where I have used specialty silvery paper in small amounts to give the appearance of metal on my finished shape.


Gold is another type of specialty paper I always keep on hand. Gold works so great for buckles, bells, jewelry, crowns, etc. I just cut out a tiny piece to lay directly over the part of the die I want cut out of the gold. Here are some examples where I have used my gold paper for accent.


The third type of specialty paper that I keep in my stash is a glitter paper. For me, I like to always have some white and black glitter paper, but I find myself using a lot of pink, too (but I scrap mostly girly layouts). And just think how cute the new Valentines Cottage Cutz dies would look with pink glitter accents on the hearts what about glittery pink icing on some those adorable cupcakes, etc!!
Now, I personally LOVE glittery accents (as evidenced by my collection of Stickles) so I actually try to keep a larger variety of glittered papers in my stash besides just the basics. For instance, nothing brightens up a Halloween pumpkin like orange glitter cardstock! My favorite collection is the Glitter Cardstock Matstack from DCWV. The smaller size papers allow me to get lots more color variety for my $$ which I really like!
Let me show you a few examples of die cut shapes where I have used some glitter paper on all or part of the die-cut shape.

 I hope this post has inspired you to dig into your stash and see what types of fun and unique papers you have hiding in there that you could be using on your die cuts. Come back tomorrow to see a layout I created using the Cottage Cutz Bear Shape - but not how you think! Hmmmm.......what could I have done :) Guess I'll see you back here tomorrow to find out!
Wednesday, December 23, 2009
Watch for it Wednesdays!! #40
I feel like we have sort of reached a milestone with our 40th Watch for it Wednesday post! I guess 50 will really be exciting!!
My post today is a memory preserving kind of a tip. I think around the holidays more than any other time, you end up taking a lot more pictures in a much smaller period of time, am I right?? Every family gathering big and small, parties, children's pageants, you name it - the photo ops during this time of year way out number the scrapping hours available.
Sometimes, us scrapaholics can get bogged down by wanting to scrap every single picture we have in order to truly commemorate the holiday season. If you have that kind of time and patience, go for it!! But for the rest of us, we need another system.
What you need to remember is that there is a difference between a scrapbook and a photo album. Photo albums exist so you can print every picture you took of each and every Christmas present and proudly display it in the album. But scrapbooks are for telling the stories and the memories behind the pictures you see. That's why we scrap, right?! To tell and preserve the stories.
I want to share with you something I have started doing for my Disney album which I think would also work great for these holiday times. Why not have a combination scrapbook/photo album?! There are no rules saying you can't have layouts and photo pages in the same album!! In my combination Disney album, I scrap the pictures I want, and then in between the layouts, I include photo pages filled with all the "extras" that go along with the story of the layout. For instance, I scrapped a page detailing a parade we watched in Magic Kingdom. Then following that layout, I added photo pages to hold all of the parade pictures I took. It is like the best of both worlds, plus it keeps all of my pictures and stories together in one place.
I hope this tip has been interesting and has inspired you to stay "caught up" this holiday season!
Merry Christmas!!!!
Wednesday, October 28, 2009
Watch for it Wednesdays!! #32
I actually had a different technique all worked up to share today for my Watch for it Wednesday post, but I decided it was really better suited for a November project so you'll have to wait a few weeks for that one :)
The tip I would like to share today is one that I used just this week and LOVED it! I really like to use buttons on my scrapbooking projects, but I hate having to stop working to thread my buttons each time. So one night this week I was sitting in bed listening to the TV and I decided to grab a handful of buttons and start threading them. Since it is Halloween, I grabbed buttons in Halloween colors and cut some black thread to use inside of them. This was a simple, mindless activity I could do at night when I am too tired to scrapbook but not ready to go to sleep yet.
Today, I was working on a Halloween mini album and I pulled out my little stash of pre-threaded buttons to use. I can't tell you how great it was to just be able to grab a button and glue it on without having to stop and thread it up each and every time wanted to add a button to a page. Plus, I wasn't tempted to just stick them on "naked" to save time because I had already done the work at a more convenient time.
 Here is a picture of some of the buttons I pre-threaded to have on hand for my Halloween projects.
You could use this trick with Christmas-colored buttons, too. Just choose a neutral thread color or use a couple of different colors and you'll always have some buttons ready to go!
Sunday, October 18, 2009
ATTACHING THE FOAM TO YOUR COTTAGECUTZ DIES

Are you like me that sometimes has trouble separating the foam from the backing sheet??? Or are you new to using CottageCutz dies and are not to sure how and where you are meant to use the foam. Well then, this tip is especially for you.
I was just about to foam my COTTAGECUTZ HAUNTED HOUSE die, and thought I would share this tip with you.
Please excuse the dirty nails…. Its just ink – I promise!!!!


STEP 1- Firstly, put the CottageCutz die flat on the table – smooth side down with the picture facing up.
STEP 2- Take the foam that is supplied with the die and hold it so that the foam section is at the bottom and the backing sheet is on top.
STEP 3- Because I don’t have long enough nails to use, I use a pair of fine sharp point scissors to carefully wedge in between the Foam and the backing Sheet. It doesn’t have to go in far, just enough for you to be able to see the foam and backing sheet separate.
STEP 4- While my scissors are still in between the foam and the backing sheet, I very gently slide my scissor blade along until I have made enough of a split to hold just the backing sheet with my fingers and then pull it to separate if from the foam. You can know throw the backing sheet away.


STEP 5– I carefully line up the sticky foam with the picture side of the die and stick them together.

STEP 6- Use your fingers to carefully and firmly push the foam down onto the die and rub gently to make sure its attached properly . A good indication that it is attached properly is once you have rubbed the die, you seen the picture indentation show on the foam.
For those of you that are beginners in the die cutting world of COTTAGECUTZ DIES, I hope this helps. And for those of you that are well educated on the subject, I hope you enjoyed the trip down memory lane.
Click link below to see a short video on how to use CottageCutz products...
http://www.scrappingcottage.com/index.asp?PageAction=Custom&ID=20
Wednesday, October 07, 2009
Watch for it Wednesdays!! #29
For my Watch for it Wednesday tip this week, I wanted to get you thinking about ways to have more fun with your page titles and card sentiments. There are lots of different ways you can spice up your titles. For instance, if you are making a Halloween-themed layout, you could have a little ghost flying out of a letter, maybe some spooky eyes peaking out from the inside of a smaller letter, or a spooky cat perched on top of your title letters. On my example this week, I added the Cottage Cutz Mini Pumpkin inside one of the O's from my "Boo" page title. Since my title font has such nice large letters, this adorable little pumpkin sits perfectly inside the O.  If you want to take your creativity one step further, you could actually replace a letter with a shape that matches the theme of your layout or card. For instance, if you were using Halloween as your title, change the o to a small pumpkin, the n to a screeching cat, the l to a witches broom, and so on. You can have equally as much fun with lots of other themes and holidays.
If you want to take your creativity one step further, you could actually replace a letter with a shape that matches the theme of your layout or card. For instance, if you were using Halloween as your title, change the o to a small pumpkin, the n to a screeching cat, the l to a witches broom, and so on. You can have equally as much fun with lots of other themes and holidays.So, get your creative juices flowing and try to really mix things up on your next paper crafting project!!
Wednesday, September 02, 2009
Watch for it Wednesdays!! #25
I love that so many manufacturers provide such fun embellishments to coordinate with their paper lines. It makes it so easy to add some extra elements to your pages when someone else has done the "matching" for you. Recently, I purchased some cute overlays. The designs were really cute but I wanted to add a little something extra.
My tip for this week is how to dress up your overlays. For these little ladybugs, I wanted to add a little extra bling. So I flipped over the overlay and added black stickles to the head and red stickles on the back to color the spots. You don't have to worry about trying to get the stickles to stay inside those tiny little ladybug spots because the extra won't show through on the front. Once the stickles are dry, flip your overlay over and look how cute these little bugs are now! You could also use your Copic markers to add some color to your overlays as well.
 Come back tomorrow to see the rest of this layout!! :)
Wednesday, August 05, 2009
Watch for it Wednesdays!! #21
I have spent a great deal of time this summer cleaning out and organizing different parts of my home. Some areas were more "over-due" for this work than others. :) And of course, I couldn't neglect my scrap room! For today's tip, I have a couple of good storage solutions that I use to organize and store different sized metal dies.
The first one is for your 12" long dies. I discovered this tip "accidentally" one day while shopping with my youngest daughter in Hobby Lobby. In an attempt to keep her happy while I finished up my shopping, I let her pick out one of these colored transparent boxes. As I was helping her pick out which one she wanted, I started kind of looking over them myself and then it dawned on me that these ruler boxes would make a PERFECT storage place for my 12" dies! I love it because it is pretty, very inexpensive, and completely functional!
You can see from the pictures that each box will hold a lot of 12" dies. I love having all of my 12" dies together in one place. It makes it so easy to see everything I have if I am not sure what border I want to use.


My second storage tip is for your 4x4 dies. Have you ever tried sliding one of your 4x4 dies into a CD sleeve inside a CD holder? It is the perfect size! The sleeves are wide enough to make getting the dies in and out very easy, but they still hold the dies securely in place. I have started using this particular CD case because I like how sturdy the outside case is which allows me to stack them on top of one another. (Yes, I have had to add a second CD storage box to hold all of my 4x4 dies. And after I get my hands on the Halloween Cottage Cutz dies, I am probably going to need to add a third!!) What is great about the CD holders for die storage is that there are so many different types and sizes available, you can easily find ones that meet all of your needs.


Wednesday, July 08, 2009
Watch for it Wednesdays!! #18
For today's Watch For It Wednesday, I would like to show you a tip for using your Quickutz 12" borders. Now each border has a nice finished edge on either end, right, which looks great when you are using the entire length of the border. But what if you only want to use a portion of the border, but you still want a nice finished edge? This tip will show you how to put that finished edge on each end of your cut.
First, cut your paper slightly longer than your desired finished length. Place that piece on top of your border and roll it through your Revolution like normal to get your first cut.

 Now, you need to decide how many scallops you want to have on your finished border. Once you determine where you last scallop will be, you'll want to place your cut piece back onto the die matching your marked spot with the end of the border die. You'll need to flip your cut piece over to do this.
 If you look closely here, you can see the edge of the die around the pink paper and you can see how I have lined up the scallop with the end of the die.
 When you have your cut piece placed onto the die, the already rounded end will just rest on the remainder of the die. It won't touch any of the cutting surface, so you don't have to worry about it being re-cut.
 Now that you have the first border cut lined up onto the border die again, simply roll it through your Revolution like you normally would to get your second cut which will finish off the second edge.
 This technique is great for smaller pages, cards, or even larger layouts where you just don't need to entire length of the border. You can use this technique on any of the other 12" borders that have a repetitive pattern like this scalloped border die. Click here to see the card I posted earlier where I used this technique to cut the scalloped piece of cardstock.
Tuesday, June 09, 2009
Watch For It Wednesdays #14

For this weeks Watch For It Wednesdays Post, I’m going to share a tip on RECYCLING WHILE SCRAPBOOKING. Whilst most of us are trying to watch our wallets and stick to a strict budget, we don’t want to or should have to put away our craft projects just because we are a bit short on $$$$$ to buy that perfect embellishment.
When I did this layout of my son wearing his Favourite ‘Party’ outfit, I knew that he was never going to wear it again and Because I don’t want hundreds of my children’s old “Favourites” lying around the house long after the kids have outgrown them, I decided to make a true size colour photocopy of part of the outfit and use it in my layout. I then cut off the tags, labels, ribbons and buttons and attached them to the layout to give it a more textured 3 dimensional look. There you have it!!!! The perfect embellishments that also have a sentimental meaning and cost you nothing. Just imagine how many more CottageCutz & Quickutz dies you could buy from THE SCRAPPING COTTAGE if you don’t have to spend all your well deserved craft money on little embellishments that can be very costly.
Wednesday, May 27, 2009
Watch for it Wednesdays!! #12
I have been using my Silhouette A LOT lately. Isn't funny how you go for awhile not using one of your tools and then all of a sudden *BAM* you can't scrap without it!
 One of the greatest advantages of the Quickutz Silhouette is its ability to cut any True Type Font you have loaded onto your computer. There are virtually 1000's of fonts available for free all over the internet. All you have to do is Google "Free Fonts" and you'll find tons of sites to get fun new fonts for your Silhouette. However, if you don't know how to download these fonts into your Fonts Folder, you will not be able to access them from your Silhouette software.
My tip for today is to show you how to create a shortcut on your Desktop for your Fonts Folder to make this downloading process much simpler!
In order to first locate your Fonts Folder, take the following steps:
Go to your Start Menu
Then click on the Control Panel (You must be in Classic View!!)
Now you'll see your Fonts Folder
Now that you have located your fonts folder, you'll want to create a shortcut on your desktop. Simply RIGHT CLICK on the Fonts Folder Icon and select "Create Shortcut".
Place the new shortcut onto your Desktop.
Now you can easily drag and drop new fonts into your new Fonts folder shortcut. Just make sure when you are downloading fonts, that you open all files until you get the True Type version. This is the one you want to drag and drop into your Fonts Folder. Then your computer will do the rest!!
One of the greatest advantages of the Quickutz Silhouette is its ability to cut any True Type Font you have loaded onto your computer. There are virtually 1000's of fonts available for free all over the internet. All you have to do is Google "Free Fonts" and you'll find tons of sites to get fun new fonts for your Silhouette. However, if you don't know how to download these fonts into your Fonts Folder, you will not be able to access them from your Silhouette software.My tip for today is to show you how to create a shortcut on your Desktop for your Fonts Folder to make this downloading process much simpler!
In order to first locate your Fonts Folder, take the following steps:
Go to your Start Menu
Then click on the Control Panel (You must be in Classic View!!)
Now you'll see your Fonts Folder
Now that you have located your fonts folder, you'll want to create a shortcut on your desktop. Simply RIGHT CLICK on the Fonts Folder Icon and select "Create Shortcut".
Place the new shortcut onto your Desktop.
Now you can easily drag and drop new fonts into your new Fonts folder shortcut. Just make sure when you are downloading fonts, that you open all files until you get the True Type version. This is the one you want to drag and drop into your Fonts Folder. Then your computer will do the rest!!
Wednesday, May 06, 2009
Watch For It Wednesdays #9

I get asked a lot of questions about my scrapbooking but the question I get asked the most is “How do I ink my die cuts and what do I use”? There are many different ways and products to ink with so not everyone will have the same equipment & style. The best way is to keep practising with different techniques until you find a style that works for you. There is no one set way of inking, and that is what makes this such a fun and exciting technique.
I am going to go through step by step the way that I do my inking so that you can see how I do it and hopefully get an idea of how to start inking your die cuts until you can build your own technique & style.
The above picture shows the Banner before and after it has been inked.

For this demonstration I have used:- The Quickutz Banner Border die for the die cut, Tim Holtz Distress Ink ‘Vintage Photo’ (medium brown), Tim Holtz Distress Ink ‘Walnut Stain’ (dark brown), Sponge cloth, Pencil and a Piece of scrap paper to work on when inking.

STEP 1- Cut a piece of Kitchen sponge cloth into a rectangle shape about 2”x4”. Cut 1 for each colour ink you will be using – This will keep your colours separate & stop your ink pads turning into a horrible mud colour.

STEP 2:- With a lead pencil, very lightly draw an outline where the banner looks like it’s going to fold back on itself. This will help you see where you need to add some shadow to give your banner a 3D look.

Step 3:- Fold your piece of Sponge Cloth in half and hold it with the open end towards the palm of your hand. Place your fingers on top and your thumb underneath. You are now ready to ink.


Step 4:- Using your lighter coloured ink first,(if you are using more than 1 shade of colour) ink the underneath front section of your sponge. The size of your die cut will determine the amount of ink needed. Because I am doing a long die cut, I have inked the entire length of the bottom of the sponge.


STEP 5:- Always start inking from the edge of your die cut working towards the centre so that the darker areas are on the edges and to avaid having solid lines in the middle of your die cuts where there shouldn't be any lines - It just give your inking a much smoother more flowing look. Press your sponge down firmly on the very edge of the of your die cut or just over onto the scrap paper you are working on and ‘flick’ the sponge upwards towards you (now pick the sponge up off the floor and try it again, but this time keep a hold onto the sponge and don’t let go :-) :-) :-) - sorry I couldn’t resist :-). This will help your ink gradually change from dark to light as it get closer to the middle of your die cut.


STEP 6:- Keep repeating step 5 until you have gone all the way around your die cut. You may need to do the same area a few times to get a look that you are happy with. Don’t forget to ink the area where you drew your pencil line for the Banners Shaded areas. For this area place your inked sponged along the pencil line as if that was the edge of your die cut and flick your sponge forwards towards where you would like your shadow to be.

STEP 7:- If you are using a second ink, this is where you would start the inking process again from the beginning using the darker shade of ink. You will now ink over the top of your other inking but this time you will ink very lightly still doing the flicking motion and not ink as much of the die cut area as you did with the lighter ink. This would be more of an outlined shadow area so you would stay more to the edges of your die cut.
Remember when you are inking with more than 1 Shade of a colour, always start with the lighter Shade first and then the darkest Shade last. Gradually add your colours because you can always add a darker colour on top of the lighter colours, but it gets very difficult when you are trying to do it the other way around.

Step 8:- Finally, to ink the edge of the die cut pick it up and with your sponge, holding it the opposite way as before, this time with your thumb on top and fingers underneath, put the inked section of the sponge onto the side of the die cut and do the flicking motion away from you. Continue until you have gone around the entire edge of the die cut. You are now FINISHED and ready to use your die cut in a project.


This may sound complicated, but trust me IT’S NOT. Each time you try it, it will easier & easier. I believe that the best way to learn is by your mistakes so don’t be scared to experiment with different products, sponges & techniques. You will soon find out whether it’s your style or not. So go and experiment. You may be surprised at what you turn out with. Don’t worry if you make a mistake or 2 because they can always be covered up by some die cuts or pretty flowers etc. :-)
Wednesday, April 22, 2009
Watch for it Wednesdays!! #7
One of the great things about Quickutz dies is that they are so well designed and allow for so much personal creativity and experimentation when assembling the different shapes together. However, occasionally, some shapes may seem a little harder to piece together than others. So here are a few tips to help make assembling your die cuts quick and easy! For my example, I have used the Anime Monkey from the March Release, but you could apply these tips to just about any of the dies.
First, make all the cuts you will need to assemble your shape and gather all the pieces together.
 Next, start with the body of the monkey and place it directly on the card that came inside the Quickutz packaging so that it lays right on top. (If you no longer have your original packaging, you can always download the image and print it out from the Quickutz site.)

Now you can place some glue right at the top of the body where the nose/mouth piece will lay. Next, lift up the body and place the head piece down over the picture and add glue to the bottom of the head piece so you could place the body right back over the head piece.
 Here is another trick I use when you need to attach pieces that don't have a back. I simply place a little piece of scotch tape across the opening of the ears. Now you can easily place the inside pieces of the ears into the openings. This tip is also helpful when you are assembling a die cut like this one that you want to be able to lift of the page or card with a pop dot.
 Now you can easily continue assembling the rest of the die cut :)
 Be sure to check out the new April Quickutz release in the store and don't forget to leave a comment here to be entered into the drawing for a free die of your choice from the new release (excludes the alpha).
First, make all the cuts you will need to assemble your shape and gather all the pieces together.
 Next, start with the body of the monkey and place it directly on the card that came inside the Quickutz packaging so that it lays right on top. (If you no longer have your original packaging, you can always download the image and print it out from the Quickutz site.)
Now you can place some glue right at the top of the body where the nose/mouth piece will lay.
 Next, lift up the body and place the head piece down over the picture and add glue to the bottom of the head piece so you could place the body right back over the head piece.
 Here is another trick I use when you need to attach pieces that don't have a back. I simply place a little piece of scotch tape across the opening of the ears. Now you can easily place the inside pieces of the ears into the openings. This tip is also helpful when you are assembling a die cut like this one that you want to be able to lift of the page or card with a pop dot.
 Now you can easily continue assembling the rest of the die cut :)
 Be sure to check out the new April Quickutz release in the store and don't forget to leave a comment here to be entered into the drawing for a free die of your choice from the new release (excludes the alpha).
Subscribe to:
Posts (Atom)