Thursday, August 24, 2023

Fall Color

Hello Friend

I am making a few more fall cards.  I just love working with the color palette and it is my favorite time of year! I am so ready for the crisp air, football and beautiful colors!

Design steps:

1.  Use a brown A2 card base, 5 3/8 x 4 1/8 piece of cooper card stock, 5 1/4 x 4 piece of green cards stock, 5 1/8 x 3 7/8 piece of checked DP and a piece of cooper cut with the Wide Piereced Rectangle Frame die.  Glue the Cooper to the brown base, next comes the green and then the DP
2.  Use the Stitched Leaves die and cut out the following card stock colors: rust, plum, mustard, green, and kraft. Cut out the basket in dark brown using the Basket of Vegetables die.  Ink the pieces with complimentary colors
3.  Put a dot of glue in the center of the basket to hold in place then add the leaves

4.  Add the frame and then tuck in a few more leaves and acorns to the bottom of the basket.  You can now glue the basket edges down

5.  Layer your sentiment on green and add a twine ribbon

6.  I had a few scraps left over so I added them to the inside of the card


We have more inspiration on our YouTube Channel check it out HERE

Thanks so much for stopping by!  And I will see you next Thursday.

Blessings and Take Care


Wednesday, August 23, 2023

One Small Die One Beautiful Wreath


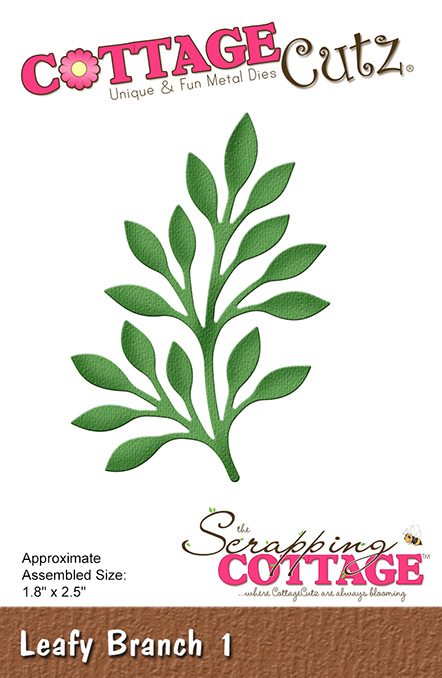
Happy Wednesday.  Marla here back with a new card making tutorial on the CottageCutz YouTube Channel.  I have said over and over again how much I appreciate the small CottageCutz foliage and flower dies that have been released.  I find them so useful and have created many beautiful swag and floral arrangements using them. As we creep into fall, I thought I would revisit the "Leafy Branch 1" and use it to create a beautiful wreath.  I kept mine simple using the one die, but you could fill it with flowers, acorns or berries too. There are many colors you could use for your wreath that would also change the vibe.   I kept mine rich with a deep green because I like the way it complimented my wood plank background.

You can find more specific detail about my card in my video and enter to win this die to create fall wreaths of your own.  I hope to see you there.  Until next time.... Marla


Tuesday, August 22, 2023

Shabby Butterfly Fall Card

Happy Tuesday crafty friends!
I hope your Tuesday is off to a great start! Today I am sharing a card I made with some beautiful Cottage Cutz dies. Take a look at what I created.
A top folding card with a gorgeous Butterfly front and center! The butterfly is the Folk Art Butterfly Die.

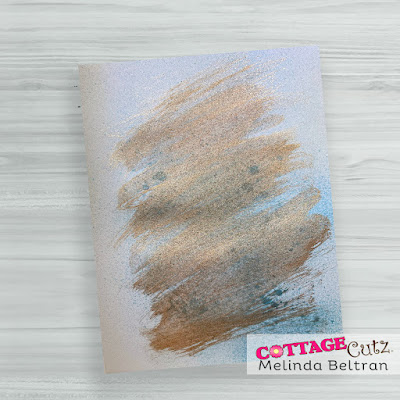
I started by taking a plain white piece of cardstock and spritzing some of my blue ink spray onto my cardstock mat.

I then took some gold paint and swashed it over my blue spritzing. I then edged the paper with my blue ink. You will see that on the next photo.

I then added some of my die cuts at the top and the bottom. The deer horns are from the Deer Floral Spray.

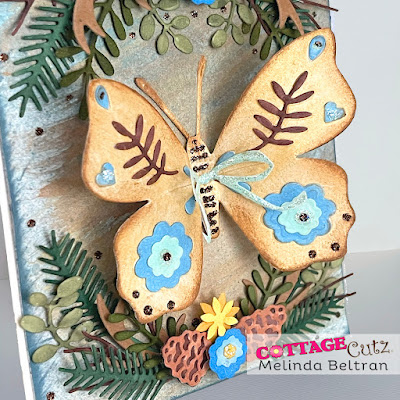
Here is a closer look at my beautiful butterfly. I started with it as plain white cardstock. I then added some of the same gold glitter paint as a base. I then added some brown inking to the edges. I used my blue markers for some of the decorative pieces. I used brown marker for the leaf motiffs and then dotted the wings with my brown glitter. I added some foam underneath to give it some lift.

Here is a closer look at the pretty flowers and pinecones. I added those to the center of the bottom spray.


Here's a closer look at the top spray. I added a bow with some of the sweet little flowers. I used my nuvo drops for the center of the bow. I added the finished piece to my cardstock base and done!

Here is one last look at my finished card. I think it turned out so pretty. It doesn't have a sentiment on it yet as I haven't decided if I am going to use this as a thinking of you or a birthday card. 


Dies Used

Folk Art Butterfly


Holiday Mason Jar


Well, I hope this card gave you some fun inspiration! It is always nice to have cards in all seasons. Until the next time, have a wonderfully crafty day!

Monday, August 21, 2023

Paper Pieced Pumpkin

Hello friends!  

It's Kris sharing with you today this easy-to-make pumpkin card for your inspiration!


I was inspired by some other die-cut and punched pumpkin cards on Pinterest and thought I'd give it a go with some cute Fall-themed papers and of course I got creative with my CottageCutz dies! 

CUTTING & SCORING:

Dove White Cardstock:
•  5-1/2" x 8-1/2" and scored at 4-1/4"
• 3-7/8" x 5-1/8"
• die cut Thanks w/ Shadow (shadow)

Pecan Pie Cardstock (brown):
• 5-1/4" x 4"
• die cut Thanks w/ Shadow (shadow)
• die cut Fence & Grass (fence)

Patterned Papers (Doodlebug Designs: Pumpkin Spice):
• (5)  die cut the 3rd smallest of the Pierced Oval set
• die cut (2) of the large leaves from the Flowers 4x6 die
*Tip... I just cut a piece li'l bit larger than the leaf w/ scissors first then die cut just the leaf
• die cut Thanks w/ Shadow (thanks)
• die cut Fence & Grass (grass)

DESIGN STEPS:

1.  First, I stamped "for all you do" in an olive green in the top right corner of my white layer.


2.  I assembled my pumpkin using foam strips between each of the top 2 layers.


3.  I hand cut a stem for my pumpkin and added some lines with a marker.  I then ran some twine thru a button and glued it to the top over the leaves.  


4.  Next, I decided I wanted more texture on the white layer, so I ran it thru with a lattice embossing folder.  I then smoothed it out with my bone folder, just over my stamped sentiment so it would be easier to read. ☺


5.  I cut apart my fence and grass as shown below so there are 3 slats and 2.


6.  I added my pumpkin with foam strips between the fence.

7.  I offset my brown "thanks" shadow behind the white and then glued my "Thanks" on top and added to the top left corner of card.  Done!


Thanks for looking!  I hope you're inspired to create something CUTE with your CottageCutz dies! 

♡ Kristine


Saturday, August 19, 2023

Fall Leaves


Hello CottageCutz friends! Thanks for taking the time to stop and visit with us today. It's Mary Marsh here bringing you the Saturday edition of the Blog.

Our new Folk Art release is still available in the online store at 35% off individual dies. There are 19 new designs that are so perfect for cardmaking, journaling, and scrapbooking.

In fact, all of the releases from 2023 through Halloween of 2022 are currently on sale. Check them out here if you want to pick up any that you may have missed and still want. The sale won't be on long.

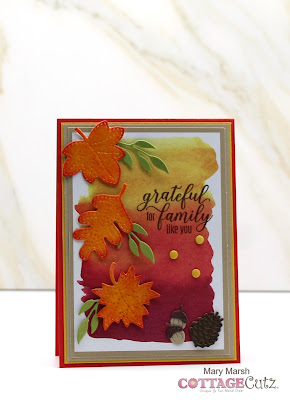
Since we are coming into my favorite time of the year, I decided to make a Thanksgiving card using the beautiful colors of Fall. The die is an older one from the 2018 collection "Stitched Leaves"

For my leaves, I first die-cut the leaves from Bristol smooth cardstock and then ink blended barn door and fossilized amber distress inks. I pressed them in Ranger Perfect Medium and then used clear embossing powder with my heat tool. This technique makes the leaves really pop. Although my camera isn't picking up all the shine that's on the leaves.
My background paper is from a kit I had in my stash.  I really like the color washed background. I layered it on a crumb cake (kraft) panel then crushed curry and my card base is the poppy parade.

Card Base: 4" x 5 3/8" 
Curry Layer: 3 3/4" x 5 1/4"
Kraft Layer: 3 5/8" x 5 1/8"
Image Panel: 3 1/2" x 5"
Next, I stamped my sentiment. I stamped in chocolate chip ink. 
Now that my card elements are prepared, I am ready to start card assembly. I attached all the layers first with double sided tape. 
I secured the leaves with double sided tape. I decided to add some other greenery using the Rustic Wreath die.
To finish off my card I added a pinecone and a couple of acorns and scattered a few curry enamel dots. I also added more leaf greenery to the bottom leaf. 
 
That's it for me for this week. See you next Saturday. 

Reminder: Marla has a video up on the CottageCutz YouTube channel. Click here.