Monday, April 18, 2022

Double Step

Hi everyone another Monday has creeped up on us and time sure goes by fast when your crafting and right now it’s pouring rain here in Florida youck…
So my card today is how I wish things were here inFlorida nice and sunny 🌞 this card features the beautiful majestic Swan from the Australian release.

To make my card I took a piece of white cardstock and cut it to 5.5x7.5 and cut slits 4 inches down each side 
Next score between the slits you just  cut at the bottom and from the top and then score 1 in down from the top and another 1in after

Use a bone folder to get nice crisp creases and form your card and now diecut all the added pieces from the trees using color cardstocl and add depth using some copics

I diecut my swan and colored it with copics and added some stickles in crystal to sparkle my swan up a bit

My completed card at and angle where you can see how the trees really surround my swan


Supplies Used


Saturday, April 16, 2022

Happy Birthday Koal-ity Friend

Hello CottageCutz friends! Thanks for taking the time to stop and visit with us today. It's Mary Marsh here bringing you the Saturday edition of the Blog.

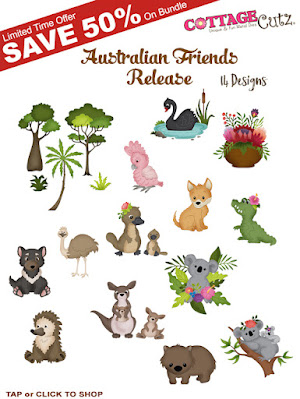
We have a new release in the online store. It's our Australian Friends with 14 new designs. The dies are perfect for Mother's Day, Baby Cards, Kids & Adult Birthdays, Thinking of You, Thank You - just about any occasion you would need a card for.

They are currently on a limited time sale of 30% off the individual dies. There is also an anniversary sale going on right now with savings up to 75% off. Shop early for best selections.  

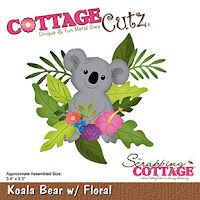
Today, for your viewing pleasure I have created a birthday card using the new Koalas die. So let's get started with some details on how I created this card. 

Design Steps:

I started my card this week using the colors from the Splitcoaststampers color challenge #891. We were to use rococo rose, pretty peacock, so saffron and just jade. Any neutrals are allowed as well. 
Rococo Rose, Pretty Peacock, So Saffron, Just Jade

I cut the koala image in a gray cardstock and sponged the edges for a bit more depth. The eucalyptus tree I cut from white cardstock and colored with Copic and Stampin' Up markers in the challenge colors. 
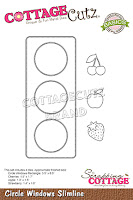
For my card base I used an espresso cardstock. It's a rich shade of brown that complemented the rose shade nicely. I had an ombre designer paper in the rococo rose color and then used the Pierced Wide Rectangle Frame die to create a frame. 
I stamped my sentiments in a chocolate chip ink. I laid the koala image down first on the background so I could get my placement correct. Then I used the MISTI for stamping. When I saw the new dies being released I bought a few stamp sets with some punny sentiments this is one of them. 
Now that my card elements are prepared, I am ready to attach my Koala image. 
To finish off my card I attached the image panel to the Espresso Brown card base and scattered a few yellow enamel dots to get that color in for the challenge. Well that's it for me for this week. See you next Saturday!
Reminder: Our YouTube Channel has a new video from Marla Harris. There is a giveaway for being a subscriber, liking the video and leaving a comment. Click here.

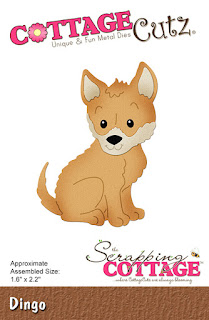
dies I used to create card: 


Thursday, April 14, 2022

G'day mate!

 Hello CottageCutz Friends

We have a new release and it is on sale!!

for a limited time...
Australian Friends Release

Save 30% on Individual Designs
14 New CottageCutz Designs

Today, I am using 3 of the new release dies: KangarooKoala Bear w/Floral, and the Cockatoo.
Design Steps:
1.  Using the following dies cut out the little critters KangaroosKoala Bear w/Floral, and the Cockatoo.  Using the following colors of card stock: Three shades of green, brown, tan, gray, black, white, light and dark pink.  Shade the pieces with a variety of ink colors and a small applicator
2.  Use a slimline white base 8 1/2 x 3 1/2.  Cut a piece white card stock 8 1/2 x 3 1/2 with the Circle Window Slimline die.  Cut a piece of DP blue 8 1/4 x 3 1/4
3.  Tape the edges of the blue DP to the back of the white slimline circle piece.  I just taped the edges so I can slip in the little critters and leaves
4.  Arrange your leaves and critters inside each circle and then glue them down
5.  Stamp your sentiment and layer it onto a piece of green card stock.  Then glue your slimline panel to the white card base and your card is complete

CottageCutz Products


We have more inspiration on our YouTube Channel check it out HERE
Thanks so much for stopping by!  And I will see you next Thursday.

Blessings and Take Care


Wednesday, April 13, 2022

Bridge Card Featuring Australian Friends


G'Day my crafty friends, Marla here today.  The new Australian Friends release is filled with adorable critters from down under. These sweet animals are so inspiring that I needed to create a card that would allow me to really showcase them properly.  

I am sharing this fun bridge card over on the CottageCutz YouTube Channel and I am giving away the adorable Kangaroos die.  I hope you head over to watch and find out how to enter to win this new die.


Tuesday, April 12, 2022

Have Faith Easy Easel Card

Happy Terrific TuesDIE Scrapping Cottage friends!
Melinda here with you for another fun Tuesday. My project today features some dies from the fabulous new Australian Friends Die Release!!! Here is what I created.

This super cute and very easy easel card!


To create the base:
I started with a piece of 4.25 x 11 white cardstock. I folded that in half at 5.5"

I then folded the right half, which would be the "top" in half again. I just folded that half to the 5.5 fold I made first. I burnished it with my bone folder.

Here is what the base looks like once you have made the two folds. EASY PEASY!

I then cut a separate piece of 4.25 x 5.5 and that became the "top" of my card. I simply attached it with some adhesive to the bottom half of that top fold.... tent if you will in the picture above.

Here is a side view to show how I attached it once it was done.


To make a "ledge" where the top can "stop" and be held in place I used the double stitched rectangle die set to create this sentiment. I hand wrote the word "Have" and then die cut faith from the Faith Sentiments die set. I cut out a couple of sets of that adorable Koala die from the new release and added some flowers to the corner of the sentiment. I added some foam tape under the rectangle when attaching it to the base. That gives it just enough lift to allow the top to catch

Here's a closer look at that sweet Koala. I nestled her among all the pretty foliage and flowers that come with the die. To finish off, I added a few hearts from the hearts slimline die. I love all the hearts that come out of the negative space of that die in just one pass! I added all of that to one of the double stitched rectangles. I used some fun and super colorful patterned paper from Paper House Productions.

Here's a view of the front finished.

Here's a view of the side of the card. You can see that I added a piece of white cardstock to the top half of the base. This is so I can write a note to the recipient. 


Here is the fantastic new collection 
FROM DOWN UNDER!
Hurry for a limited time...
New CottageCutz 
Australian Friends Release
Save 30% on Individual Designs
14 New CottageCutz Designs

PLUS FOR A LIMITED TIME....

The Dies I used to create this project:
In case you didn't hear, The CottageCutz YouTube channel is filling up with beautiful projects and great how-tos!  Head over and check out the latest video! 

Well that about covers it for today! Until the next time, have a wonderfully crafty day!
Melinda Beltran