Saturday, September 25, 2021

High Flying Snowman (new die)

Hello Scrapping Cottage friends! Thanks for taking the time to stop and visit with us today. It's Mary Marsh here bringing you the Saturday edition of the Blog.

IT'S NEW RELEASE TIME! The new Christmas dies are in the online store with 40 new designs and they are on a limited time sale at 30% off. It's not too soon to get started on your Christmas cards. I make about 50 handmade cards so I am anxious to get started on mine. Plus, Christmas is my favorite time of year to make and send cards. 

Also there is a big Fall sale going on right now with savings of up to 50% on selected dies. And the new Lil' Bluebird Designs stamp sets and dies are also on a 25% off sale. Lots of ideas on the Blog from the Design Team on ways to use these new stamp sets. 

Today for your viewing pleasure I am featuring the new High Flying Snowman die. So let's get started with some details of how I created my card. 

Design Steps:

I started my card this week by selecting my designer paper. I found this paper with a snowflake theme background. I also had the matching cardstock base. 

Tranquil Tide card base - 5 1/2" x 4 1/2"
Designer Paper - 5 3/8" x 4 1/4"
Then I cut the flying snowman images in colors that coordinated with the designer paper. The plane trim and banner are the greenish blue shade in the designer paper and card base.  The plane itself is red because that makes it so Christmas. You can also follow the colored image on the packaging which is always a good guide.
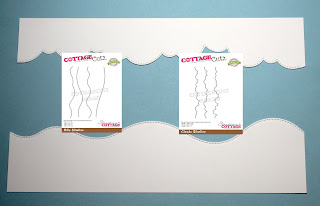
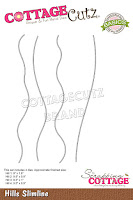
 I wanted both clouds and a snow bank on my card for interest and also because the designer paper pattern was a bit busy.  I used the Hills Slimline  & Clouds Slimline dies. I cut them the full 9 1/2" and that way I could decide what part of the pattern I would use. 
Next,  I stamped my sentiment on the snowbank in the same ink (tranquil tide) as my card base. I trimmed the snowbank down to 5 3/8" and also added some white glitter to the top of the bank..
Now that all my card elements are prepared I am ready to start card assembly. I attached the clouds and snowbank with dimensional adhesive. I didn't want them laying flat against the designer paper. Also, sponged broken china distress ink on the clouds for added interest. 
I used dimensional adhesive to attach the flying snowman image for more depth. Looks like I forgot to give this little guy his carrot nose.  
To finish off my card I attached the image panel to the card base. Scattered some white snowflakes on the clouds and some red glitter dots on the snowbank. I think this new die is just too cute and will make a great card for someone on my list that is out of state. 
Well, that's it for me for this week. See you next Saturday. Before I close there are a couple of announcements. 

Goodbyes and changes are always hard to announce. After being with us for 4 years, Jeanne is leaving the team because of  work and family responsibilities. We are sorry to see you go and send our well wishes.

And, on a more upbeat note we will once again be back on YouTube with videos starting this Wednesday. Marla, one of our newest designers will be publishing videos 2x a month. So make sure you check them out. 

Dies I used to create card:


Friday, September 24, 2021

Puppy Celebration

Happy Friday!  It's Jeanne today with fun birthday card for the dog lover in your life.  The card features pups from the Lil' Bluebird Designs Puppy Love stamp set and the Celebrate w/Shadow die.

I started by using a card sketch from Splitcoaststampers however as often happens I diverged from the sketch. First I flipped it and then in order to fit in all three images, I used a strip down the side instead of circles.  I stamped the images at angles to add a bit of whimsy.

To color the images I used a technique that I learned years ago.  I started by laying down a flat layer of alcohol markers.

 After laying down the marker, I added Prismacolor pencils on top of the marker.  This gives nice shading and detail.

For the card, I cut an A2 base from festive, birthday themed paper and I cut my puppy strip to 1 1/2 inches by 5 1/2 inches.

When cutting the sentiment the die cuts the shadow and word at the same time.
This gave me two choices for my sentiment.

I glued the strip down the right side and added a felt embellishment that I had in my stash.  I decided to use the pink background sentiment on the card.  The other one I placed in the die package for future use.

Products used:


Thanks for stopping by today!  I hope you have a fun and creative weekend!


Thursday, September 23, 2021

Llama Love

Hello Scrapping Cottage Friends

It is Pam creating with you on the blog today!

Today, I am making a fun little card that is sure to bring a smile!  I am using the Lil' Bluebird Llama Love stamp set.  The dies and stamps are still at a 25% savings so hop on over to the store and check them out!

Design Steps:

1.  Stamp your images using Memento Black ink and the Llama Love stamp set.  Color the images with copics.  The copics I used are in the picture above
2.  Use the coordinating die set to cut out the images
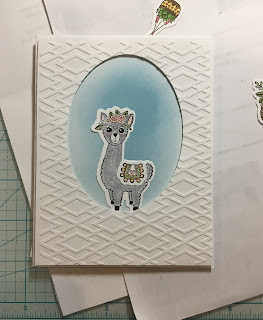
3.  Use an A2 white card base and a piece of white card stock cut to 4 x 5 1/4.  I used the second from the largest Pierced Oval die to cut the oval from the center of the piece of white card stock.  Then I ran it through an embossing folder.  Next I used a blue ink and blending brush to create the sky behine the oval
4.  Take the embossed piece of card stock and place dimension tape on the back
5.  Place the embossed piece onto the A2 white card base and then glue down the llama as shown
6.  Glue down he remaining stamped images and then stamp your sentiment and glue it between the cactus and basket of flowers and your card is complete

Lil' Bluebird Stamps and Cottagecutz Dies


Thanks so much for stopping by today and don't forget the stamps and dies are still at a wonderful savings of 25% off!  They make great Christmas gifts for all of your crafty friends.  So check them out HERE!

Take Care and Blessings
See you next Thursday
Pam


Wednesday, September 22, 2021

Reindeer fun and games

Good morning wonderful crafters, it’s the middle of the week so we’re halfway towards the weekend :-). It’s Wendy bringing you today’s blog and I really wanted to share this card with you. I like making cards which make people smile so I hope you like this


I am loving the slimline dies and have made the snow using the slimline hills dies. What I like about the dies is that they are longer than the card so you can play about with the layout using just one of the dies

I have cut the hills dies twice. The first layer has been adhered to the card with acrylic glue. The second layer has 1mm foam pads to give the card some depth.

For the snowflakes I have used the slimline snowflake background. For ease I stuck white card onto double sided adhesive before cutting it out. This made it easy to put the small flakes on the card without the need for glue and mess!

I have then cut the silly reindeer and artic snowy trees and again added these to the card using 1mm foam pads. I like giving the card some height rather than sticking elements flat on the card. For the noses and eyes I have used flat back pearls as they look so realistic 

I really hope you like the card as much as I did making it. Have a super day 
Wendy 

Here are the dies I used 


Monday, September 20, 2021

Trio of Teddy Cards

Happy Monday Scrapping Cottage lovely people . It's Wendy bringing you the blog today! I hope you've had a wonderful weekend. My weekend has been full of crafting happiness and walking my little Border Terrier Betty. Isn't she a beauty :-)


Anyway back to today's blog post, Today, I bring you a trio of cards as they are easily repeated. I thought they woud be great cards to send to friends and loved ones just to let them know you are thinking of them


So to start these cards, I measured card blanks of 9.5cm x 9.5cm


On top of the cards I used the 'Nested Scalloped square' set. I adhered them using 1mm foam pads as I like my cards to have some depth


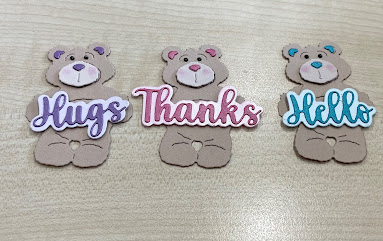
Next, I started cutting out all the elements from 'Mr Snuggles' die. I use this die so much that I have brought several over the years. It's a really good idea if you are making  lot of the same cards


You'll notice that the ears and the noses are the same colours as the base card, just to pull it all together.

 Next I die cut the sentiments that I wanted the bears to hold. These sentiment dies are such good value for money and I can see me using them on many ocassions.


Next I assembled Mr Snuggles with his sentiments, I think he looks really cute


I thought it might be nice to add some floral embelishments to the top left of the base card to give the card another point of reference and is a great finish to the final cards. I used the 'Little Princess & Roses' die. 


So here are my final cards. I've used black flat backed pearl for the eyes on the bears and gave them rosy cheeks with some chalks. Finally I've used some flat back gemstones for completion. I really hope
the cards. You could make sets of them to sell or to give them as a gift. It would be wonderful to make a box for them


Here are the dies used