Friday, August 14, 2020

Beautiful Friendship

Happy Friday! It's Jeanne today with a beautiful floral card celebrating friendship.  The card features three dies from the new Tropical collection.  I LOVE this collection - hibiscus flowers are one of my favorites followed by plumeria.  Both are in this collection!

 
I wanted the flowers to be very organic and fluid so I decided to watercolor my cardstock that I would use to cut the flowers.

This was very easy to do.
I took a piece of Mixed Media paper 6 x 11 and just started watercoloring with three analogous colors - a yellow orange, an orange and a bright pink.  This gave me the color palette I was looking for.
Using the Hibiscus Flowers, the Tropical Bouquet and the Sloth dies, I cut my flowers from the watercolored cardstock and my leaves from various colors of green.  I took my greens from the designer paper I decided to use for my accent strip.

Next I cut a panel 4 1/4 x 5 1/2 inches (A2 card size), a strip 1 x 5 1/2 inches and three circle using the largest of the Stitched Circles dies.  Two in green and one in white.
I stamped my sentiment in the lower left and glued the strip to the right side of the card.  I stacked all three circles together and glued them to the upper right overhanging the circle.  I then used scissors to trim the circle.
To glue the flowers to the card, I started with the two main flowers and adhered just their centers.  In this way, I could tuck the leaves behind the flowers.  When everything was on the card, I added glue with my fine-tipped glue.
The small flower is popped up using foam dots.  Some of the leaves were overhanging the edges of the card and I trimmed those using scissors.
Finally, this card seemed to need a bit of sparkle.  I added a few sequins and used a shimmer pen on the small hibiscus flower in the front.

Dies used:

 
Be sure to stop by the online store to check out all the new dies.  They're on sale for a limited time!

Thanks for visiting today.  I hope you have a fun and creative weekend!

Thursday, August 13, 2020

Day at the Beach

Hello Scrapping Cottage friends! Thanks for taking the time to stop and visit with us today. It's Mary Marsh here bringing you the Thursday edition of the Blog.

We have a brand new release of Beach & Tropical dies in the online store. We have 14 new designs in this release and they are currently on sale for a limited time at 25% off. They are so perfect for creating beach themed birthday cards, thanks you, thinking of you etc. Let your imagination soar! The Design Team has begun showing cards with these fun dies so take a look back on the blog for some creative ideas. 

For today I am using the new Day at the Beach die to create a birthday card for my daughter-in-law's August birthday. We just came back from a beach vacation in Sandbridge, VA. Sitting under our umbrellas on a beach chair and relaxing is just what her and I like to do at the beach.  She will definitely like this card. Let's get started on some details of how I created my card.

Design Steps:

I started off this week with a sketch that I found online. I thought it would help me create a beach scene. The rectangle layer would allow me to have the water in front of the beach chair and the circle to create the beach scene.  
Next, I cut out the beach images in various colored cardstock. I cut the chair and the umbrella from a patriotic designer paper. It looks like the ones that we have and use at the beach. For the sand, I cut in white cardstock and sponged with crumb cake ink (kraft).
I used the largest circle die for the 3.5" circle in the sketch. A cloud stencil helped me sponge in clouds with tumbled glass distress ink. I wanted a sun in this scene and decided to use the sun image from the Stitched Sun, Clouds & Umbrella die. The sun rays were a bit longer than I wanted so I trimmed them to fit in the circle. 
I cut the center rectangle piece (2 1/8" x 5 1/2") in a light blue cardstock and stamped my sentiment. I used just the words "our memories of the sea". 
For the horizontal rectangle, I used the same blue cardstock and embossed it with a wave embossing folder. I sprayed the cardstock very lightly with a little water before I used the embossing folder. Sometimes the paper will crack and rip when I emboss and this helps the fibers to break down a bit. 
Now that all the elements are cut, embossed and stamped I am ready to start card assembly. I attached the sentiment and embossed panels with double sided tape to the white card base. 
I attached the images to the circle panel with dimensional adhesive. I also used dimensional adhesive and attached to the the card base. To complete the card I added a few yellow enamel dots. 
Well, that's it for me for this post. I hope I have given you a fresh idea for a way to use this new die. See you again on Saturday. Also, we just added an Instagram icon to our Blog that links directly to our account on that site. Check us out there and follow us on that site as well. 

dies I used to create card:

Wednesday, August 12, 2020

Pink Isn't Just a Color, It's an Attitude!

Hello!  This is Sukie and today I have a new post to share for my design team day!  There's a fun new Beach & Tropical die release in the store which is showcased on my card.  All of these dies are also on sale!
I used the adorable Flamingo w/Hibiscus, the greenery is from the Sloth die set and the surfboards from the Surfer Van die set.
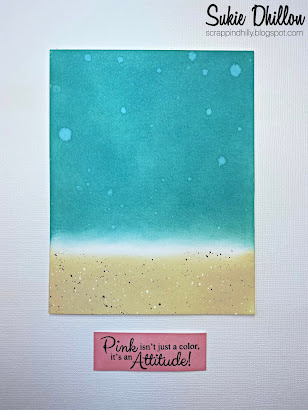
I created a simple background by blending a couple of different colors of Oxide Inks and bit of water. The bottom portion of my card was also splattered with some paint to replicate a sandy beach.
The adorable flamingo was placed on my card striking a contrast against the pop of color on the background.  
The bold and fabulous surfboards were tucked into the sand and accented with the tropical palm die cuts.
The sweet sentiment was stamped on some inked up card stock and was the perfect addition to this card.  I embellished the sentiment tag with a few more tropical palms and a tiny flower. 
Here is my final card, a fun tropical scene!  This card definitely showcases my love of flamingos!
Here are the die sets used on my card, available in the store

Monday, August 10, 2020

Tropical Birthday Bouquet


Hello Scrapping Cottage friends! Thanks for taking the time to stop and visit with us today. It's Mary Marsh here bringing you the Monday edition of the Blog.

For my card today, I am featuring the new Hibiscus Flower & Tropical Bouquet dies to create a birthday card.  There are 14 new designs in this release and they are all Tropical and Beach themed. I am finding them so easy to use for cards for my beaching loving friends and family. 

My colors for today's card were determined by the color challenge #803 on Splitcoaststampers. 
whisper white, real red, crumb cake
I love hibiscus flowers in a vibrant red color. For this challenge you can use a dark green as a neutral shade. So using these new dies to create this card was a win-win for me. I started off by stenciling an oval using the crumb cake ink. From there I layered the hibiscus and leaves around the oval. 

The sentiment is stamped in the same dark green ink as the leaves. I added some crumb cake ribbon and a few red glitter enamel dots to complete my card. That's it for me for this post. See you again on Saturday.

Just a reminder that the dies are on sale at 25% off for a limited time. 

dies I used to create card:


Sunday, August 09, 2020

Seahorse & Sea Turtle

Hi!

It's Anja here. I have two cards for you today. I made a cute set with a Seahorse and a Turtle. 

 For this project I used:

- Cottage Cutz dies (Seahorse, Sea Turtle, Circle Set),

- Dye Inks,

- 2 white card bases (15x15 cm),

- white card stock for die cuts,

- water color paper (2 14,2x14,2 cm),

- acrylic paint sprays (blue shades),

- sentiment stamps,

- acrylic block,

- black pigment ink,

- white pigment ink,

- black pen,

- white pen,

- Wink of Stella glitter pen,

- heat gun,

- adhesive foam pads,

- paper glue. 


First I cut and colored the turtle. I used white pigment ink and a brush to emphasize some parts of the turtle. I also added a bit of glitter to it.

Next I cut and colored the seahorse.

Then I cut two paper stencils.

I put the stencil over the watercolor paper and sprayed it with acrylic spray paints. I used three shades of blue.

Next I removed the stencils and added a few drops of the lightest blue shade to add over the paper. I dried the paper with the heat gun.

After that I added some color to the edges of the background paper. I also stamped the sentiment.

When I had all the pieces ready I assembled the cards together. I added the turtle and the seahorse using adhesive foam pads for dimension. And my cards were done.


This is all from me for today. Have a nice Sunday and see you again next week.

Anja Z.


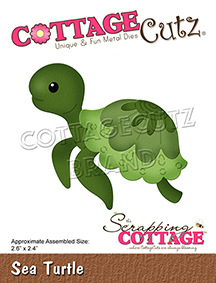
Cottage Cutz dies I used for this project: