Thursday, September 05, 2019

Fun Flip and Fold Birthday Card!

Good Morning All!

It is Pam sharing with you today!

I was watching a YouTube video on fancy fold cards and came across this cute Flip and Fold card by Janie.  This is the link for that video if you would like to watch it.  I thought it was such an adorable card and it would give me a chance to use the Birthday Cake with Pedestal die and a bunch of bright and happy designer paper.
Designer Steps:

 1.  Cut a piece of yellow card stock 4 1/4 x 11.  Score at 2 3/4 and 5 1/2
 2.  Cut a piece of green card stock 3 1/2 x 10. Score at 5
 3.  Cut 4 pieces of DP 2 1/2 x 4 1/8.  I did 2 flower pieces and 2 pink polka pieces.  Also cut 2 more pieces of DP a flower one 5 1/4 x 4 1/8 and a pink polka dot piece 3 1/4 x 4 3/4
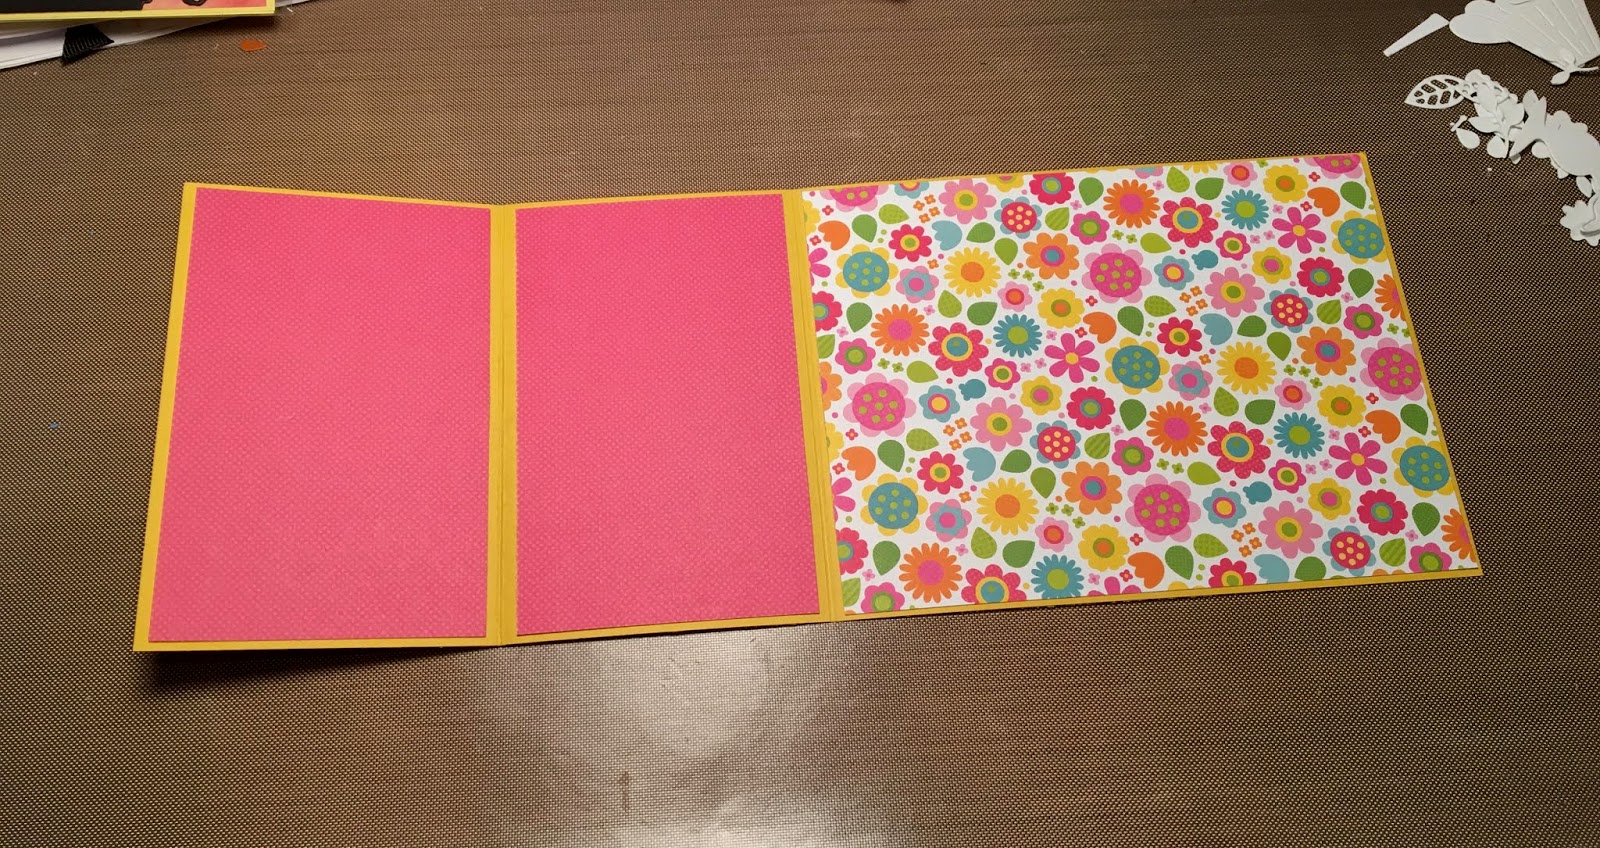
 4.  Open the yellow card and glue the large piece of flowered DP to the inside
 5.  Fold the front flap in half and then close the card glue one of the smaller pieces of flower DP to the front flap
 6.  And glue the other piece of flowered DP to the back of that fold
 7.  Completely open the card and glue the 2 strips of pink polka dot paper to the inside of the folds
 8.  Glue the green card to the inside of the open yellow card as shown noticing how it opens the opposite directions
 9.  Close the green card and attach the larger piece of pink polka dot paper as shown
10.  Open the green card and tuck the folds from the front flap under the green card
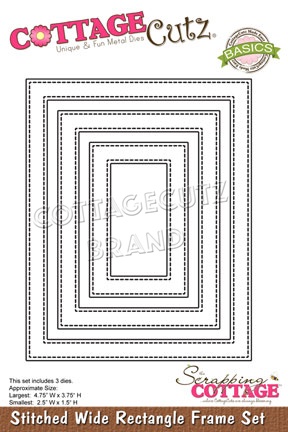
 11.  Cut out all the pieces in white card stock using the Birthday Cake w/ Pedestal die 
 12.  Use your favorite makers to color all of the pieces
13.  Assemble the pieces.  I cut a few more flowers and one more cupcake to decorate the inside of the card
14.  Using the Expressions Happy Birthday cut out 2 sets and glue them together
15.  Pop dot the cupcake to the front of the card and add the sentiment and additional flower in the corner
16.  Open the card and add the sentiments and addition flower and cupcake.  Your card is complete and is ready to send to someone special!

CottageCutz Products 


Praying for all of those devastated by the terrible hurricane Dorian.
Blessings
Pam

Wednesday, September 04, 2019

Congratulations On Your New Home!

Hello! This is Sukie and I'm back for my design team post. The Magical Garden release has inspired me to create a stash of house warming cards.  I used the Stone Fairy Door and the Tree with Tire Swing for my card.
I pulled out my inks and watercolored all of the elements of this card. The die cuts were colored with a fine water brush to enhance all of the details.  I hand cut a couple of steps to create an entrance for the Stone Fairy Door.
A larger water brush was used to create the background with a mix of the 3 colors of ink.  It's best to move quickly with broad brush stokes for this simple background.
I stamped a sweet sentiment on a speech bubble shaped cork sticker. The sentiment is from the Scrappy Moms (retired) Countless Occasions stamp set.
I began building the scene of my card by strategically placing the Stone Fairy Door to the right side of my card base, leaving enough space for the Tree with the Tire Swing.
The sentiment was anchored perfectly above the scene creating a cohesive look between the die cuts and cork sticker.
A bit of Twisted Lime Trendy Twine was tied along the top edge of my card as a finishing accent.
Here are the die sets used on my card, available in the shop:

Tuesday, September 03, 2019

Party Animal Bus

Hi, Janja is here with you.
Today I would like to show you another birthday card.


- CottageCutz dies: Party Animal Bus, Fancy Happy Birthday, Stitched Wide Rectangle Frame Set
- white card base: 4.25 x 5.5" (10,8 x 14 cm), folded
- colored cardstock
- colored ink pads
- cloud stencil
- glue, double-sided adhesive tape, self-adhesive foam pads

Start by die-cutting the bus from colored cardstock. Additionally color edges with colored pads.


Also die-cut a sentiment and two strips. I used the largest die of the set.


Create a cloudy sky background with a stencil, ink pad and brush.


Cut a white frame with two rectangle dies. The size should match the size of the cloudy sky background.
Now all we have to do is put together a card.


Have a nice day. 
Janja


Sunday, September 01, 2019

Ahoy!

Hi!

It's Anja here. Summer is coming to an end and I want to hold to it a little bit more. I tried to capture a bit of Summer in today's card.


For this card I used:
- Cottage Cutz dies (Compass, Map & Spyglass, Message in a Bottle, Paddles & Rope Ladder, Porthole, Seagull, Crab, Life Preserver, Pierced Wide Circle Frame Set, Circle Set),
- Distress Inks,
- craft card base (125x12,5 cm) and card stock for background (12,2x12,2 cm),
- white card stock for die cuts,
- gold pigment ink,
- black pen,
- embossing folder (wood),
- double sided adhesive tape,
- adhesive foam pads,
- foil (approx. 5x5 cm),
- paper glue,
- scissors.

First I cut all the pieces and colored it with Distress Inks and gold pigment ink. I cut two circle pieces of the porthole.


Next the paddles and the net.


Then the seagull. I used black pen for the eyes.


Next was life preserver.

And then the map and the spyglass.


I cut two bottles, one from foil to add some glass effect to the bottle.


Then I cut, colored and assembled the compass.


I also did the crab.

And two circles for the inside of the card.


Then I switched to the card base and background. I cut paper for the background from craft card stock and cut a hole to the bottom right side. I did a matching hole to the cad base.


I cut background paper to two pieces to get it through my embossing folder. Then I colored it with Distress Inks to get more dimension.


I adhere foil over the hole in the card base. And then I glued the wooden background over it. And after that I adhere all the small pieces to the front and inside of the card.


In the end I made an Ahoy sign and adhere it on the finished card using adhesive foam pads.


And my card was done.


Hope your Summer lasts a bit longer too. See you again next week.

Anja Z.


Cottage Cutz dies I used for this card: