Sunday, May 21, 2017

Slider & shaker card

Hello!

It's Anja here. Today I'm sharing a card where I used two popular card designs. I combined a shaker and a slider card. I used mini toys dies that are perfect for these kind of interactive cards.


I used:
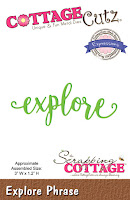
- Cottage Cutz dies (Toy Airplane Mini, Toy Submarine Mini, Toy Tugboat Mini, Stitched Rounded Square Set),
- Distress Oxides (Fired Brick, Spiced Marmalade, Peeled Pint, Fossilized Amber, Broken China, Faded Jeans),
- white card base (12,5x12,5 cm),
- watercolor paper (9,5x9,5 cm and 12x12 cm),
- white foam,
- clear acetate,
- shaker filler material (seed beads),
- foam adhesive pads,
- pennies,
- spin&slide discs,
- glue.


 I die cut all the toys and colored them with the Distress Oxides. I glued little pieces of paper on the backside to make the windows.


Then I made the background. I took 9,5x9,5 cm watercolor cardstock. I used blue shades of Oxides and blended them together. Then splashed some water drops on top and dried them with a heat gun.


Then I used the biggest square die for the 12x12 cm paper and the 3rd and 5th biggest for the 9,5x9,5 cm paper. I also cut another square from white cardstock that was the same size as the small blue frame (not pictured).


Next I made the shaker part of the card. I used the second biggest square die to cut the acetate and 3rd and 5th biggest die to cut foam. I adhered the acetate on the colored frame first and added the foam. I let it dry before continuing. I glued the other two pieces as shown on the picture below. Bigger blue frame on the card base and the smallest blue square on the bigger white square. When all was dried I put shaker fillers inside and closed it. I let it all dry again. I used liquid glue but could also used double side adhesive tape and made it a little quicker.


I used foam adhesive foam pads to glue the shaker part and white frame on the card base.


Before I adhered the white frame I made the slider mechanism. I used pennies and discs for that and inserted them on. Then I glued the frame.


In the end I added the toys. I glued the boat directly on the acetate.


And this is the finished card.


Thanks for stopping by. Have a beautiful Sunday.
Anja Z.


Saturday, May 20, 2017

Exploring in a MotorHome (New Die)


Hello Scrapping Cottage friends! Thanks for taking the time to stop and visit today. It's Mary Marsh here bringing you the Saturday edition of the Blog.

There is another great release of new dies over in the online store. The Expressions Plus (word dies) with 35 designs are available right now. The font is so beautiful and you will definitely want these in your collection. Janet (our video artist) has put together a video showcasing some of these new dies.
https://www.youtube.com/watch?v=QSLcthpx5W0&feature=youtu.be


For your viewing pleasure today, I am featuring one of the new dies. I am using the Explore Phrase. As soon as I saw this word, I thought of making an outdoor scene with the dies from the November 2016 Camping Bundle set.

I have some friends that just retired. they bought a motorhome and are taking a 3 month trip across our beautiful country. This is a retirement celebration card for them.

I thought the outdoor scene would work best in a different type fold. I found a tutorial on YouTube for a double front fold card. You have your front image, then an inside image an then another panel for a 2nd inside image.  Here is a video link. I will also give you a step by step tutorial.

So let's get started with some details on how I created my card this week.

Step 1: I started by cutting my navy blue card base. It is 5 1/2" x 8 1/2". I scored it at the 4 1/4" point and cut 2 1/4" off  the 8 1/2" side. This is how I achieved the front fold on my card.  I set that aside to work on my outside image panel.
Step 2: The next step was to cut the Motorhome. I used light and dark gray + red cardstock on the image. The white panel is cut at 2 3/4" x 3 1/4". I layered that over red cardstock measuring 3" x 3 1/2". I stamped my sentiment and set this aside to work on the inside image panel.
 
Step 3: On this panel I used the images from the Campsite & Woodland Friends dies. I cut the pine tree in a dark green, a yellow sun and the directional arrows in red, green and blue. I cut a small cloud from the sun & clouds die and used that as a template and did a bit of background sponging.

The white panel is cut at 2 3/4" x 3 1/4". Cut the explore phrase word in navy cardstock. I layered this panel over red cardstock measuring 3" x 3 1/2".

Step 4: I cut another piece of white cardstock at 5 /14" x 8" and scored it at 4". I attached this image panel to the cardstock and then secured it to my navy blue card base.

1st inside image
Now I can attach the front panel to the card.  It goes directly over the inside image. I used Scor-tape to make sure it stays put when the card gets opened and closed.
 
 
Step 5: Now it's time to decorate the inside hidden panel or the double fold part. I used the Jamboree Bear die and the campfire from the Campfire Squirrel die. The background paper is some that I had in my stash. It reminds me of a nighttime sky so I thought it would work well here.
 
2nd inside image
Well, that completes my card for this week. I hope I have shown you another way to use the new Expression Phrases dies and incorporating them with existing CottageCutz product you already have. And, I hope you will give this fun fold a try. I think it makes a big impact on a card.  
 
Dies I used to create card:
http://www.scrappingcottage.com/cottagecutzwoodlandfriends.aspx

 
http://www.scrappingcottage.com/cottagecutzcampsite.aspx

http://www.scrappingcottage.com/cottagecutzjamboreebear.aspx

http://www.scrappingcottage.com/cottagecutzmotorhome.aspx

http://www.scrappingcottage.com/cottagecutzsnowcappedmountains.aspx

http://www.scrappingcottage.com/cottagecutzexpressionsplusexplorephrase.aspx
 
Front panel
1st inside panel
2nd inside panel
 

Friday, May 19, 2017

Marching Elephants Slider Card

 Hello to all !!
I am Anita here and it's my day to share super fun project using CottageCutz dies. The baby theme dies are all so cute and amazing that we can create many cute cards etc using them . You can check the collection here.
For today, I have a Slider card using the Elephants from the baby collection.
It is very easy to make such cards which are very popular with kids.
This is my card and below are the pictures of how I made them.


Begin by cutting the die cuts from the Elephants on Parade die. I have cut three times as I wanted to create thick die cuts .
Colour the Elephants as shown following the image on the package.
 Pass two Elephants of each size -the ones that have been coloured without shading through a sticker maker.
 Adhere the Elephants as shown and assemble the pieces together.

Cut a card stock 4 inches by 5.25 inches and adhere layers of pattern paper.
Draw a half inch parallel line in the centre and punch out two holes using a 1/4inch punch .
Cut in between the holes.
 Turn the card panel over. Double the 3d foam tape and cut into strips and adhere at the back as shown. Keep the penny in place to know where to place the tape.


Attach a blue pattern paper cut to the size of the Slider panel at the back. Add clouds using distress inks . Add some stamped butterflies .

 Adhere the Slider panel on A 2 card base. Add ribbon and sentiments.


CottageCutz die used

Do stop by the CottageCutz store for your die shopping. 
Have a nice day.