Sunday, March 19, 2017

100% Country Scrapbook Page


Hi! It's Janet with SugarShine Designs here to share with you my very first post as a video designer for CottageCutz. I'm so happy to be given the opportunity to share projects with you. You will see a variety of projects from me including scrapbook pages, cards and other dimensional projects.

Today's project is a scrapbook page featuring the adorable stamp and die set, Farm Animals. This set is so cute! I couldn't help but use them in a page about my family's visit to a ranch in Arizona a few years ago. This set has so many applications that I'm sure you'll see these animals show up in some of my future projects.


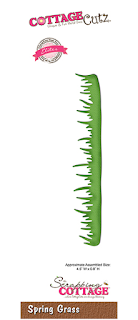
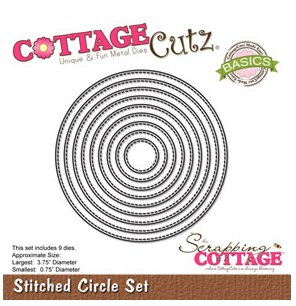
For the photo mats, I used three stitched die cut shape sets including the circle, oval and square sets. I also used the double-stitched rectangle set which adds a unique look. The Spring Grass die is used in the page's title.


Click the video link below to see how the page was made using all these great dies. Thanks for stopping by and have a great week!


Dies Used in Today's Project:

 Farm Animals Set
 Spring Grass Die


 Double-Stitched Rectangle Set

 Stitched Circle Set

 Stitched Oval Set

 Stitched Square Set

Saturday, March 18, 2017

Easter Bunny


Hello Scrapping Cottage friends! Thanks for taking the time to stop and visit today. It's Mary Marsh here bringing you the Saturday edition of the Blog.

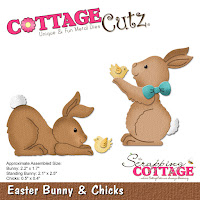
There are some fabulous new Spring dies in the store. Today for your viewing pleasure, I am featuring the Easter Bunny & Chicks die. This die has two cute bunnies and 2 chicks.

This week I decided to make an Easter or spring card. So I selected my die and some bright patterned paper and cardstock. The whimsical pattern on the designer paper will fit well with the Easter bunny. I also thought this sketch would keep my layout more simple and still allow the patterned paper to be seen.  Let's get started with some details on how I created this card.

coral card base: 4 1/4" x 5 1/2"
patterned paper layer: 4 1/8" x 5 3/8"
white image panel: 2 7/8" x 3 1/2"
green layering panel: 3" x 3 5/8"
The bunny is cut in a cantaloupe shade of cardstock and his little bow in a medium green. The chick in a bright yellow and I shaded his wing with the same color of ink to give a bit of dimension.  Did some shading with cantaloupe ink around the bunny to add depth.


For the image panel, I sponged the bottom with a medium green ink for grass and also to ground the bunny image. I used a cloud template and added a few clouds with a light blue ink.
I wanted the sentiment in the corner of the card and the "some" word to be placed on an angle. I pulled out my stamp positioner to accomplish this. I taped off the 2nd line of the sentiment and stamped my first line. Then I taped off the "some" word and stamped my 2nd line.
 
All the preliminary work is done and I am ready for card assembly. For the long rectangle panel on the sketch I decided to use a flag. And I added enamel dots that matched the green cardstock to complete the card.
 
I hope I have given you some inspiration to create either an Easter card or a Spring card to send to someone special. That's it for me for this week. See you next Saturday!
 
 
Dies I used to create card:
http://www.scrappingcottage.com/cottagecutzeasterbunnyandchicks.aspx


Friday, March 17, 2017

Watercolour on Diecuts-floral card


Hello dear friends

Happy Friday to all !!!
Spring is in full bloom and flowers are spreading their beauty all over. It's Anita once again, sharing with you the beauty of spring flowers.

Many times we are all short of time and also some people are not fond of making 3D flowers . They want quick beautiful cards .
So here is a cool technique where colouring die cuts with water colour can really make them look beautiful and layering them together gives a lovely floral card like this.


To make this card,
Cut all the die cuts with white card stock and emboss a card panel 6" x 4"


Using distress inks , colour all the die cuts. Use the negative of the wild flower to create subtle stamping on the oval label. Distress ink names are mentioned below.


Layer the ovals like this and adhere on the embossed panel as shown.

Adhere all the die cuts layering them together like this.
Add a sentiment.

Adhere the card panel on card base measuring 7" x 5".

CottageCutz products used.

Wildflowers 2

Springtime Bluebell flowers


Cross-stitched Oval set

Distress inks used -- Peeled Paint, Mowed Lawn, Chipped Sapphire, Candied Apple, Fossilised Amber, Carved Pumpkin
I hope you will try this technique. Do share your work. I hope you have a good crafty weekend. 

Thursday, March 16, 2017

Night in the Woods!

Hello Scrapping Cottage fans!
My name is Pam MacKay and this is my first time posting as a new design team member. I am just thrilled and honored to have been selected and I can't wait to share with you. The dies and stamps from The Scrapping Cottage are just incredible!

For my first project I decided to make a card for a friend who loves camping and the beauty of nature. She is in need of some cheer and a little time to relax. So when I saw this adorable little cabin I knew it would make a perfect card for her.

Design steps to make this card:
Cut an A2 size kraft card stock base
Cut a 5.25 x 4 inch piece of gray card stock
Cut a 5 x 4.75 inch piece of designer paper and glue to gray card stock then to the card base

Use the 4.25 x 3.25 Double-Stitched Rectange Die and cut the kraft card stock to make the base for your woodland scene
Using the Woodland Cabin (4 x 6) die begin cutting all the piece to create your scene
    I cut all the pieces and then began the assembling. After I got the assembling finished I inked the edges of each piece to give them a little depth and dimension
    I started making my scene by glueing down the background pieces first and all of the layers of grass.
    After the background was complete I popped up the cabin with dimensional tape
    I added more trees to the sides of the cabin by just cutting apart some of the trees from the background and it worked great!


    http://www.scrappingcottage.com/cottagecutzstitchedrectanglesetbasics.aspx


    I just absolutely love how this little cabin in the woods turned out!  I hope you will give it a try!!

    Take Care and be sure to leave us a comment!
    Pam


    Wednesday, March 15, 2017

    CottageCutz Wildflowers


    Hello, friends, and welcome to the Scrapping Cottage blog!  This is Beverly from Guneaux Designs, and I am so excited to be a guest designer today for the Scrapping Cottage.

    I have for you a beautiful card featuring the CottageCutz Wildflowers 3 Die.  The card also features a Marbled and Ghost Stamping Technique.


    Directions for creating the card:

    Step 1.  Cut out the flowers from white card stock using the CottageCutz Wildflowers 3 Die.

    Step 2.  Cut the largest rectangle from a piece of white card stock using the CottageCutz Double-Stitched Rectangle Set Dies.

    Step 3.  Scrunch up a piece of saran wrap.

    Step 4.  Put a drop or two of white (e.g., Frost White) All-Purpose Ink onto a non-stick craft sheet.

    Step 5.  Dab the saran wrap repeatedly into the ink to ensure all of the saran wrap folds are covered with ink.

    Step 6.  Transfer the ink by dabbing the inked saran wrap onto the CottageCutz double-stitched rectangle, leaving some white space.


    Step 7.   After that dries, sponge on two or three different colors of distress ink (aqua and purple used for this card).

    Step 8.  Choose a stencil of your liking and place it over the colored panel.

    Step 9.  With a water spritzer, spritz three to four times a small amount of water onto the panel and over the stencil.

    Step 10.  Remove the stencil right away and lay a dry piece of paper towel across the panel to remove excess water (no rubbing).

    Step 11.  Watch a "ghost" of the stencil appear while allowing the panel to dry completely.

    Step 12.  While that is drying, cut a 3-3/4" x 4-3/4" piece of white card stock.

    Step 13.  Using a temporary adhesive to attach the back side of the piece of white card stock to a craft sheet or grid paper.

    Step 14.  Lay the stencil (the one used in Steps 8 and 9) over this piece of white card stock and use temporary tape to attach it to your coloring surface.

    Step 15.  Sponge the lightest ink used in Step 7 over the stencil and onto the paper.
    Step 16.  Remove the stencil and let the ink dry.
    Step 17.  Using the saran wrap and ink process, dab the white All-Purpose Ink onto the sponged card stock.  Let it dry and this is the result.

    Step 18.  Select a piece of card stock that closely matches the lightest ink color used and cut out a rectangle frame using the two largest dies from the CottageCutz Double-Stitched Rectangle Set. This creates the following frame.
    Step 19.  Turn over the frame and with an adhesive, attach the white wildflowers to the bottom of the frame.
    Step 20.  Add a double layer of double-sided foam tape around the frame and where needed on the flowers.
    Step 21.  Remove the paper from the tape and attach the frame to the rectangle completed in Step 11.

    Step 22.  Attach the above frame to the panel created in Steps 12 - 17, and adhere to the card base.


    Step 23.   Add a sentiment and embellishments as desired.


    Cottage Cutz Dies Used:


    Before you leave, check out the new CottageCutz Dies on the Scrapping Cottage.  I am sure you will find one or more dies that you must have in your crafting toolbox.    

    Also, we love hearing from you, so leave us a comment on this or other projects!  Come back tomorrow to see the beautiful project that Pam MacKay will have for you!  Have a great day!