Sunday, November 27, 2016

Winter Cheer!


Hello everyone,

It's Donna here sharing another Christmas card to share with you.  I hope all of you that celebrate Thanksgiving had a wonderful day on Thursday.  I had a great time with my family in North Carolina and to even top it off, the weather was fabulous, it was 73 sunny degrees there.

Have you heard about the BIGGEST SALE OF THE YEAR over at CottageCutz?  Yes, you can get up to 70% off your order!  Please hope on over to the store and see all the goodies you can get.


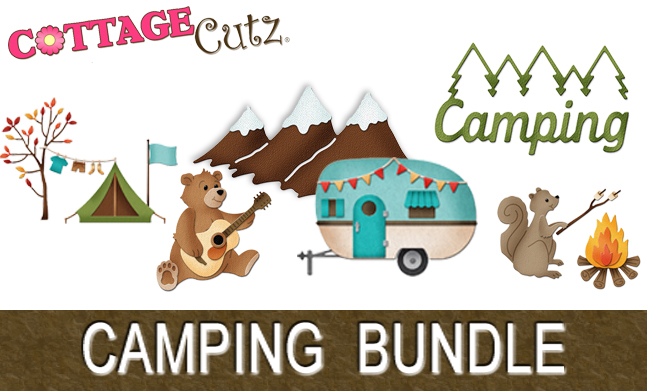
Also, there is a Black Friday Release. It's all about camping and forest friends.  You can get the whole bundle at 55% off click  here to see it.  


Now that I have given you all the news about the sale and the new release, here is my card.  I am using the adorable Candy Cane Penguin!  And guess what, it is 50% off in the store.  This one is a keeper for me, I love it and it is so easy to put it together.


Here is how I put my card together:

1.  My card is a 4 1/4 x 4 1/4 card,

2.  The first layer is 3 1/8 x 4 1/4,

3.  The pattern paper is 3 x 4 1/4,

4.  The next layer is 1 1/4 x 4 1/4,

5.  The penguin paper is 1 x 4 1/4,

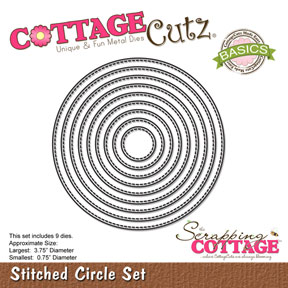
6.  The circles are from the Circle Set, I used the largest and next to the largest for the layering, 

7.  I cut out all the pieces of the penguin, inked the edges, and glued the pieces together,

8.  I added the sentiment, and finished off the card with some glitter enamel dots.

Thank you so much for stopping by, please come back again soon!


Dies and stamps used:


Saturday, November 26, 2016

Christmas Holly Bells


Hello Scrapping Cottage friends! Thanks for taking the time to stop and visit today. It's Mary Marsh here bringing you the Saturday edition of the Blog.

Well our Thanksgiving Day has come and gone here in the US. We had a wonderful time with 4 generations sitting around our table having our Thanksgiving dinner. I spent days preparing for it and now it's time to think seriously about Christmas.

So if you haven't started your cards as yet, I am showing one today that could very easily be mass produced. You could change it up by simply using a different patterned paper. So let's get started on some details of how I created my card. The bells are part of the Christmas Holly Bells die and the corner holly is from the Holly & Berries die.

Looks like both these dies are on a 50% off sale. In fact there is a Black Friday blowout sale going on as well as a new Black Friday "camping" release. So it's a good day to shop with this being small business Saturday. Plus you can get some great deals on Christmas dies. Check out this Blog or our Pinterest Board for lots of inspiration from the design team.


Red Card Base: 4 1/4" x 5 1/2"
Medium Brown Layering Panel: 4" x 5 5/16"
Patterned Paper Layer: 3 7/8" x 5 1/8"

I started my card by choosing my patterned paper. That determined my card colors and the shades of red and green I would use for my holly die cuts. I used a real red and a ivy green cardstock. I cut the holly leaves 2x because I like a bit of dimension with my dies.

Cut all the dies and now I am ready for assembling. The bells are cut from a metallic gold on kraft cardstock. I thought this shade of gold went well with the patterned paper. I tried a lighter one but didn't like it as well.

Decided on my sentiment and stamped that in a real red ink on kraft cardstock.  I cut it out with the stitched rounded rectangle die.  It makes it stand out a bit and adds interest to the card. The patterned paper was a bit busy to stamp directly on there.

To complete my card I added a few drops of glossy accents to the holly berries. I hope this card has given you some inspiration. If you want to recreate it for your Christmas cards, the dies are on sale including the stitched rectangle die.

Well Blogger friends, that's it for me for this week so until next time.......inky hugs.


http://www.scrappingcottage.com/cottagecutzchristmashollybells.aspx
http://www.scrappingcottage.com/cottagecutzstitchedroundedrectanglesetbasics.aspx
http://www.scrappingcottage.com/cottagecutzhollyandberries.aspx


Friday, November 25, 2016

A Floral Fantasy with Anita Kejriwal

Hello everyone !!!!
It's Anita here. I wish you all a very Happy Thanksgiving to all. I feel blessed to be a part of the CottageCutz family and thanks for believing in my creations.

We at CottageCutz have the biggest sale of the year and have fabulous discounts store wide. Check it out here.


And we also have a new Black Friday Release. It's all about camping and forest friends. You can find them here.

Now on to some more beautiful inspiration from CottageCutz.

Here is my card with some 3D flowers and I have a video as to how I made these flowers. 


Do Check out my video on creating these flowers.


Do leave your comments. Have a great day !!!


Tuesday, November 22, 2016

Autumn leaves

Hi, Janja here!

In a sunny autumn afternoon during a walk in a nearby forest, one hears only rustling of leaves beneath the feet. Under the impression of beautiful colors that flow on autumn leaves, I created this card.


For the card we need:
- white card base: 5.3 x 5.3" (13,5 x 13,5 cm)
- patterned paper: 5 x 5" (12,7 x 12,7 cm)
- white and color cardstock
- Distress ink: Scattered Straw, Spiced Marmalade, Mowed Lawn, Peeled Paint, Vintage Photo
- Memento ink: Desert Sand

Slightly shadow patterned paper with distress ink and stamp text.


With dies - give thanks and cornucopia cut out the most of oak leaves and acorns. Also cut out branches with winter branches die. Shadow all the pieces with distress inks.


For a hedgehog use forest critters die. At the end stamp " Thinking of you".


 Thank you for coming over and have a great day. 


Monday, November 21, 2016

Christmas Wreath and Greetings


Hello everyone !!!
It's Anita here.
I hope you all had a super exciting weekend. Black Friday is just around the corner and everyone is geared up for the super sale.
We , at CottageCutz have an amazing array of dies for wonderful Christmas Craft.You can check them out here and here.

I have a pretty traditional Christmas card with Greetings and Wreath .
Check it out here.


The finished card measures 7" by 5".
1.On the red card base, adhere a plaid pattern paper measuring 4" by 6" with 3d foam tape. Cut the corners with Crop a dile.
2. Then cut out the 4 die cuts in white card stock with CottageCutz Fancy Floral Corner #2 and paste the sides together to form a doily. Adhere the doily to the centre of the pattern paper.
3. Wrap a brown twine 7-8 times around a circle and adhere on the card front. This forms the base for the wreath.
4. Cut die cuts in green card stock from CottageCutz Holiday Wreath and arrange on the twine. Add a few berries cut from red paper from CottageCutz Autumn Foliage . Add a few red blings here and there.
5. Cut a die cut from CottageCutz Stitched Circle set and stamp the Christmas sentiment. Adhere in the center of wreath.
6. Add a bow cut from CottageCutz Double Bow.

Products used.


Do leave your comments and feedback. I love reading them.


Sunday, November 20, 2016

Season's Greetings


Hello everyone,

Can you believe it is almost the end of November!  Is everyone ready for Thanksgiving?  Do you have any special plans?  My plans are to spend the holiday with my family and eat plenty of good food!  I wish all of you a Happy Thanksgiving and enjoy your family and friends!

It's Donna here and I am back again featuring some of the new release stamps by Peachy Keen Stamps.  The Peachy Keen Stamps work perfectly with the CottageCutz Christmas ornament dies. CottageCutz has several different shape ornament dies in the store, be sure to go over and check them out!  Did you know Peachy Keen stamps all have a tint of pink symbolizing the "Peach"?  They have been around since 2003 featuring their whimpsical face stamps.  They are just the cutest ever and I have really enjoyed working with them.  

 I am using the Candy Cane 1 7/8th Face Set and the Candy Cane 1 1/8th Face Set.  Here is my card:


Closer look at the card.

Here is how I put my card together:
  • The card is an A2 card 4 1/4 x 5 1/2,
  • The red and white stripe design paper is the same size as the base of the card, 
  • The red solid piece is cut from the CottageCutz Double Stitched Rectangle Set,
  • I cut all the elements that I wanted to put on my card:

  • I cut the small and medium nested ornaments bulb,
  • I then used my Misti to stamp on the faces on the bulb ornaments,
  • I added all the elements to my card,
  • I finished it off by adding the red bling to give the bulbs some dimentsion.
Thank you so much for stopping by, please come back again soon!

Dies and stamps used: