Thursday, December 28, 2023
Moving on from Christmas
Wednesday, December 27, 2023
Time for Valentines
Hello Friends
I hope you all had a blessed time with family and friends this past Christmas. And I would like to wish you all a very Happy New Year. We are running an after Christmas Sale in the online store right now. So use your Christmas money and save big! Click here to see what great values we have.
I am getting a jump start on my Valentines. I am using the Garden Butterflies and Bee die from our Black Friday release for this fun little block card.
Design Steps: (Here is a link to a video that I used to make the base https://www.pinterest.com/pin/443534263317816376/ )
1. Start with a piece of white card stock measuring 10 x 6 3/4. Score at 3, 4 1/2, 6, 7 1/22. Fold the flap back along the 6 inch score. Place a ruler at the bottom along the fold and use a pencil to mark small dots at 1/2, 1 3/4, 2, 3 1/4, 3 1/2, 4 3/4, 5, 6 1/2
3. Place your card into a paper cutter and cut from the dots to the closest score line as shown above
4. When you have completed the cuts fold as shown below
5. Using the Honeycomb Background Slimline cut 2 pieces in white: 6 1/2 x 2 3/4 and 6 1/2 x 2 1/4. Using a blending brush and a pink ink to add some color to both pieces.
6. Using the same pink ink place some of the ink onto a acrylic block and then add a little water. Pick up the ink with a brush. Hold the brush over the place you want splattered and gently tap the brush with your finger
7. Cut 6 pieces of pink card stock 1 1/4 x 1. Glue the pink rectangles to the card as shown above
8. Using the following dies and card stock colors: Garden Butterflies and Bee black and yellow, Fancy Heart pink, Be My Valentine Puppies red glitter card stock and Stitched Alphabet black
9. Arrange your pieces as shown above and add a few silver sequins and your card is complete
We have more inspiration on our YouTube Channel check it out HERE
Tuesday, December 26, 2023
Thank You Berry Much Card
Hey crafty friends,
So glad you stopped in today! Whew what a whirlwind this holiday season has been.... but wait it's not over yet...lol! We still have the new year coming. Today it's my turn to share here on the Cottage Cutz blog...so I wanted to take a break from all the holiday "stuff" and create a thank you card that is completely out of this season...
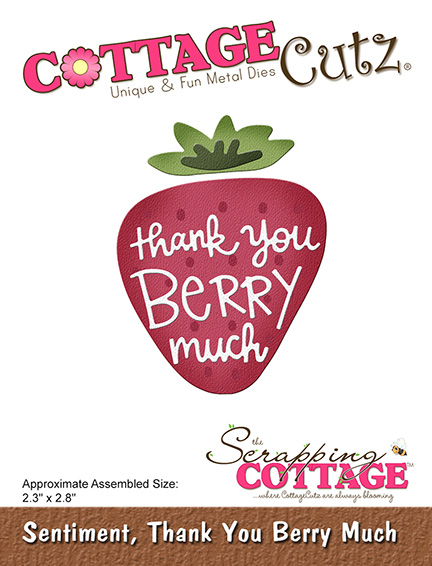
I needed a thank you card, so I decided to go with a fun, bright and very spring"ish" card. I used the new Strawberry Thank You Berry Much die that was part of the recent Black Friday release. This die is a fantastic one to have in your craftty arsenal!
Here's a closer look at the berry. I cut it out in white and also some patterned paper. I did ink the edge of the large berry and then added the white letters. I then used the Strawberry plant die and added the flowers and the smaller strawberries. I anchored all of the berrylicious goodness onto a double-stitched circle cut from some patterened paper. Lastly, I used the double stitched rectangle die and cut that out in white. I added a multi-colored polka dot mat to that and then seated all of that onto my card base that has another patterned paper mat. I do like to put lots of layers on my cards.
This is a quick and easy card that you can recreate very fast and in a variety of themes to have on hand.
Dies Used For This Project
Strawberry Plant
Sentiment, Thank You Berry Much
Well, that about covers it for today. Be sure to come back real soon. You will want to keep up with my crafty adventures! Until the next time, have a wonderfully crafty day!
Melinda
Saturday, December 23, 2023
A Joyous Holiday
Hello CottageCutz friends! Thanks for taking the time to stop and visit with us today. It's Mary Marsh here bringing you the Saturday edition of the Blog.
We have 2 new releases in the online store. The Christmas 2023 release is available and currently at 30% off individual dies. The Black Friday In The Garden release is also available at 30% off individual dies.
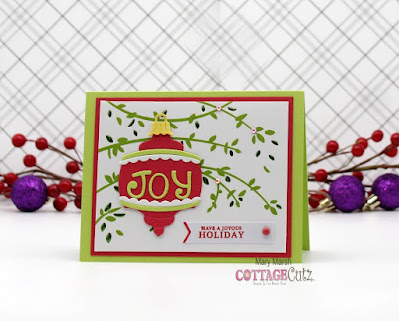
For today's card, I am featuring the new Old-Fashioned Ornament 1 die and created my last Christmas card of the 2023 season. It is another quick card because I was under a time crunch (LOL)!
For today's card, I am featuring the new Old-Fashioned Ornament 1 die and created my last Christmas card of the 2023 season. It is another quick card because I was under a time crunch (LOL)!
Design Steps:
I started my card with the colors from this week's color challenge #979 on Splitcoaststampers. We are to use sweet sorbet, lemon-lime twist, daffodil delight and petal pink for our color combo.
 |
| sweet sorbet, daffodil delight, lemon-lime twist, petal pink |
The background foil paper was something I had in my stash and the color was a perfect match. I stamped a sentiment in sweet sorbet ink on a flag and added some bright pink jewels since I don't have the petal pink color. I also added a sweet sorbet enamel dot to the flag.
The A2 card base is lemon-lime twist.
Card base: 4 1/4" ' x 5 1/2"
Designer paper Layer: 3 3/4" x 4 3/4"
I cut my ornament in the challenge colors. I think it turned out so pretty.
Attached the image to the designer paper layer with double sided tape. I also add a layer of sweet sorbet cardstock to the panel. Sweet Sorbet Layering Panel: 5" x 4"
To complete my card, I attached the image panel to the card base.
Reminder: Marla has a new video up on the CottageCutz YouTube channel and there is a giveaway. Click here.
Friday, December 22, 2023
Gingerbread Cottage Birthday Wishes
Happy Friday crafty friends!
I die cut my Gingerbread Cottage from white cardstock then colored with Copics and Distress Oxide inks, then adhered to card. I tucked the lollipop behind the snow, I glued the chocolate swirled candy to snow and popped up the strawberry, tree and house with foam dots.
Kris here sharing a "Sweet" birthday card featuring the Gingerbread Cottage from our Christmas 2023 Release! All the dies in this release are 30% off for a limited time, so a great time to pick some up for those last minute holiday cards for this year OR to get a head start on next year's cards! The Black Friday Release is also on sale for a limited time!
DESIGN STEPS:
I started with an A2 pink card. I then die cut the Lattice Slimline die in white. Then, with the card horizontal, I placed it on top and cut the bottom off a li'l short as shown below.
Next, I cut a piece of white cardstock to an A2 size, then I cut it diagonally following the stripe on the lattice.
I placed it into my Misti as shown below and stamped my sentiments (from the Hey Sugar stamp set from La-La Land Crafts) in Pink and Green.
I decided to add a bit of light blue (Tumbled Glass) ink around the house so the snowy roof doesn't blend in with the white background.
I adhered this piece to the card front.
Next, I die cut a piece of light pink glittery cardstock with one of the Hills Slimline set and attached to card front.
Thanks so much for stopping by today!
Be sure an check out our YouTube channel
for more inspiration and giveaways!
Christmas Blessings to you all ♥
~Kristine
Subscribe to:
Posts (Atom)


.jpg)


.JPG)


